Water seeping through a basement floor? It’s frustrating to deal with puddles and dampness every time it rains.
People want a dry, safe space. Waterproofing a basement floor isn’t as complicated as it might seem.
With the right approach and some weekend effort, anyone can prevent water damage before it worsens.
No more musty smells. No more worry about ruined storage items.
This blog details each waterproofing step, including necessary materials, effective methods and products, and tips for durable results, ensuring a dry, usable basement floor.
Sings Your Basement Needs Waterproofing
Most people miss the early warning signs until water damage becomes serious.
Catching these problems early saves money and prevents bigger issues.
Here are the key signs to watch for:
- Water stains on walls or floors indicate that moisture has already entered.
- Musty odors mean mold or mildew is growing somewhere in the space.
- Efflorescence appears as white, chalky deposits on concrete surfaces.
- Cracks in the foundation let water seep through during heavy rain.
- Puddles form after storms or when the snow melts outside.
- Peeling paint on the walls indicates moisture trapped behind the surface.
- Rust on metal fixtures shows long-term exposure to dampness.
The sooner waterproofing begins, the less damage occurs.
Tools and Products that Work for Basement Floors
Getting the job done right starts with having the right tools and products.
Here’s what works best for waterproofing basement floors.
| Tool | Purpose |
|---|---|
| Wire brush | Cleans the concrete surface |
| Shop vacuum | Removes dust and debris |
| Paint roller | Applies sealers evenly |
| Putty knife | Fills cracks and gaps |
| Mixing paddle | Blends waterproofing compounds |
| Bucket | Holds mixed materials |
| Safety goggles | Protects eyes from splashes |
| Rubber gloves | Keeps hands safe from chemicals |
Best Waterproofing Products
Concrete crack filler: Seals small cracks and prevents water from entering damaged areas in the floor.
Hydraulic cement: Stops active leaks quickly and works even when water is actively flowing through cracks.
Waterproof sealers: Create a protective barrier on concrete to block moisture from penetrating the floor.
Epoxy coating: Provides long-lasting protection and creates a durable, water-resistant finish on basement floors.
Before purchasing materials, it’s helpful to know the overall investment required. Budget planning for typical basement sizes helps you prepare financially for the project ahead.
Best Way to Waterproof a Basement Floor Step-By-Step
Waterproofing works best when done systematically, following steps ensures protection against water damage.
For Interior Waterproofing

Interior methods control water that gets past the foundation. This manages moisture from inside the basement.
Step 1: Prepare the Floor Surface
Sweep and vacuum the entire basement floor thoroughly.
Remove any loose concrete, dirt, or debris. Use a wire brush on stubborn spots. The surface must be completely clean for products to bond properly.
Step 2: Fill All Cracks
Inspect the floor for cracks of any size. Fill small cracks with concrete crack filler.
Use hydraulic cement for larger gaps. Let the filler cure according to package directions before continuing.
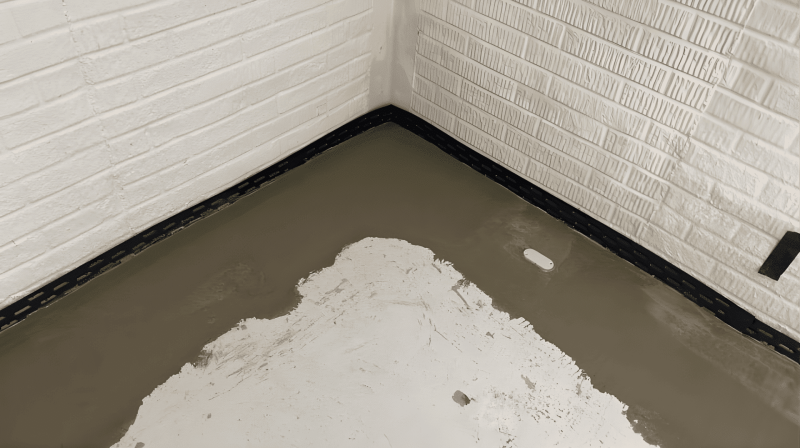
Step 3: Apply Waterproof Sealer
Pour sealer onto the floor and spread it evenly with a roller. Work in small sections to maintain a wet edge.
Apply a second coat after the first one dries. Full coverage prevents moisture from coming through the concrete.
Step 4: Install Interior Drain System
Cut a trench along the basement perimeter near the walls. Install a drain pipe that slopes toward a sump pump.
Cover the pipe with gravel and concrete. This system collects water before it spreads across the floor.
Step 5: Add Sump Pump
Dig in the lowest corner of the basement for the sump pump. Set the it inside and connect it to the drainage system.
Test the pump to ensure it activates when water enters. Route the discharge pipe far from the foundation
For Exterior Waterproofing

Exterior methods prevent water from reaching the basement. This approach tackles the problem at its source.
Step 1: Excavate Around the Foundation
Dig around the foundation walls down to the footer level. Remove soil carefully and create enough working space.
Rent heavy equipment for larger homes to make the job faster.
Step 2: Clean and Repair the Foundation
Scrub the foundation walls with a wire brush to remove dirt and old coatings. Fill any cracks with hydraulic cement.
Let repairs dry completely before moving forward. Smooth surfaces help waterproofing materials stick better.
Step 3: Apply Waterproof Membrane
Roll or spray a waterproof membrane onto the cleaned foundation walls.
Cover every inch from the footer to the ground level. Apply two coats for better protection.
Make sure there are no gaps or thin spots.
Step 4: Install Drainage System
Place perforated drain pipes along the footer at the base of the foundation.
Surround the pipes with gravel to ensure proper water flow. Connect the drainage to a safe outlet away from the house. This carries water away before it builds pressure.
Step 5: Backfill and Grade
Fill the excavated area back with soil in layers. Compact each layer to prevent settling later.
Slope the ground away from the foundation so rainwater flows outward. Good grading is the final defense against water pooling.
Prep Mistakes that Ruin Basement Waterproofing
Avoiding these common mistakes saves time, money, and frustration.
- Skipping surface cleaning prevents sealers from bonding properly to concrete.
- Ignoring cracks allows water to re-enter after treatment.
- Applying products on damp surfaces causes treatments to peel off later.
- Rushing between coats creates weak spots in the waterproofing layer.
- Using the wrong products means the waterproofing won’t hold up under pressure.
- Failing to test for active leaks can trap water inside the concrete.
Cost-Effective Waterproofing Methods
These budget-friendly methods provide solid protection without spending thousands of dollars.
Concrete densifier
Penetrates deep into concrete pores and hardens the surface to resist water absorption at a low cost.
Silicate-based sealer
Reacts chemically with concrete to create a permanent, waterproof barrier that lasts for years at a low price.
DIY French drain
Redirects water away from the foundation using gravel and a pipe installed with basic tools and effort.
Bentonite clay
Expands when wet to seal foundation gaps naturally and costs less than synthetic waterproofing membranes.
Plastic sheeting barrier
Placing over floors before finishing creates a moisture barrier that stops vapor transmission inexpensively.
Gutters and downspouts
Properly installed systems prevent water from pooling near the foundation and reduce basement moisture.
When a Floor Coating Won’t Solve the Problem
Floor coatings only work for minor moisture issues.
They can’t handle serious water problems that need structural fixes.
Coatings fail when there’s constant groundwater pressure pushing against the foundation.
They won’t stop water from flowing through large structural defects or failing footer drains.
If the basement floods during heavy storms, coatings simply wash away. Active leaks require professional intervention with proper drainage solutions.
Sometimes the foundation itself needs repair before any surface treatment can work effectively.
DIY vs Professional Basement Waterproofing
| Factor | DIY Approach | Professional Service |
|---|---|---|
| Cost | $200-$500 for materials | $3,000-$10,000+ |
| Time | Several weekends | 1-3 days completion |
| Best For | Minor seepage issues | Major flooding problems |
| Equipment | Basic hand tools | Specialized machinery |
| Warranty | None | 10-25 year guarantee |
| Expertise | Learning as you go | Trained technicians |
| Foundation Issues | Can’t address structural damage | Handles complex repairs |
| Permits | Usually not required | Obtains necessary permits |
Simple Maintenance to Keep the Basement Floor Dry
- Check the gutters monthly and remove leaves or debris that block the flow of water.
- Inspect downspout extensions to ensure they direct water at least six feet from the house.
- Test the sump pump quarterly by pouring water into the pit.
- Monitor humidity levels and run a dehumidifier when readings exceed 50 percent.
- Examine floor surfaces for new cracks or stains that indicate moisture intrusion.
- Clean window wells and ensure they drain properly after rainfall.
- Replace sump pump batteries in backup systems annually before storm season.
Final Thoughts
A dry basement floor protects the home’s foundation and creates usable living space.
The methods covered here work for the most common moisture problems people face.
Start by identifying what’s causing the water issues. Choose the right waterproofing approach based on severity.
Small problems become expensive repairs when ignored. Acting now prevents mold growth, structural damage, and the loss of storage space. With proper waterproofing, basements stay dry and functional for years to come.
Ready to start? Grab those tools and begin the first step today.
Frequently Asked Questions (FAQ’s)
1. How Long Does Basement Floor Waterproofing Last?
Quality waterproofing lasts 10 to 15 years with proper maintenance and care.
2. Can I Waterproof Over Paint or Old Coating?
No, remove all old coatings first for the sealer to bond correctly.
3. What if my Basement has a Floor Drain?
Work around the drain and ensure it stays clear to allow proper drainage.
4. What is the Best Time of Year to do This Job?
Late spring or summer, when the humidity is low, the concrete dries faster.
5. Can I Put Flooring on Top After Waterproofing?
Yes, wait 72 hours for the waterproofing to cure completely before installing flooring.