Ever opened your pantry and felt frustrated by the mess? Cans are rolling, boxes are stacked haphazardly, and you can’t find what you need.
Building custom pantry shelves is easier than you think. You don’t require fancy tools or that carpentry experience.
With basic materials and a free weekend, you can create organized storage that works.
Building your own shelves gives you control over height, depth, and spacing that fits your items perfectly. Store-bought units rarely fit tight spaces, but custom shelves do.
Good part? You can adjust shelf heights anytime.
I’ll walk you through each step to transform your chaotic pantry into an organized space.
Common Pantry Shelf Types
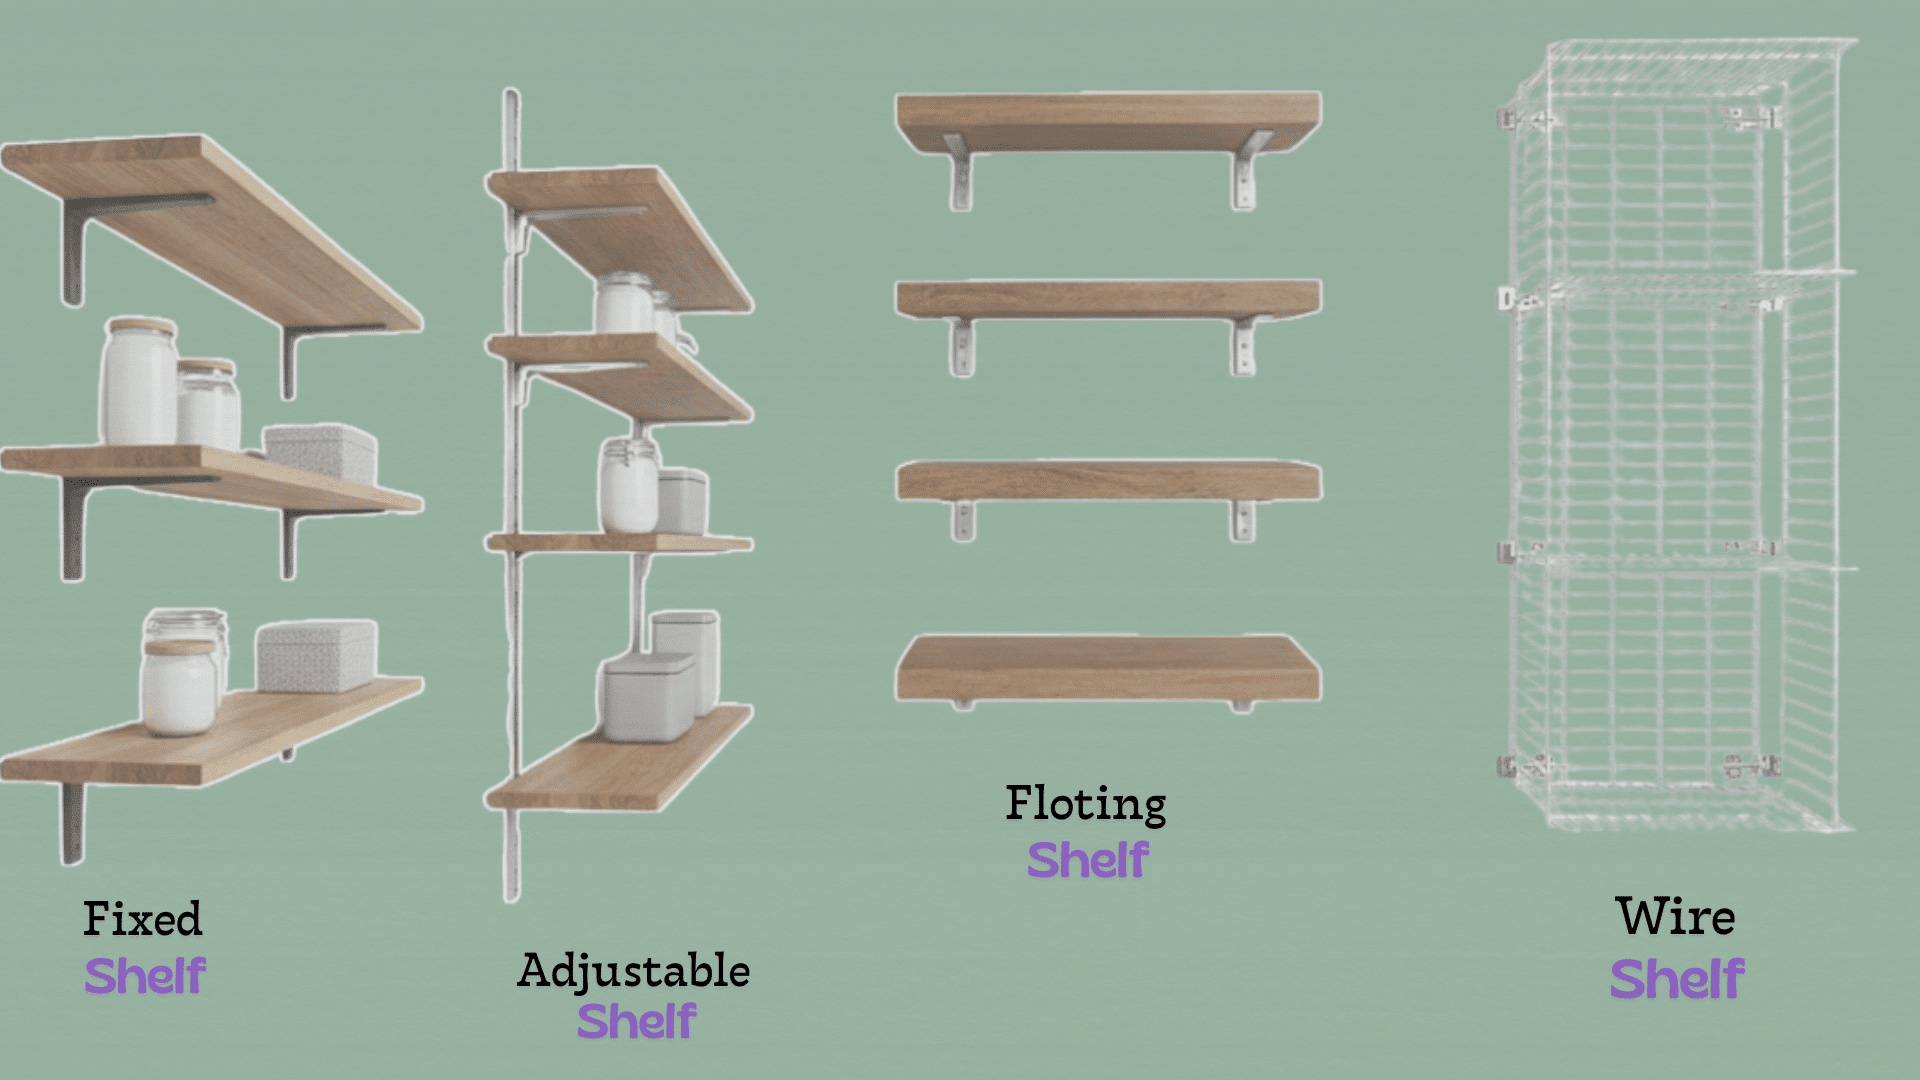
Different shelf styles serve different purposes in your pantry.
Knowing the options helps you pick what works best for your space and budget.
- Fixed Shelves: Attach directly to wall studs using brackets or cleats. Very sturdy for heavy items like canned goods.
- Adjustable Shelves: Sit on metal tracks with movable clips. Change height whenever needed without tools.
- Floating Shelves: Hidden brackets create a clean, modern look. Best for lighter items like spice jars only.
- Wire Shelving: Metal racks allow airflow around stored food. Small items may fall through gaps between wires. Add shelf liners to create a solid surface if needed.
- Corner Shelves: Maximize awkward corner spaces in walk-in pantries. Can be L-shaped or triangular, depending on your layout.
Materials and Tools Needed
The materials depend on your pantry size, but I’ll give you a standard list that works for most spaces.
| Materials List | Tools List |
| Wood boards | Drill/driver |
| Wood cleats or brackets | Level |
| Screws | Stud finder |
| Wall anchors | Tape measure |
| Wood glue | Circular saw or hand saw |
| Sandpaper | Pencil |
| Paint or stain (optional) | Safety glasses |
| Primer (optional) |
How to Build Pantry Shelves (Beginner-Friendly Tutorial)
Now comes the fun part. Building pantry shelves follows a clear process. Take your time with each step and don’t rush.
These steps work for fixed shelves, which I recommend for beginners.
Step 1: Measure and Plan the Layout
Measure the walls of your pantry from floor to ceiling. Write down the exact height and width.
Decide shelf spacing based on what you’ll store. I recommend 12-16 inches between shelves for most items. Taller items need 16-18 inches.
Mark shelf heights on the wall with a pencil. Use your level to draw horizontal lines.
Standard pantry shelves run 12-16 inches deep. I use a 14-inch depth as my sweet spot.
Step 2: Cut the Wood
Transfer your measurements to the wood boards. Mark is cutting lines with your pencil. Double-check each measurement before cutting.
Put on your safety glasses. Clamp the board to a stable surface. Line up your saw blade with the pencil mark and cut slowly.
Cut cleats or support strips from scrap wood. Make them 2-3 inches shorter than the shelf depth. This keeps them hidden from view.
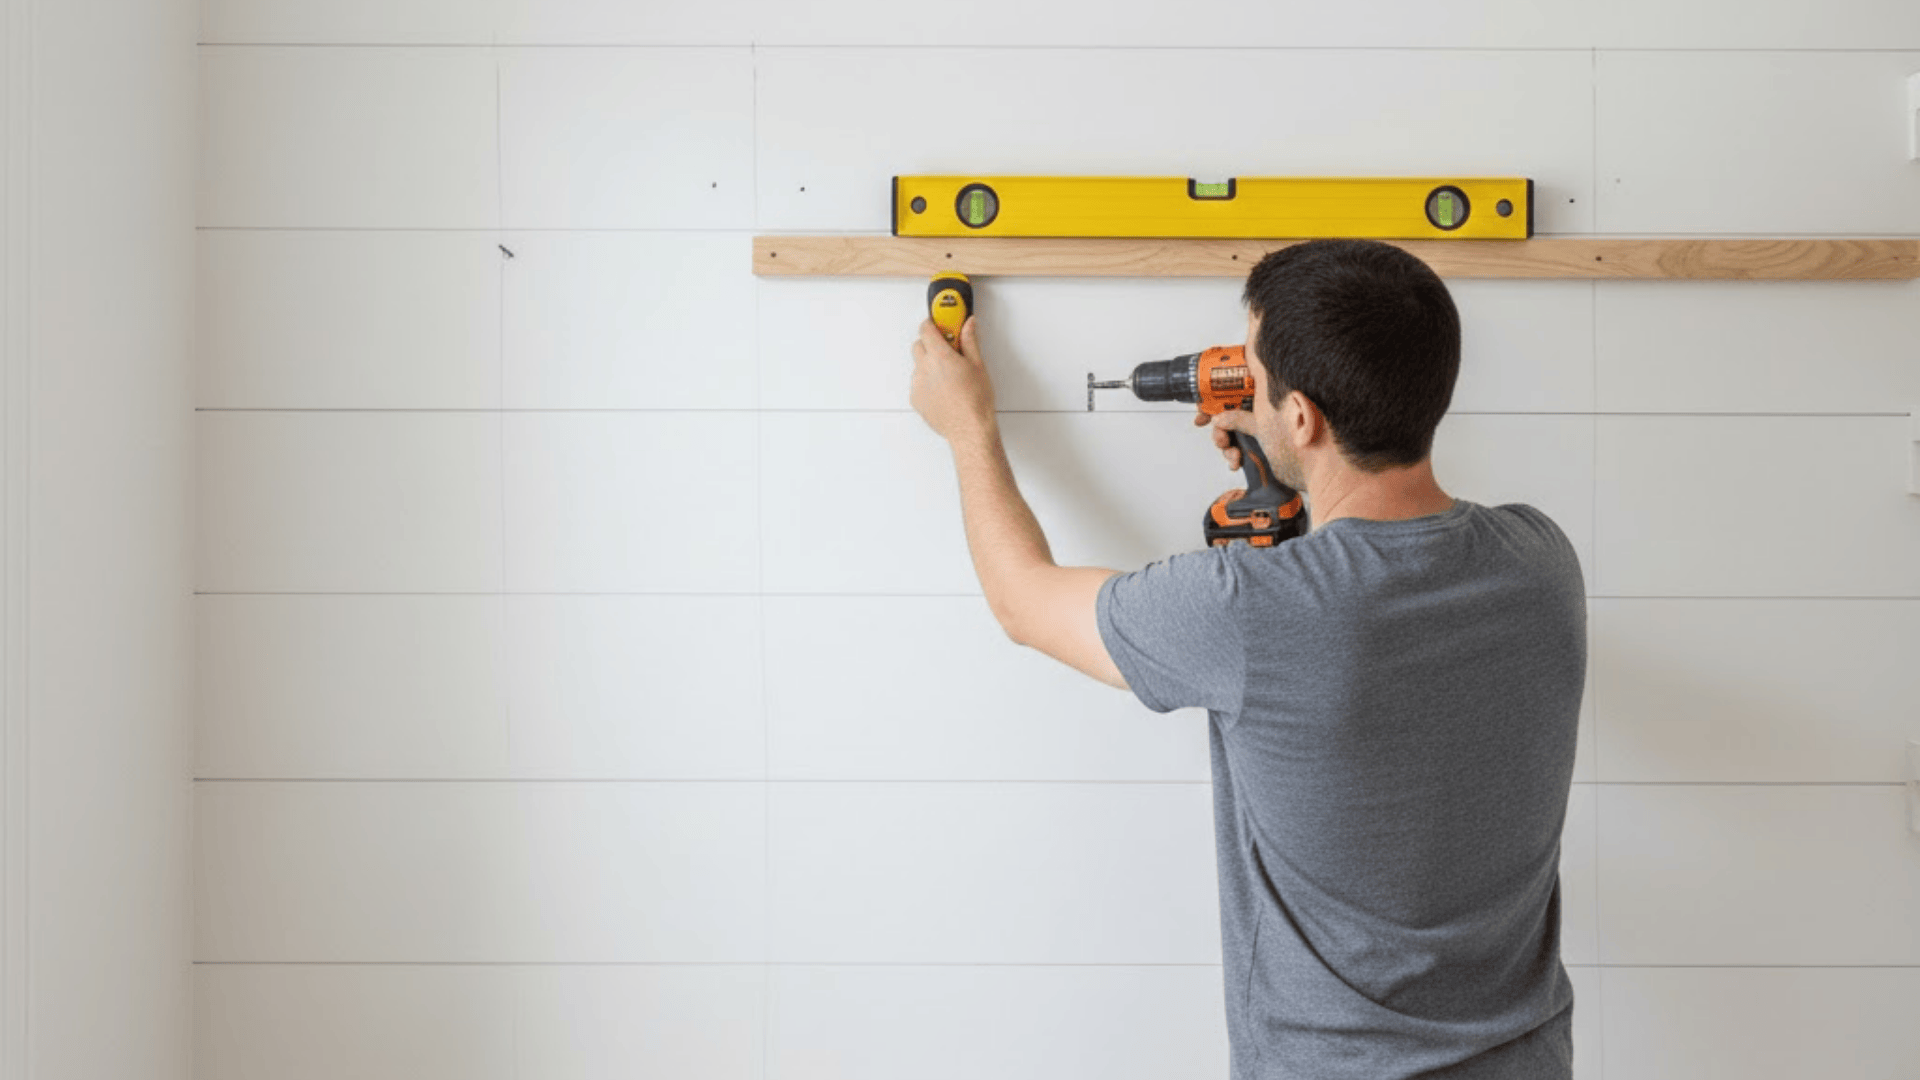
Step 3: Install Brackets or Supports
Use your stud finder to locate wall studs. Mark each location with a pencil. Hold a cleat against your marked line. Check it with your level to make sure it’s horizontal.
Drill pilot holes through the cleat into the stud. Drive 2.5-inch screws through the cleat into the studs.
If you can’t hit a stud, use wall anchors. Drill holes for the anchors first, then screw through the cleat into them. Repeat this process for every shelf level.
Step 4: Attach Shelves
Apply wood glue to the top of each cleat. Place your cut shelf board on top of the cleats. Line up the front edge so it’s even.
Check the shelf with your level and space the holes about 12 inches apart.
Drive 1.25-inch screws down through the shelf into the cleats. Wipe away any excess glue immediately. Test the shelf by pressing down on it. Add more screws if it feels weak.
Step 5: Finish the Shelves
Sand the entire surface with 220-grit sandpaper. Wipe shelves clean with a damp cloth to remove all sawdust. Apply primer if you’re painting. Let it dry completely.
Paint or stain your shelves in thin, even coats. Let each coat dry before adding another. I usually apply two coats of paint for full coverage.
Let everything cure for 24 hours before loading items. Add shelf liner if desired to prevent items from sliding.
Floating Pantry Shelves – Requirements and Installation Process
Floating shelves look clean and modern, with no visible brackets. They create a sleek appearance in any pantry.
However, they require more precision during installation than standard shelves.
Floating Shelf Support Requirements
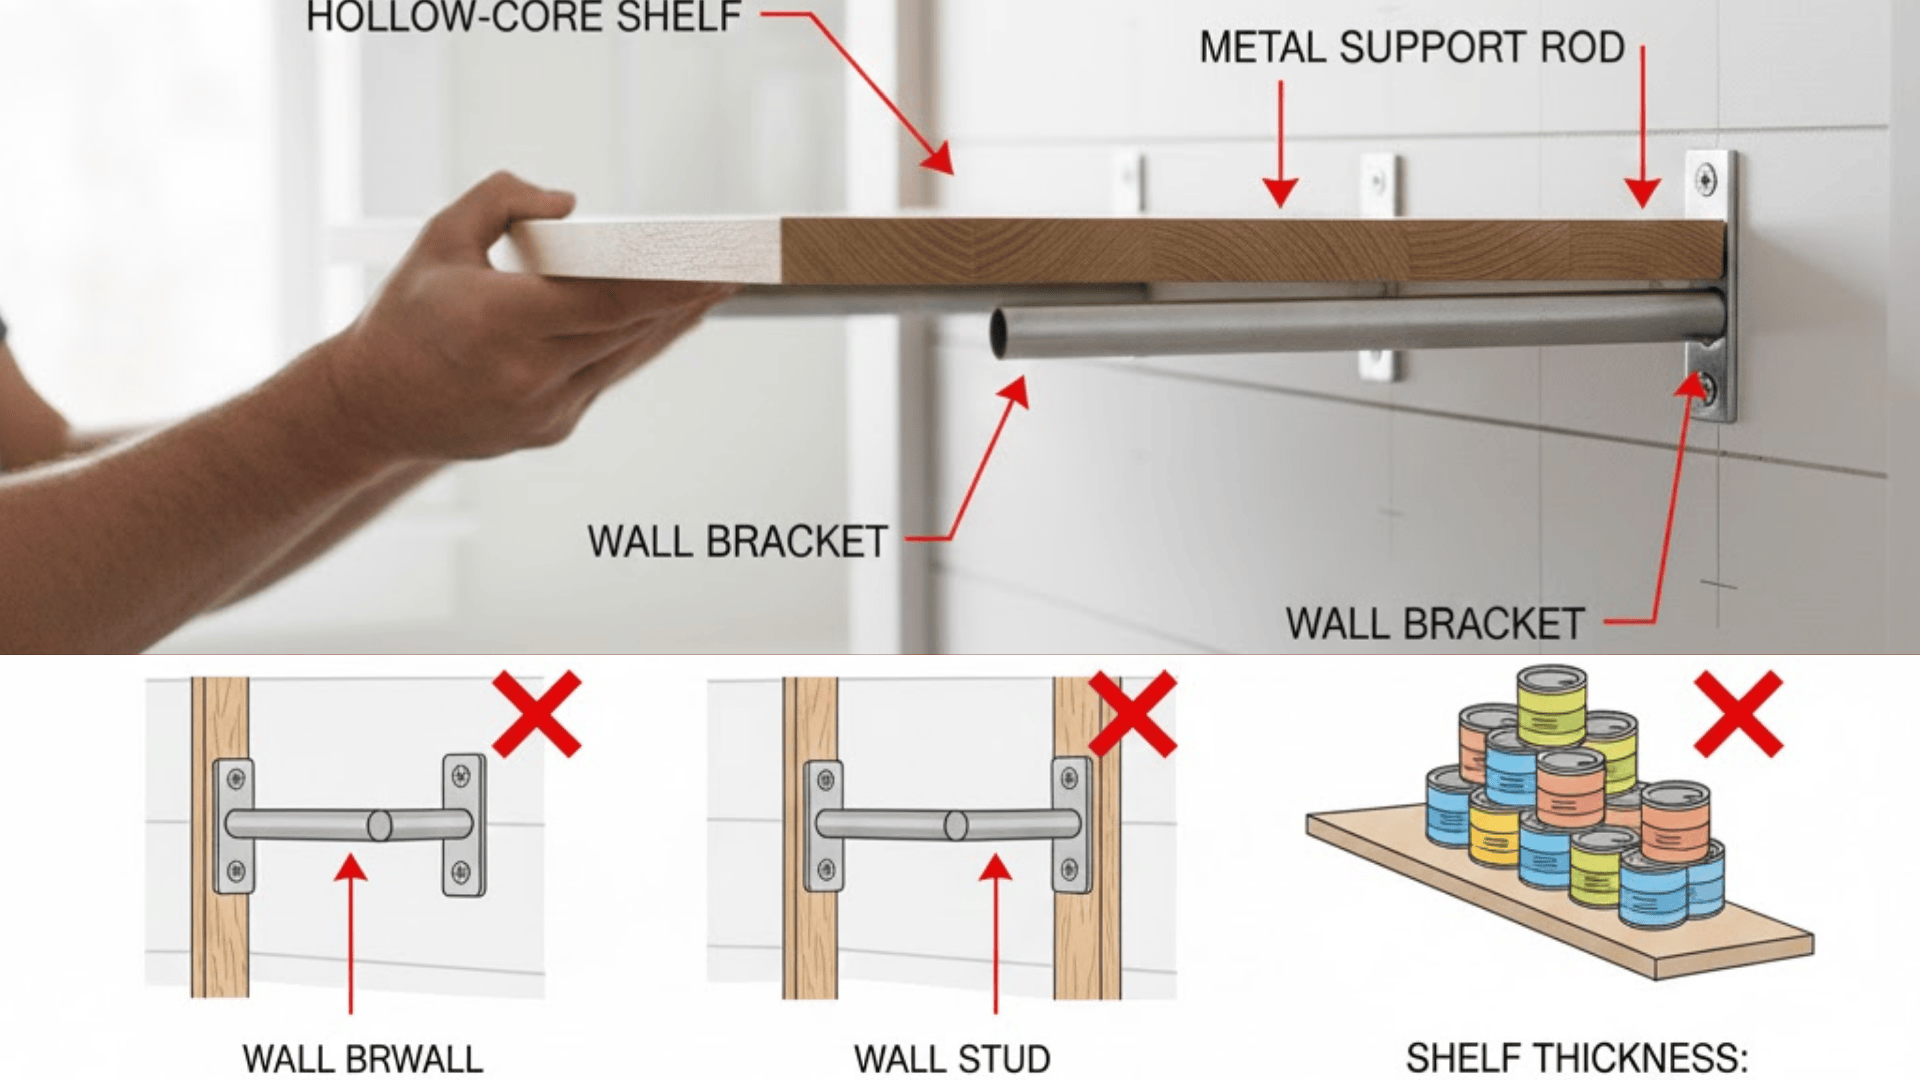
Floating shelves need hidden support rods or brackets inside the shelf itself.
These metal rods mount directly into wall studs. The shelf slides over the rods, completely hiding them.
You must hit wall studs for floating shelves. Drywall anchors won’t support enough weight. Missing a stud means your shelf will pull out of the wall.
Most floating shelf kits include metal rods that are 8-12 inches long. The weight capacity per shelf is 15-25 pounds.
Don’t overload them with heavy canned goods.
The shelf board needs to be at least 2 inches thick to hide the support rods. Hollow-core shelves perform better than solid wood shelves.
Steps for Installing DIY Floating Pantry Shelves
Installing floating shelves takes patience and accuracy. I take my time with each step because they build on each other. Getting the rods level is the most important part.
Step 1. Mark Shelf Position
Mark your desired shelf height on the wall. Use a level to draw a straight horizontal line where the shelf will sit.
Step 2. Locate Wall Studs
Use your stud finder to locate studs along your marked line. Mark the exact center of each stud with a pencil.
Step 3. Drill Rod Holes
Drill holes for the support rods at your marked stud locations. Match the hole size to your rod diameter as specified in the kit instructions.
Step 4. Insert Support Rods
Insert the metal support rods into the drilled holes. Push them deep into the studs until they’re fully seated. Check that both rods are level with each other.
Step 5. Test Rod Strength
Pull the rods down firmly to test their strength. They shouldn’t move or wiggle at all. If they do, you missed the stud and need to relocate.
Step 6. Mount the Shelf
Slide the hollow shelf over the support rods. Push it all the way back against the wall until it sits flush.
Step 7. Secure and Finish
Tighten any set screws beneath the shelf to lock it in place. This prevents the shelf from accidentally sliding off. Load only lighter pantry items like spices, oils, or small jars.
How My Pantry Looks with DIY Custom Pantry Shelves?
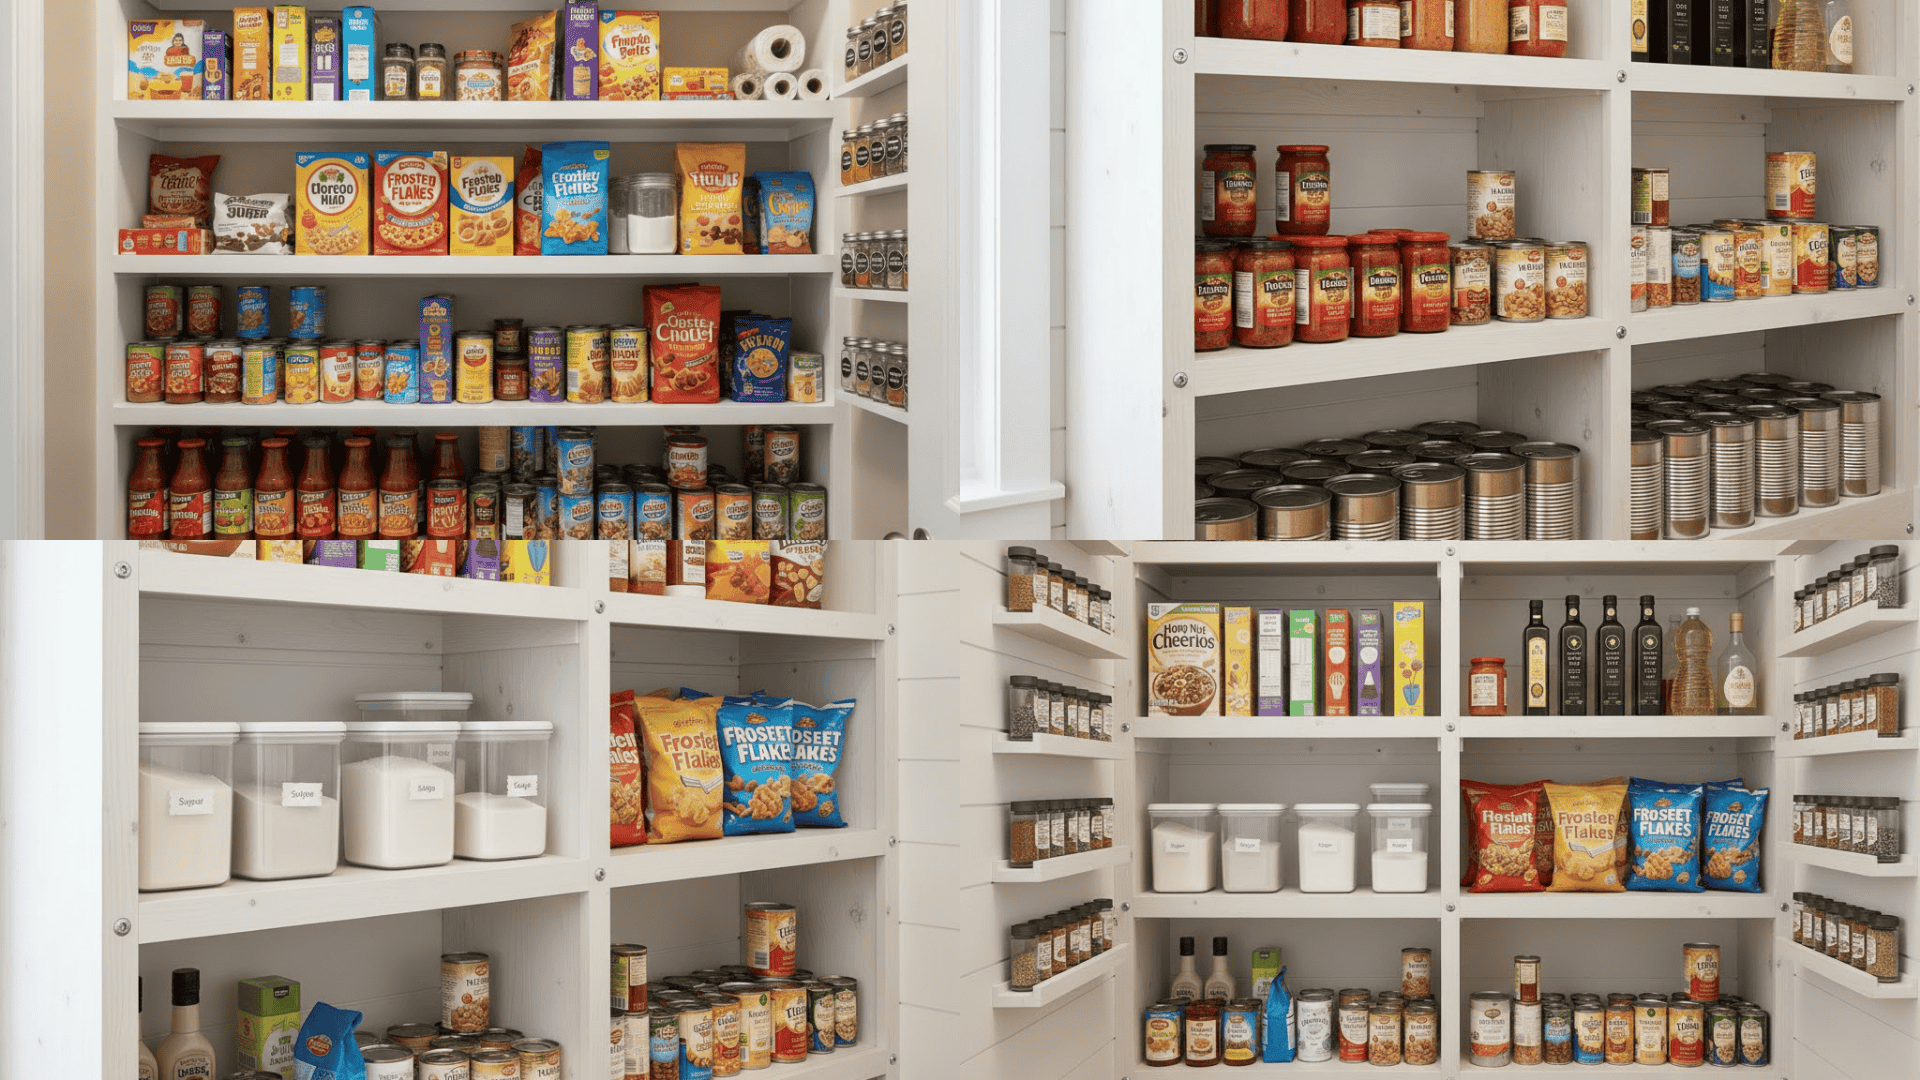
I built my pantry shelves six months ago. The change still makes me happy every time I open the door.
My bottom shelves hold heavy canned goods and jars. The middle shelves store cereal boxes and snacks at eye level. Everything is easy to grab now.
The top shelves hold items I don’t use often. Party supplies and extra napkins sit up there. I can move these shelves whenever I need to.
My floating shelves near the door display my spice jars. They look clean without big brackets.
My total cost:
- Wood boards: $45
- Screws and brackets: $20
- Paint and primer: $17
Total spent: $82 for a complete pantry makeover.
Conclusion
Building pantry shelves yourself turns a messy storage area into an organized space that feels easier to use.
You now have all the steps needed to create custom shelves that fit your exact needs.
Start with the basics if you’re new to DIY projects. Fixed shelves are simple and sturdy for beginners. Once you feel confident, try floating shelves for a modern look.
Ready to get started? Grab your tools this weekend and measure your pantry.