Staring at your old staircase? Those worn treads and outdated railings can really drag down your whole space.
A staircase remodel can entirely change how your home feels and create a major impact without gutting your entire house.
In this blog, you’ll see a real staircase remodel before and after.
You’ll see how simple updates, new treads, fresh paint, and modern railings can turn a tired staircase into a showstopper. You will find out the cost breakdown, budget-friendly ideas, and tips.
What to Know Before Starting Your Staircase Remodel
Before you begin your staircase remodel, keep these key points in mind:
- Know your goals: Decide if you want small updates, like paint or new railings, or a full rebuild.
- Check safety: Make sure the stairs are strong and not damaged. Fix any loose or uneven steps.
- Follow local rules: Building codes tell you how high steps can be and how strong railings must be.
- Set a budget: Plan how much you want to spend so the project doesn’t cost more than expected.
- Pick a style: Choose a look that matches your home so the new stairs feel like a good fit.
- Know when to hire help: Simple tasks can be DIY, but big changes often need a professional.
Staircase Remodel Before and After Creative Ideas
Here are some tried-and-true ways to convert your staircase. This works for people looking to update their space.
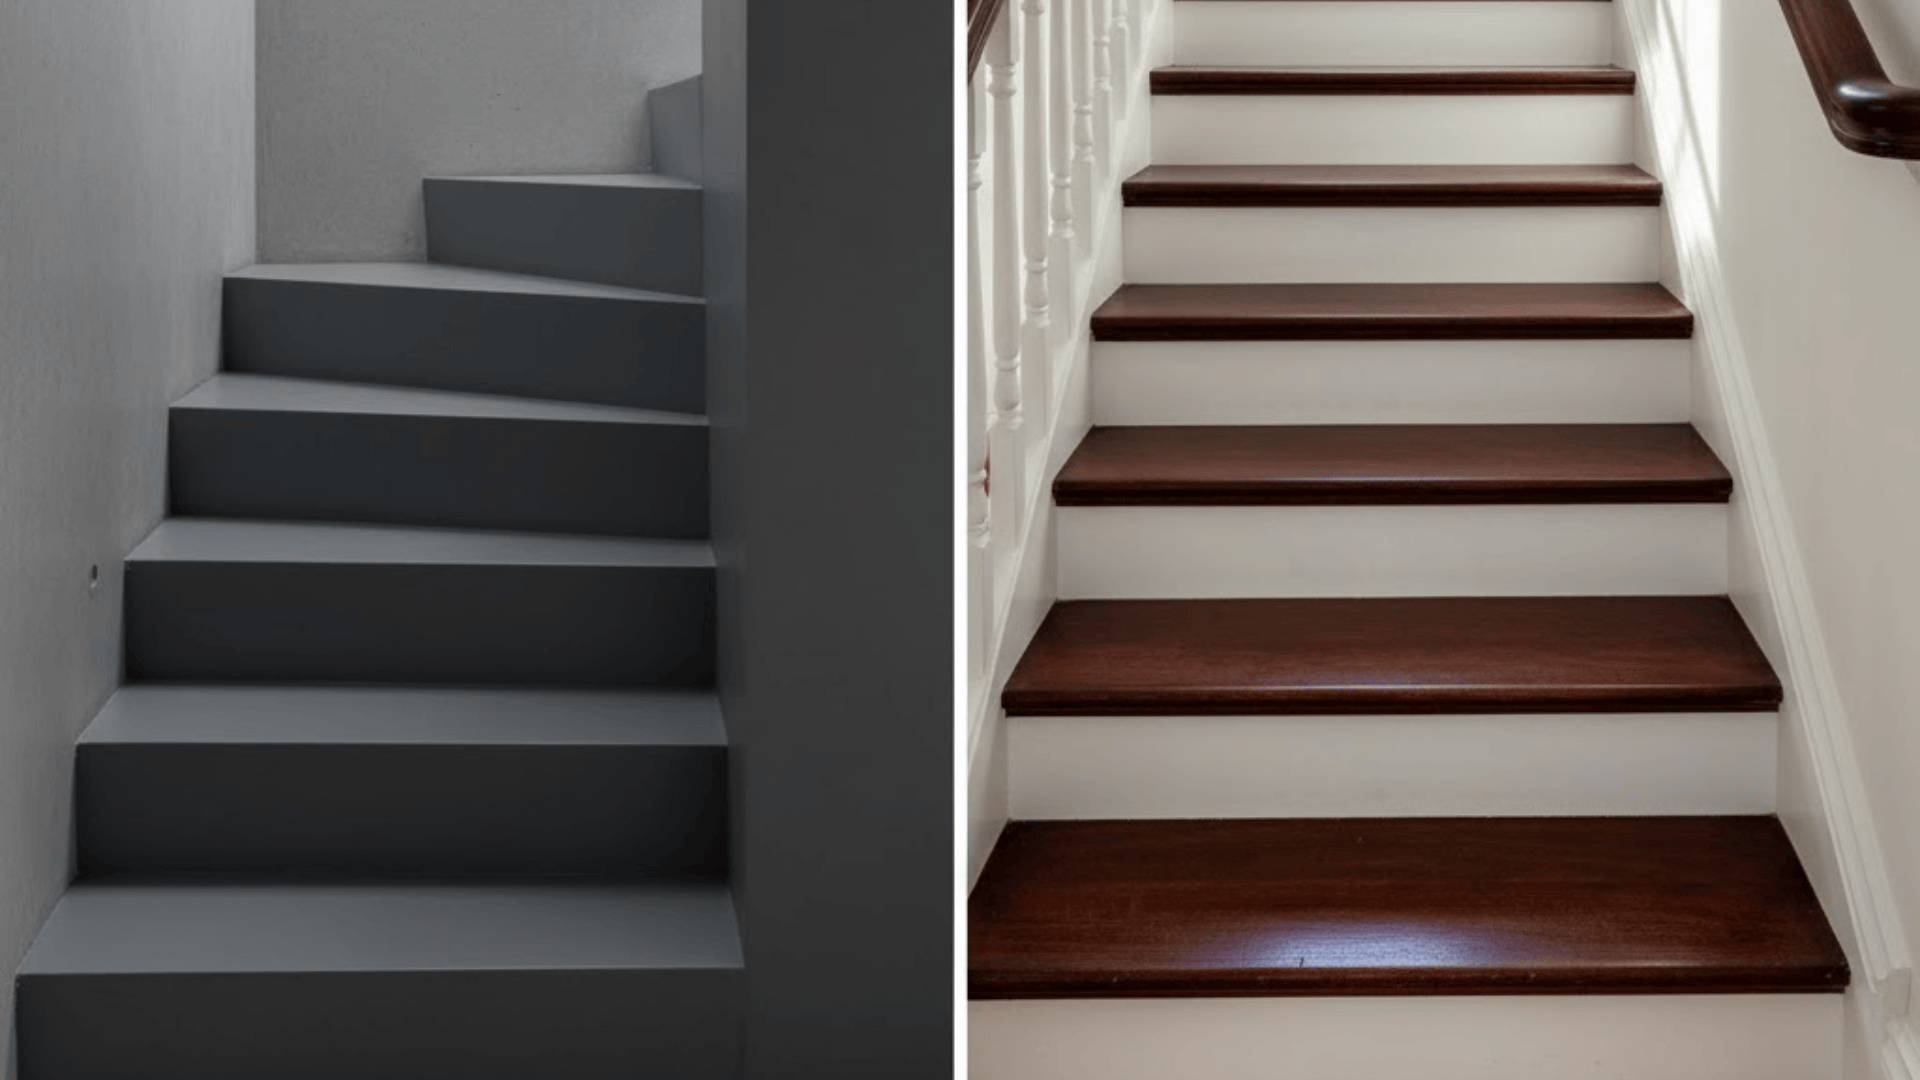
1. Paint Your Staircase White
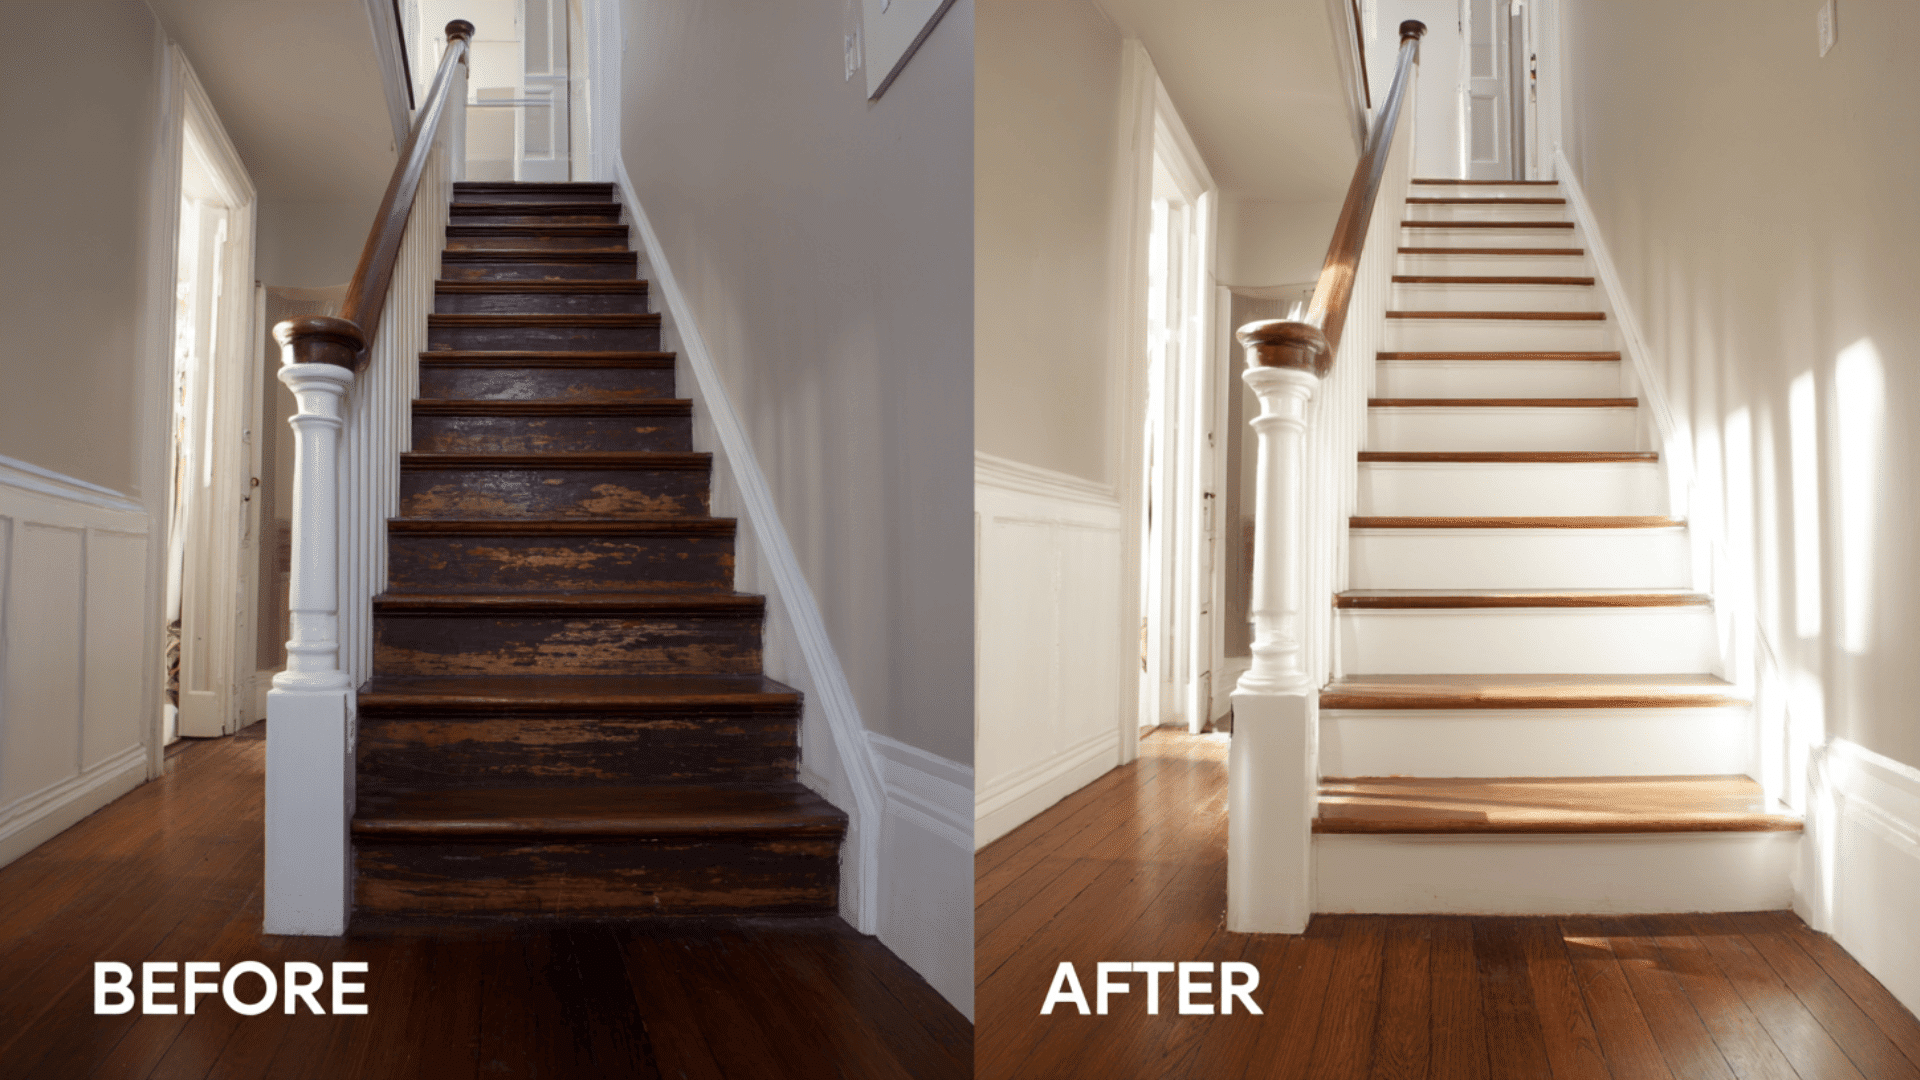
Before: Dark wood stairs that made the area feel closed in and heavy. The old stain was worn and uneven in spots.
After: Crisp white painted treads and risers opened up the space. The whole area feels brighter and more modern now.
2. Install Carpet Runner
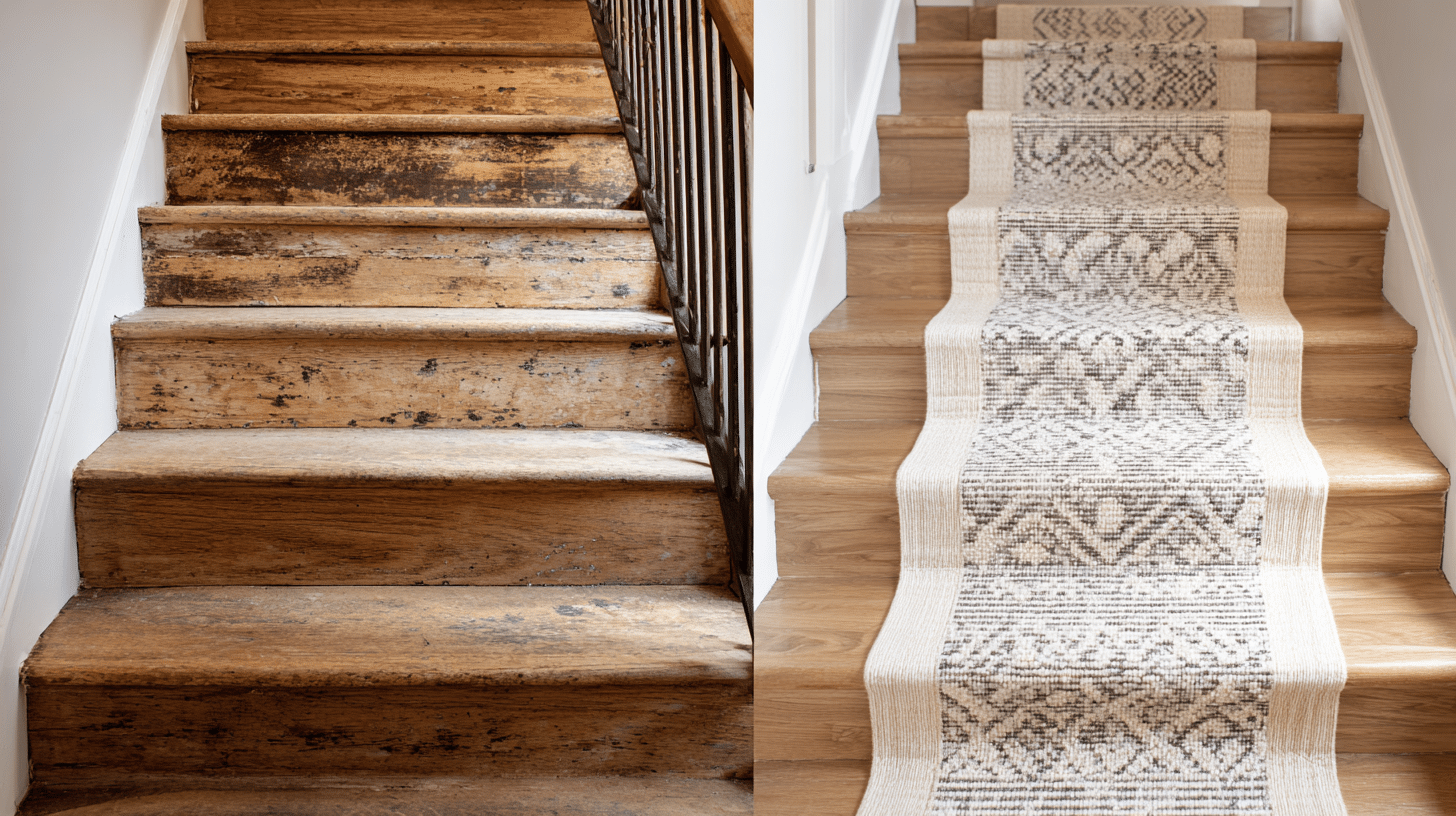
Before: Bare wooden steps were loud and slippery. Every footstep echoed through the house, and the wood showed scratches everywhere.
After: A patterned carpet runner down the center adds heat and cuts noise. It protects the wood while adding style and grip.
3. Replace Old Balusters
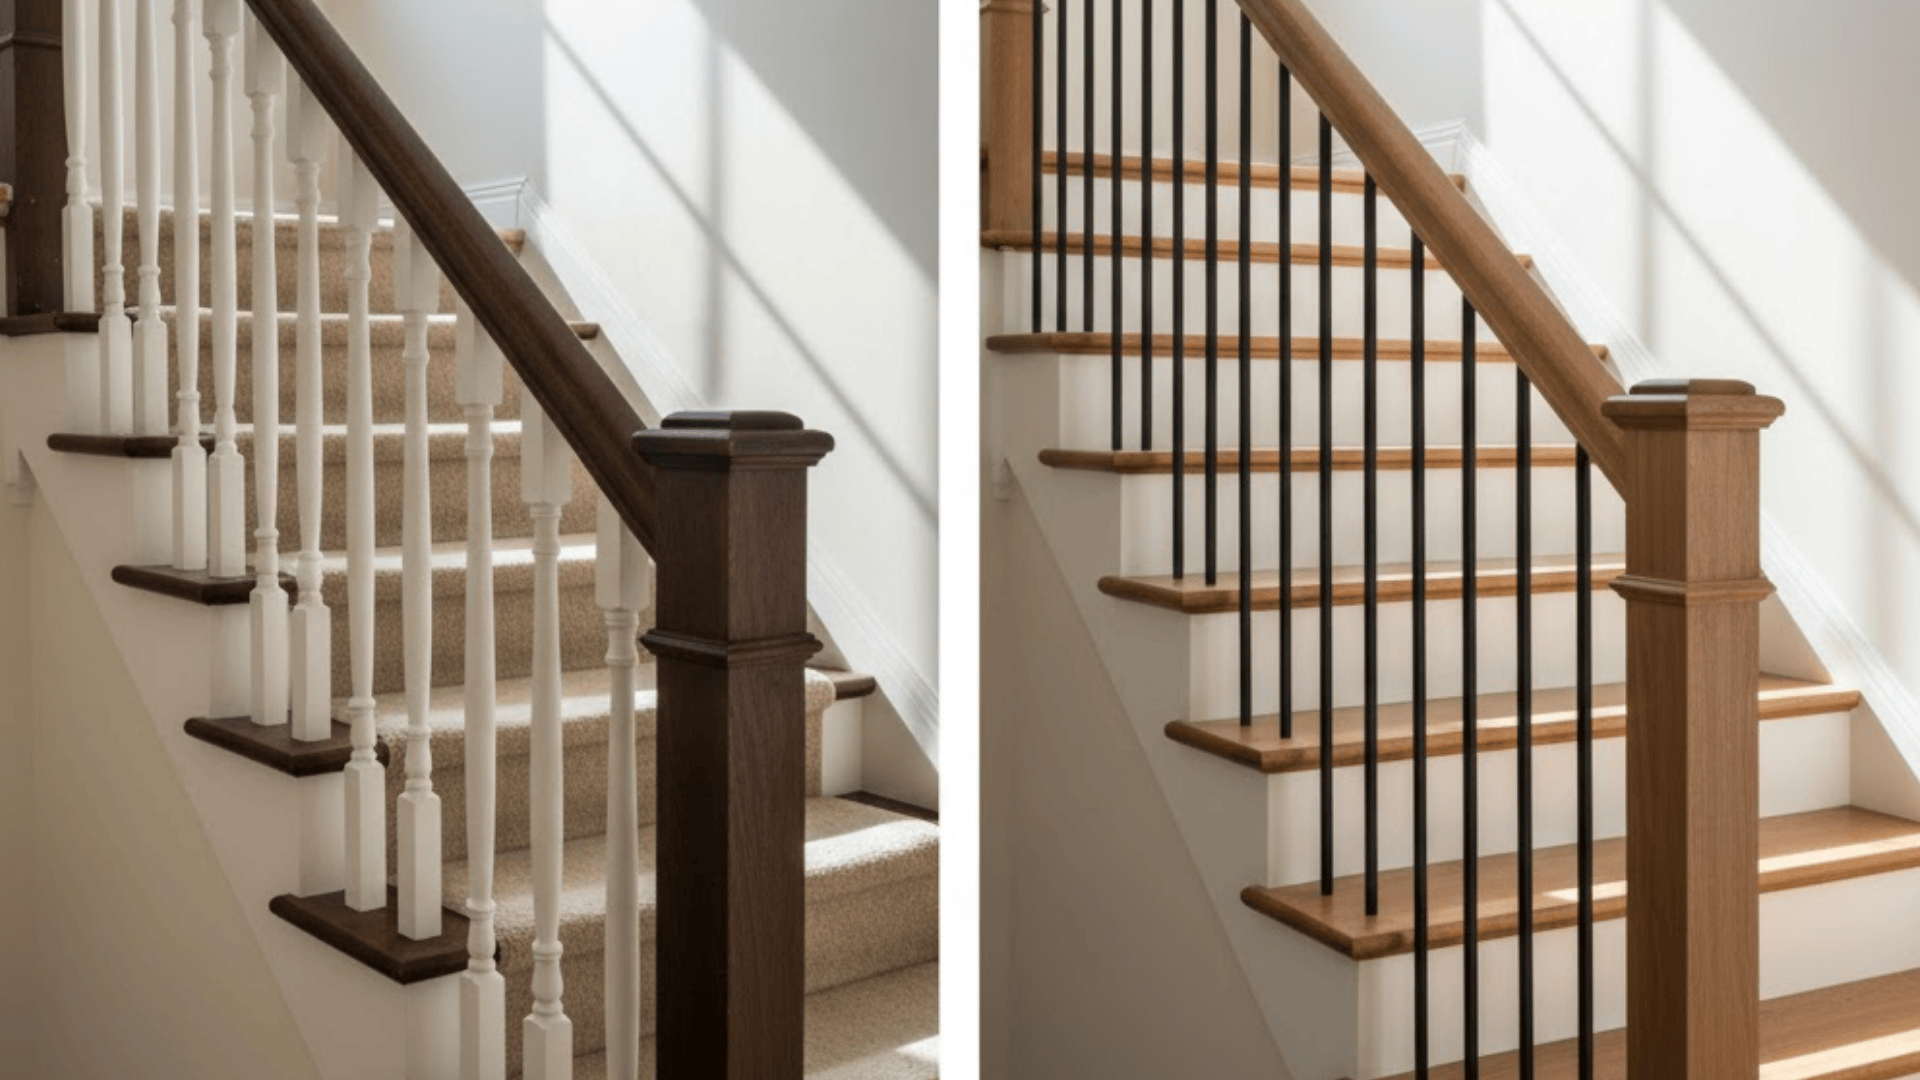
Before: Thick, outdated wooden balusters from the ’80s made the staircase look bulky. They blocked the light and felt crushed in the space.
After: Sleek metal balusters or simple square spindles give a clean, open look. Light flows through, and the stairs feel stylish.
4. Add Under-Stair Storage
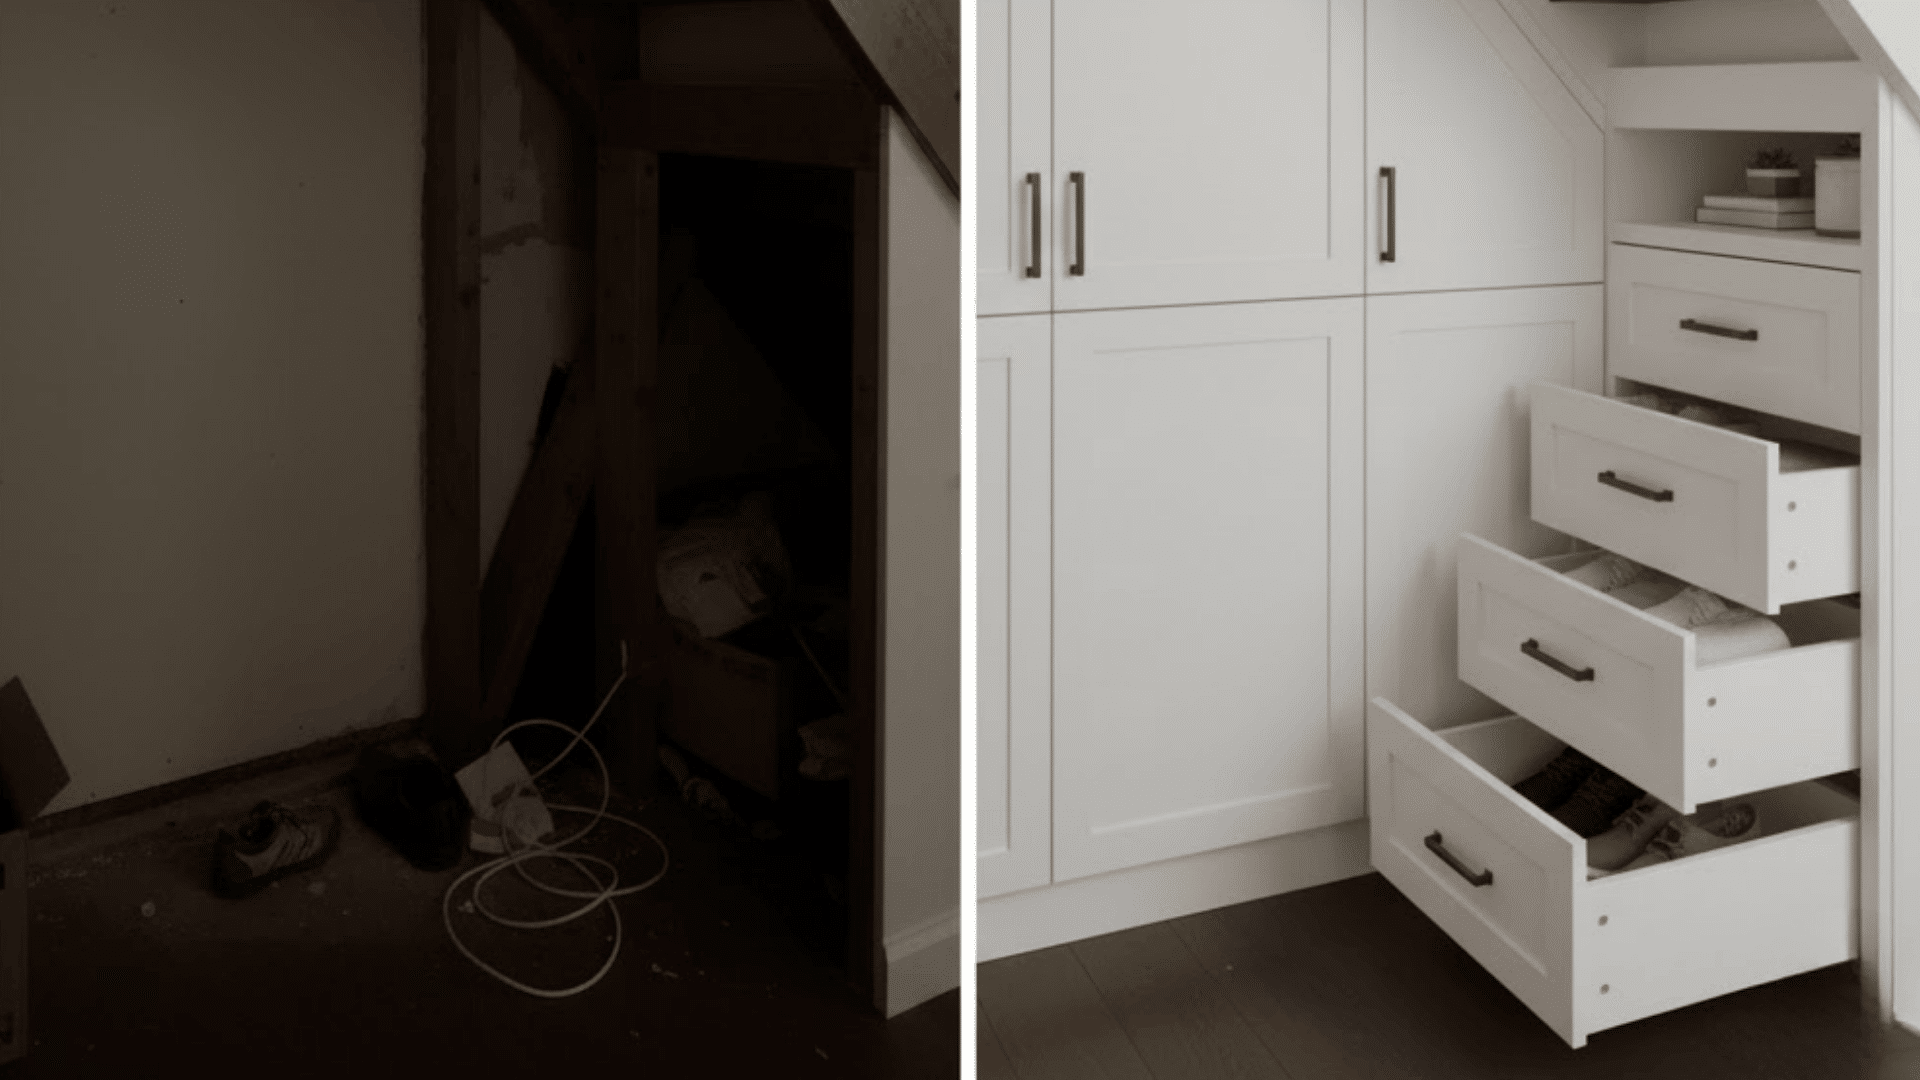
Before: Wasted space under the stairs collected dust and clutter. It was just a dark, unusable corner that served no purpose.
After: Built-in cabinets or pull-out drawers maximize the area. Now it’s functional storage that keeps your home organized and tidy.
5. Refinish Wood Treads
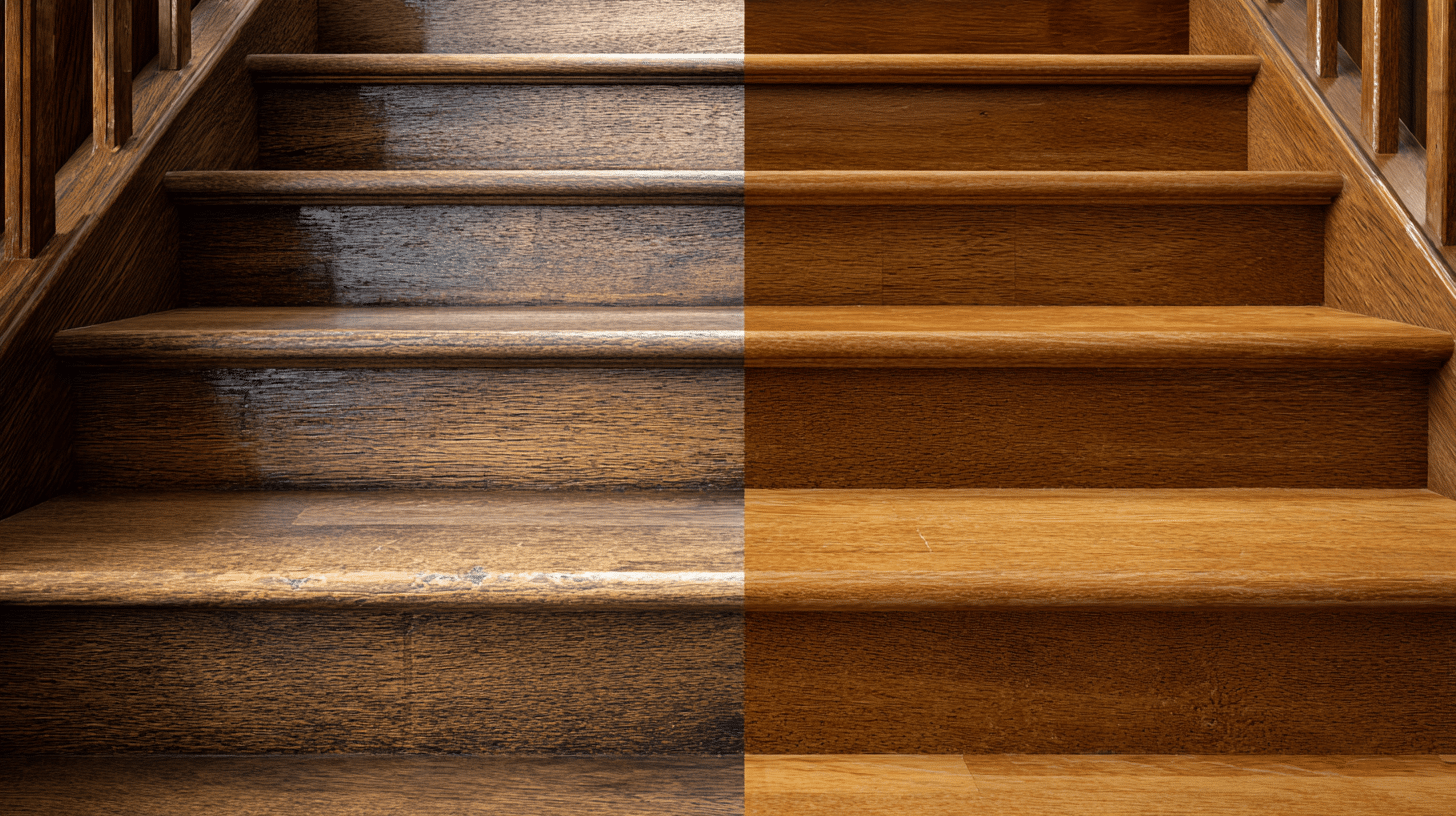
Before: Scratched, dull treads with a worn finish showed every mark. The wood had lost its color and looked tired from years of use.
After: Sanded and restained treads brought back the natural beauty. The rich wood grain shines through with a protective coat.
6. Update the Handrail
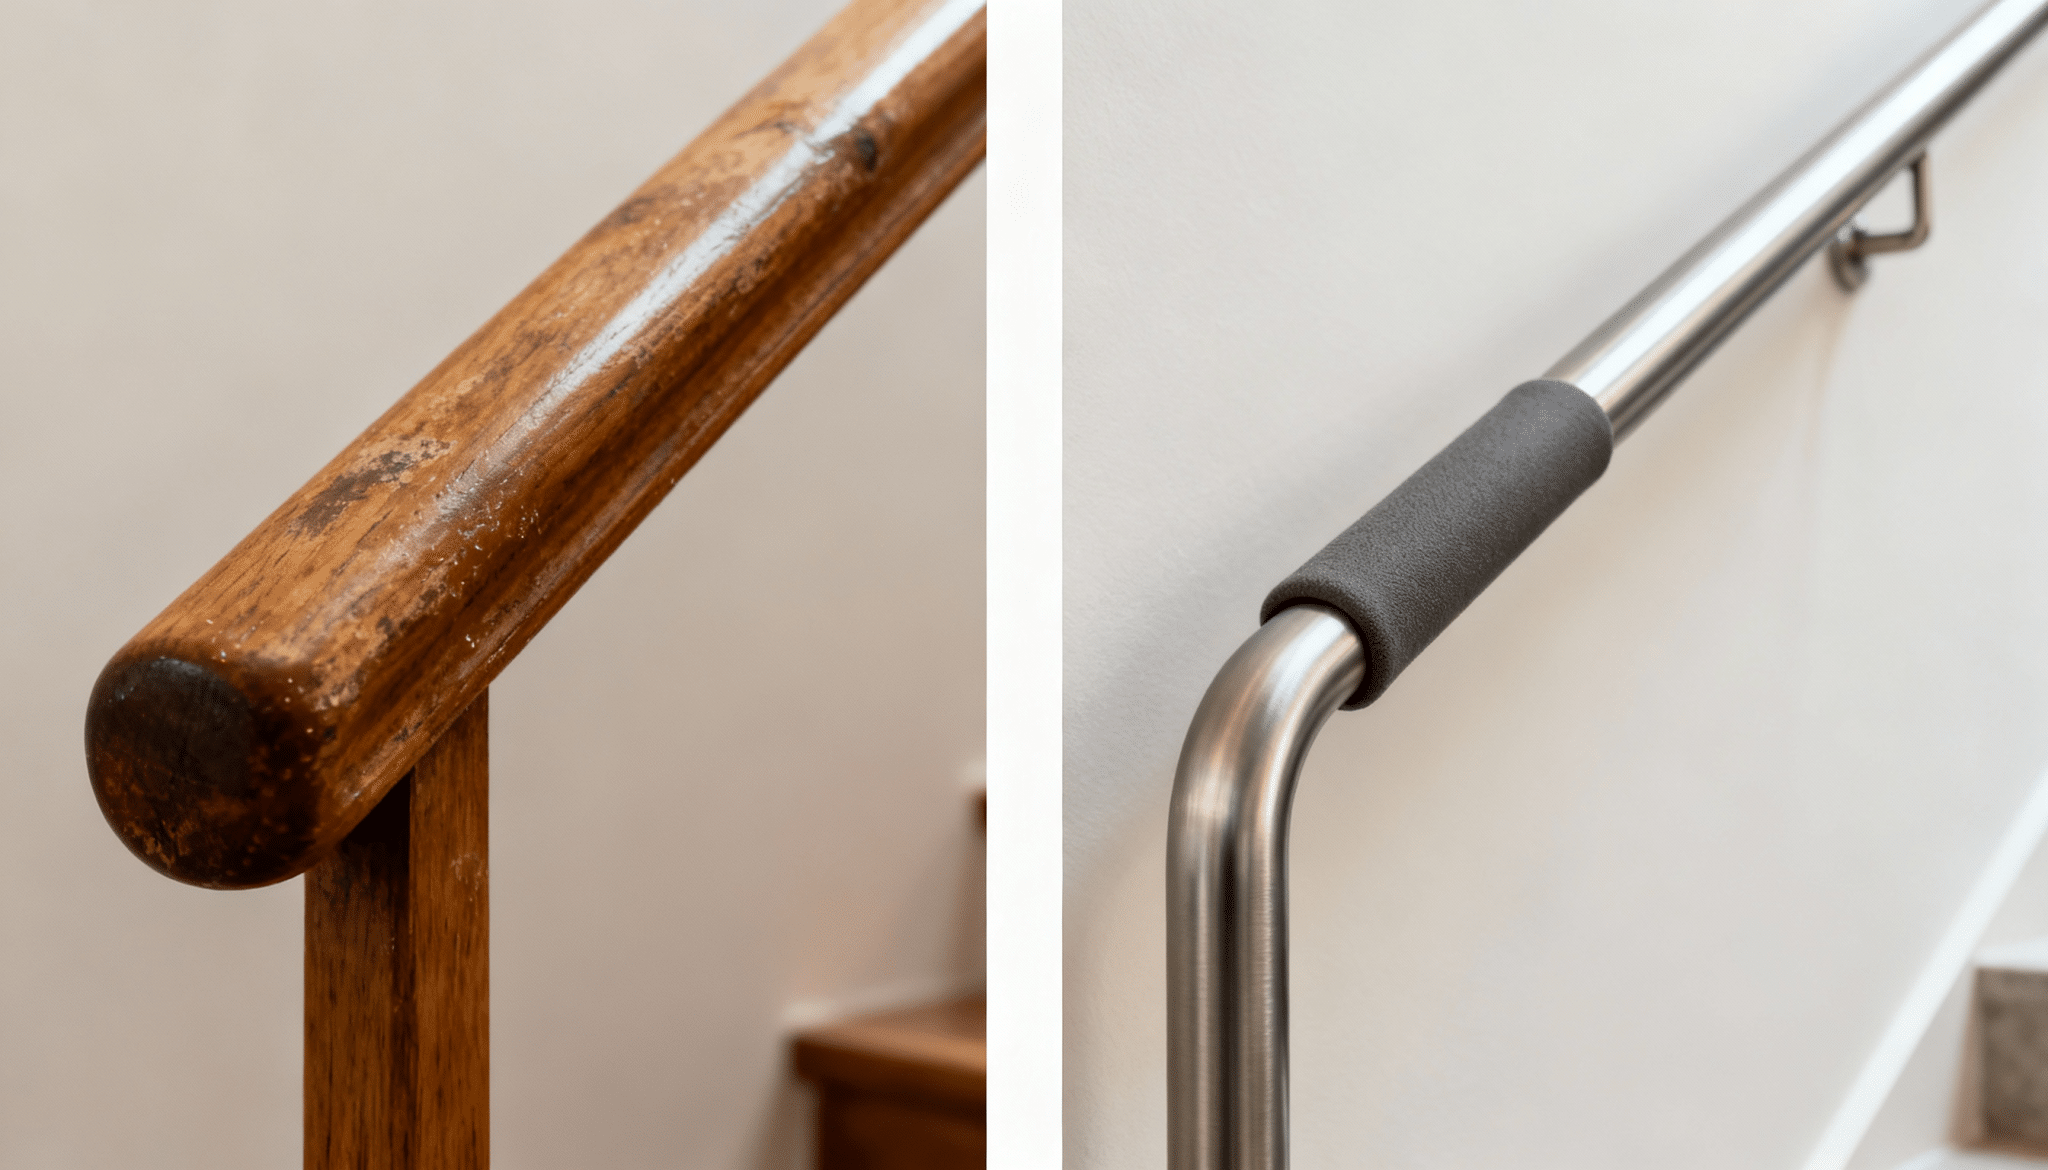
Before: The bulky wooden handrail felt dated and took up visual space. The finish was sticky and worn from countless hands over the years.
After: A streamlined metal or wrapped leather handrail looks sharp. It’s comfortable to grip and matches your updated style perfectly.
7. Two-Tone Stair Design
Before: All one color made the stairs blend together and look flat. There was no visual interest or definition between steps.
After: White risers with stained treads create a striking contrast. Each step stands out, and the staircase becomes a focal point in its own right.
8. Install LED Stair Lighting
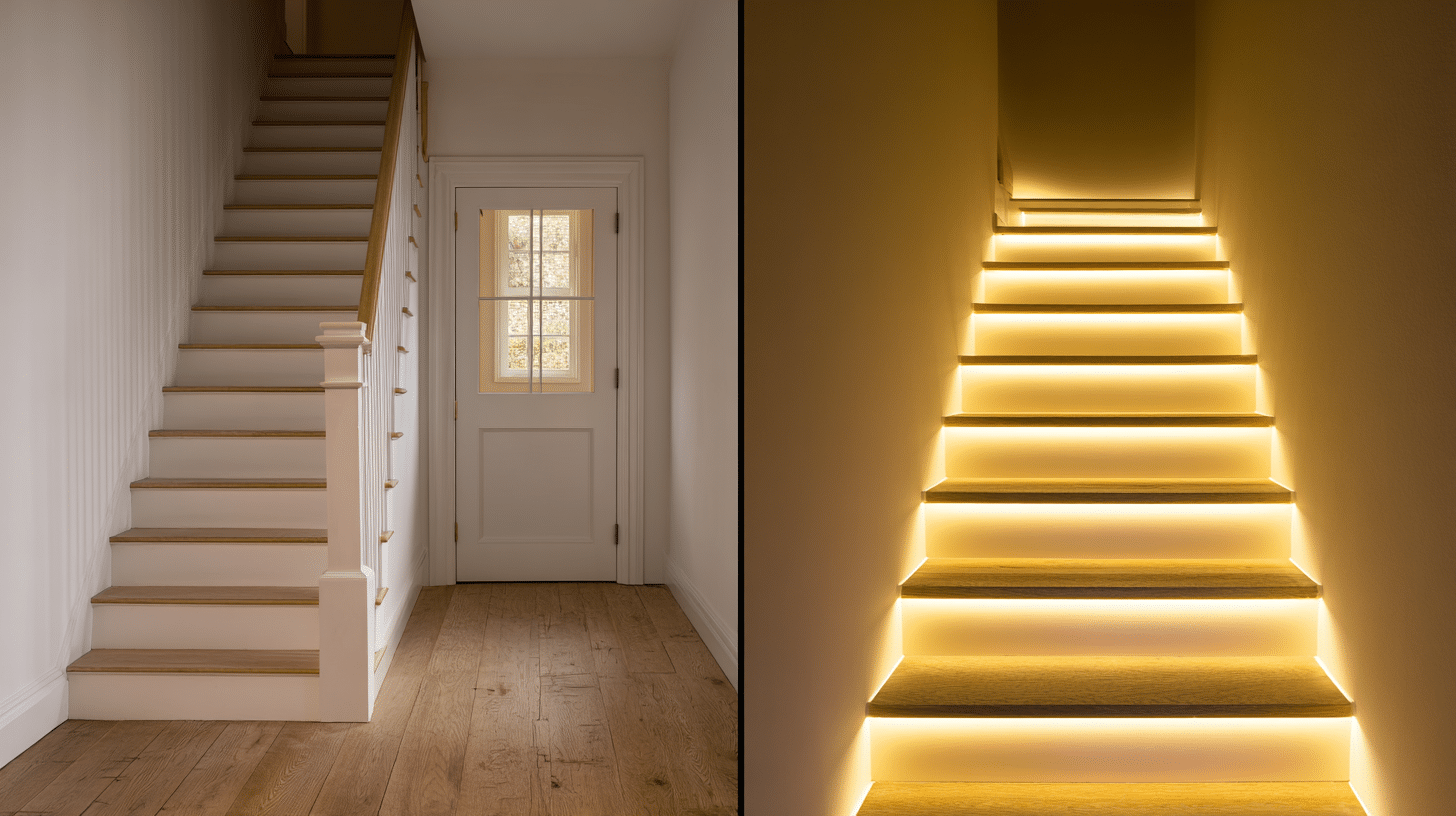
Before: Dark stairs at night were a safety risk for everyone. You had to turn on harsh overhead lights or feel your way down.
After: Subtle LED strips under each tread provide gentle illumination. The stairs are safer at night and look really cool too.
9. Remove Carpet Completely
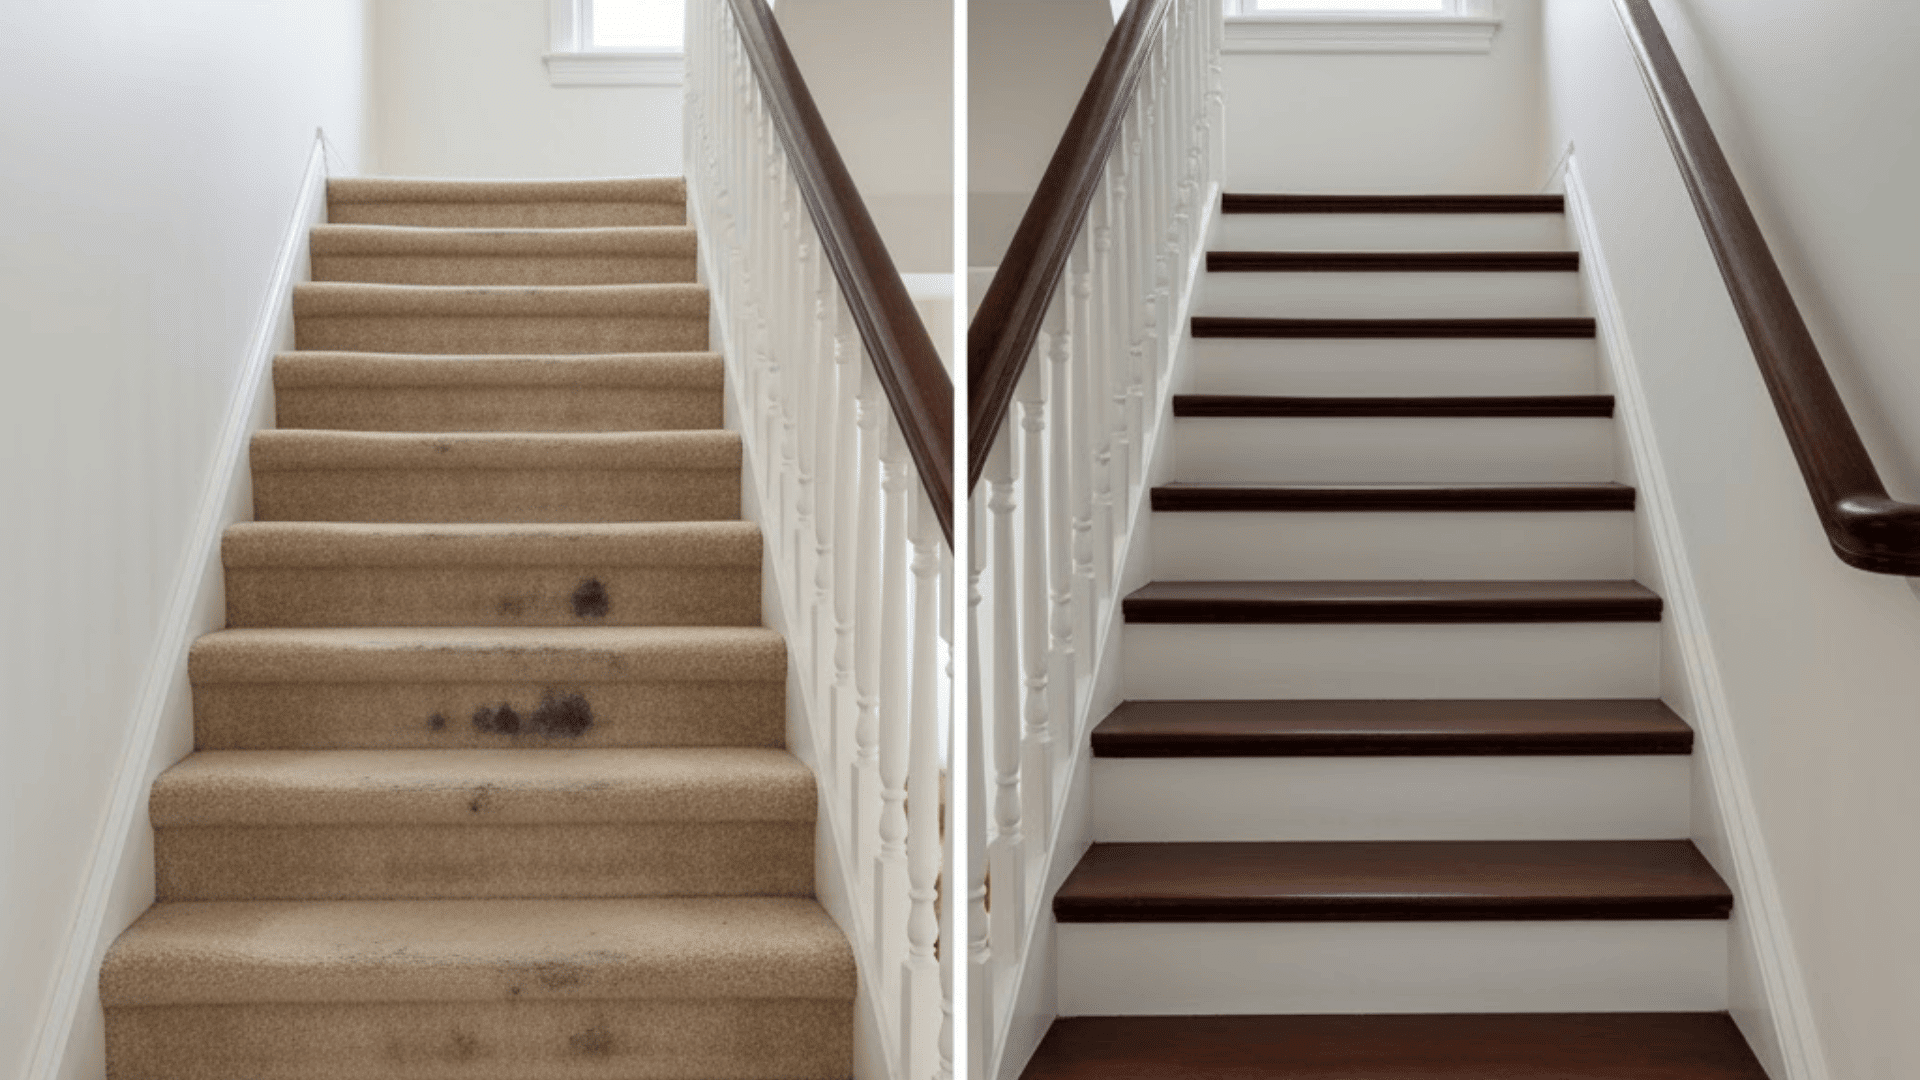
Before: Old, stained carpet covered the stairs and trapped odors. It was matted down and impossible to get truly clean anymore.
After: Exposed hardwood underneath got refinished and sealed. The natural wood is easier to maintain and looks so much better.
10. Add a Gallery Wall
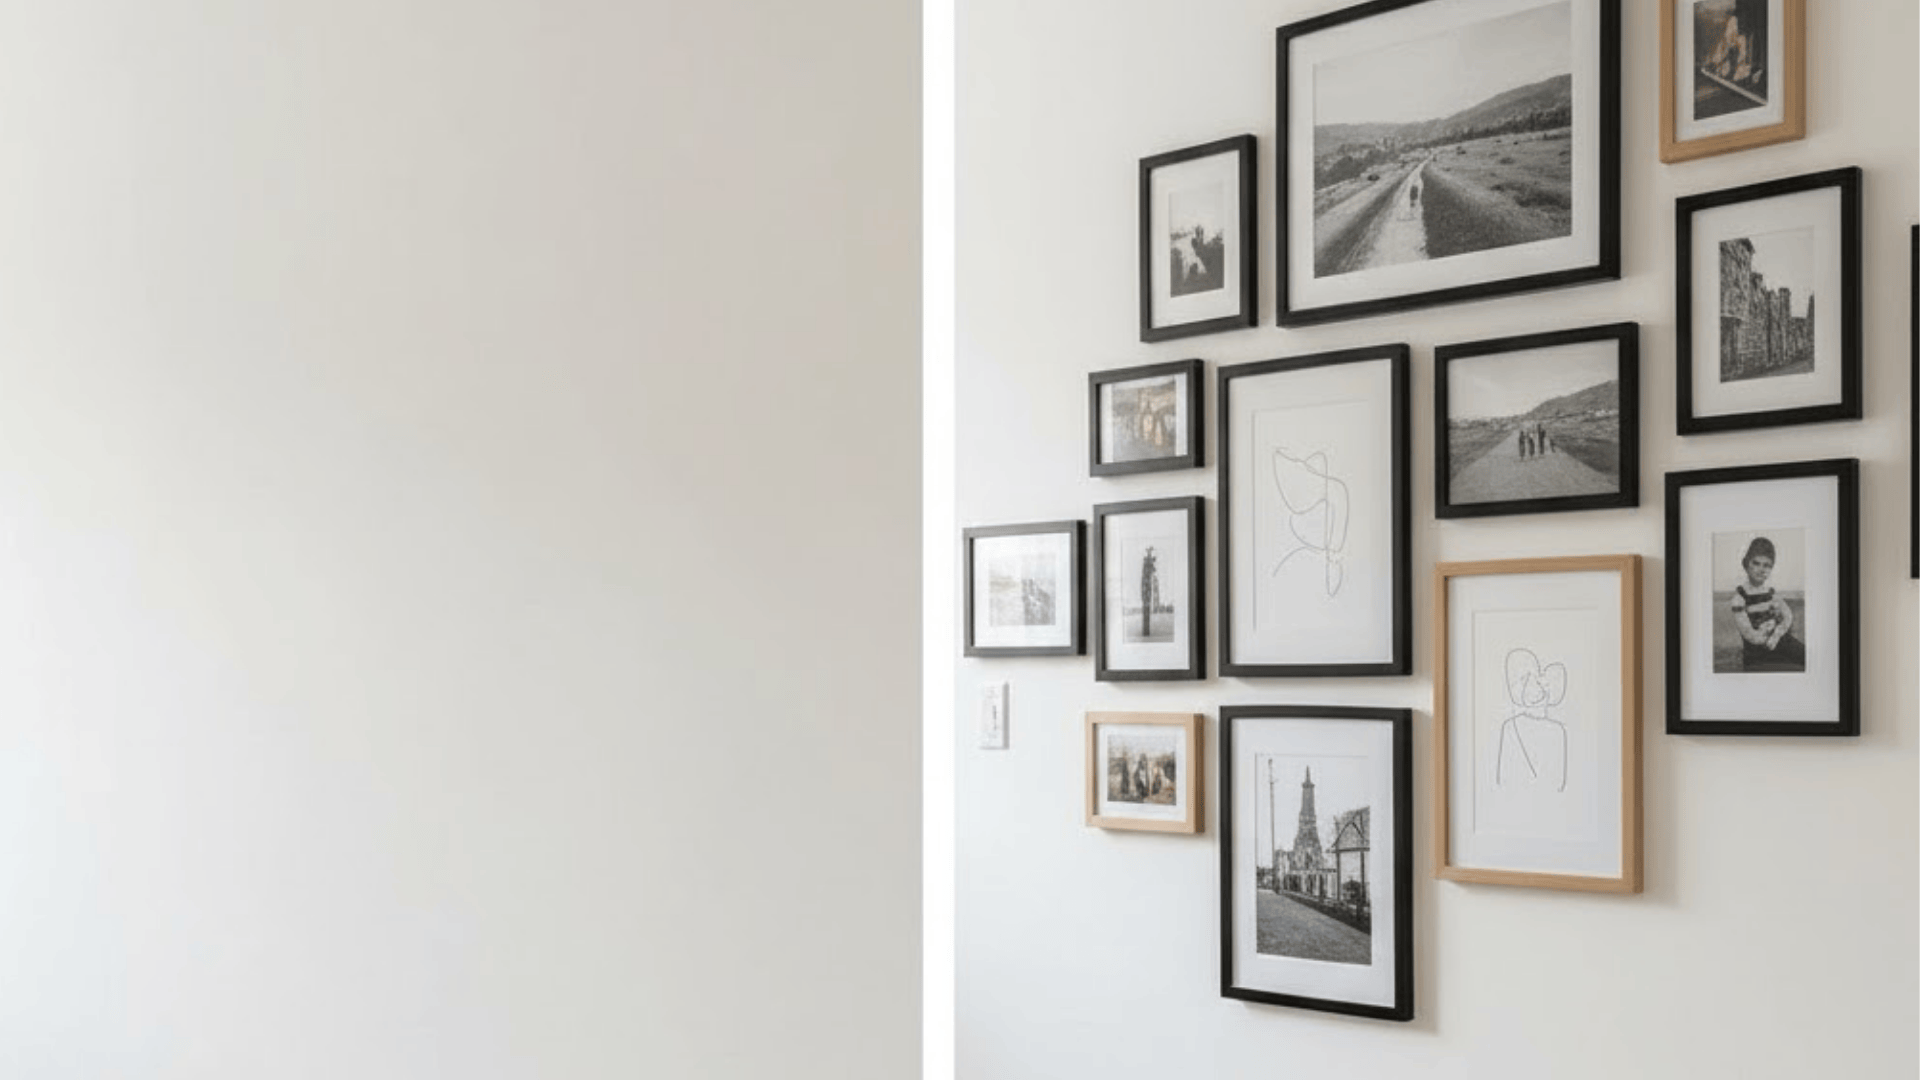
Before: The blank stairway wall was just wasted space going up. It felt boring and like a missed opportunity for personality.
After: Photos and art arranged along the stairs tell your story. The climb up becomes more interesting and personal to you.
11. Install Glass Panels
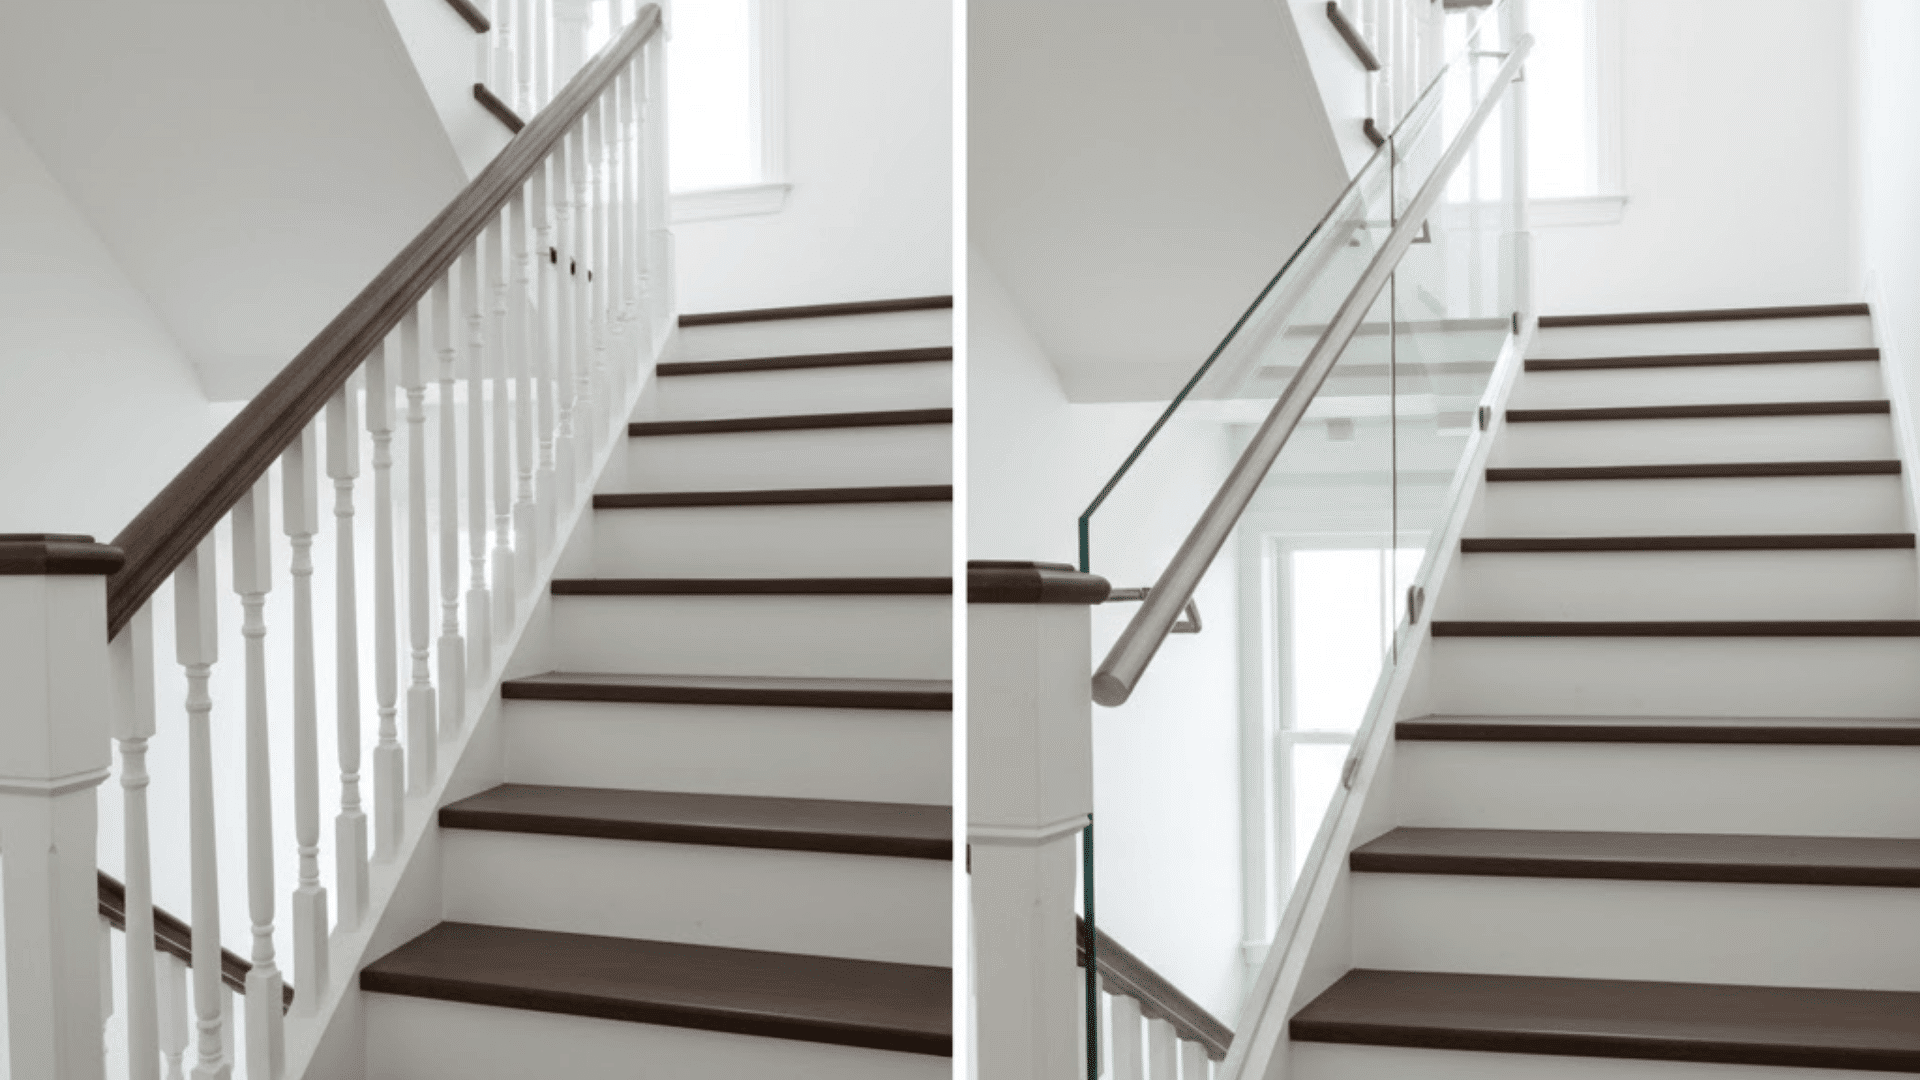
Before: Solid walls or dense balusters closed off the staircase area. The space felt cramped and completely cut off from adjoining rooms.
After: Clear glass panels between posts open everything up visually. Your home feels larger, and natural light travels through better.
12. Create Open Riser Stairs
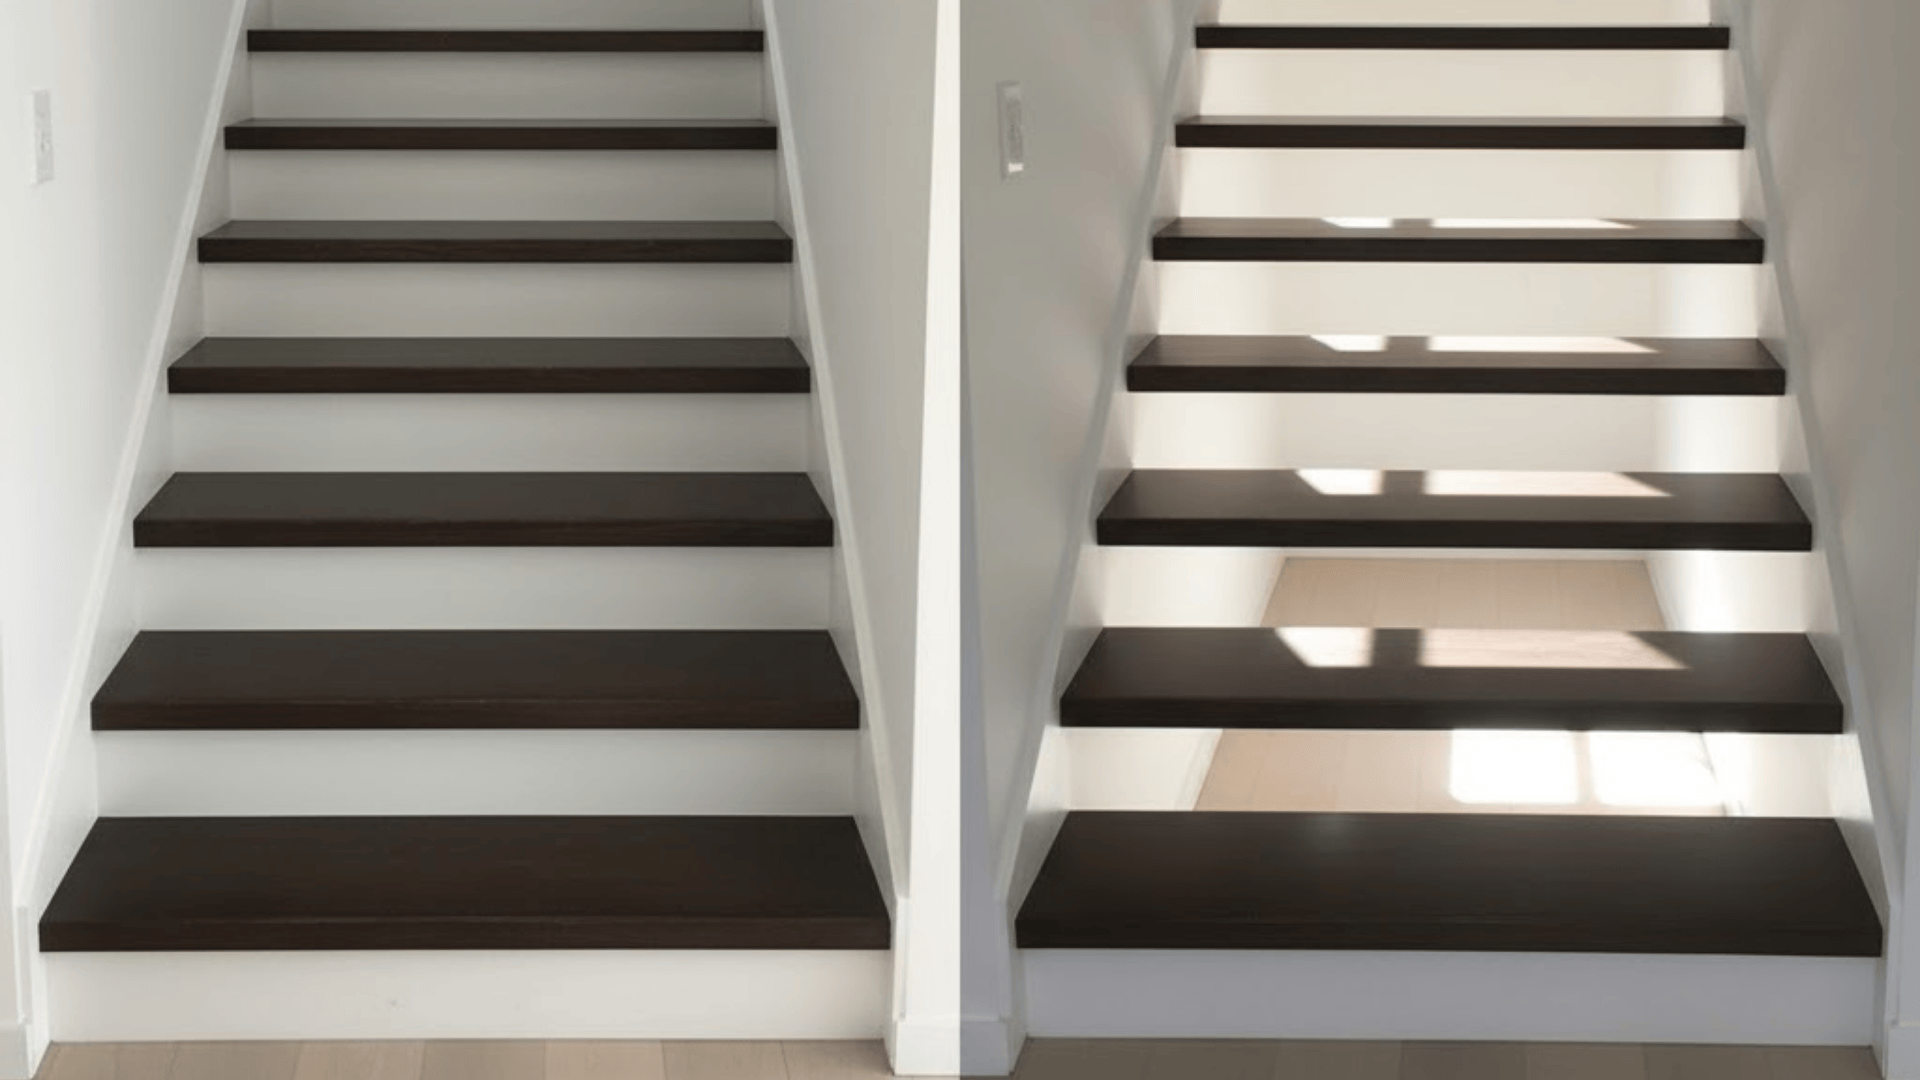
Before: Closed risers made the staircase feel heavy and blocked. It created a visual barrier in your open-floor-plan design.
After: Removing risers gives stairs a floating, airy appearance. You can see through them, which makes small spaces feel bigger.
13. Add Decorative Tiles
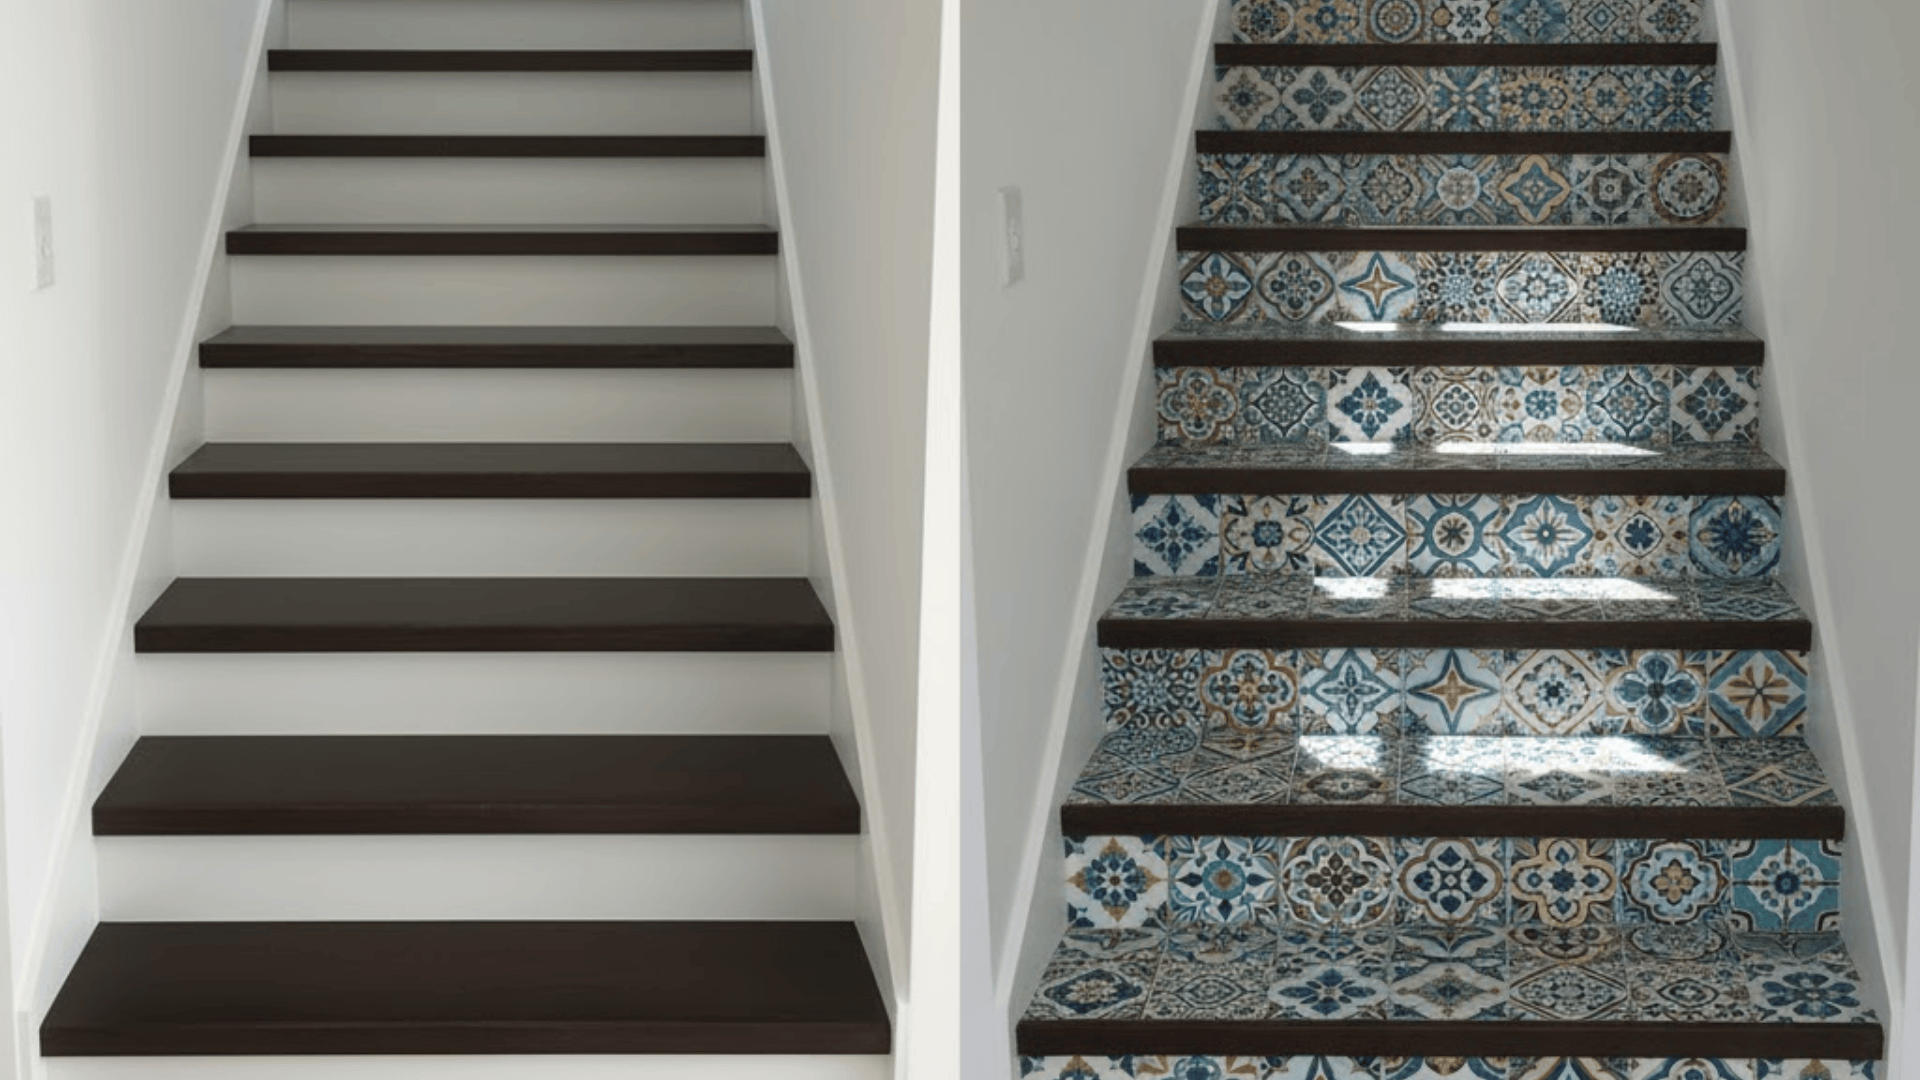
Before: Plain wooden risers lacked personality and visual appeal. They were functional but boring, just basic stair parts doing their job.
After: Patterned tiles on each riser add color and character. Mediterranean or geometric designs make your stairs a conversation starter.
Cost Breakdown of Staircase Remodel
| Remodel Type | Cost Range | Notes |
|---|---|---|
| Paint stairs | $200 – $600 | DIY saves money |
| Carpet runner | $300 – $1,200 | Depends on carpet quality |
| Refinish treads | $400 – $1,500 | Per 12-15 steps |
| New balusters | $1,200 – $3,500 | Metal costs more than wood |
| New handrail | $300 – $1,000 | Material matters most |
| LED lighting | $150 – $800 | Professional installation recommended |
| Glass panels | $2,000 – $5,000 | Includes hardware and installation |
| Under-stair storage | $500 – $2,500 | Custom builds cost more |
| Full remodel | $4,000 – $10,000+ | Complete makeover with labor |
Disclaimer:All prices are approximate and can vary based on location, materials, labor rates, and project complexity. Always obtain multiple quotes from qualified professionals before starting any remodel.
Budget-Friendly Makeover Tips
- Sand and stain existing wood yourself; rent a sander for $40 a day.
- Keep the existing structure and just update the look; no need for a full rebuild.
- Shop secondhand for balusters and railings. Architectural salvage yards have deals.
- Use peel-and-stick tiles on risers; they look excellent and cost way less.
- Update one section at a time; spread costs over several months.
- Refinish handrails instead of replacing them. Stripping and staining is cheaper.
- Add simple hooks under stairs for instant storage for under $20.
- Use leftover paint from other projects for free color coordination.
- Skip custom work; standard sizes and materials cost less every time.
Conclusion
Your staircase doesn’t have to stay outdated. You’ve seen real transformations, practical solutions, and actual costs. Now you can make informed decisions for your home and budget.
Even minor updates significantly improve how your space looks and feels.
Most projects fit your timeline without professional help.
Grab paint samples this weekend or measure for that runner you’ve considered.