Your roof does more than just sit on top of your house; it is a hardworking system made up of many parts that keep you safe, dry, and comfortable.
Each layer and piece of the roof has a specific job, from keeping out rain to letting your home breathe. But unless you are a roofer, you probably haven’t thought much about what’s really up there!
Ready to take a peek under the shingles?
Let’s break down the roof anatomy in simple terms and see how all the parts work together to protect your home.
Roof Structure & Framework
The structure of a roof is like its skeleton; it gives the roof its shape and strength. The main parts include rafters and trusses, which are wooden or metal beams that support the weight of the roof.
Rafters are built piece by piece on-site, while trusses are pre-made in factories and lifted into place. These beams are connected to the walls of the house and help hold up the roof safely.
Sometimes, extra supports like collar ties or joists are added to keep everything steady. Without a strong framework, the roof wouldn’t be able to handle heavy rain, snow, or wind.
A solid structure is the first step to a strong and lasting roof, and it is a key part of the anatomy of a roof. If this part fails, the whole roof could sag or collapse.
Roof Decking and Underlayment Layers
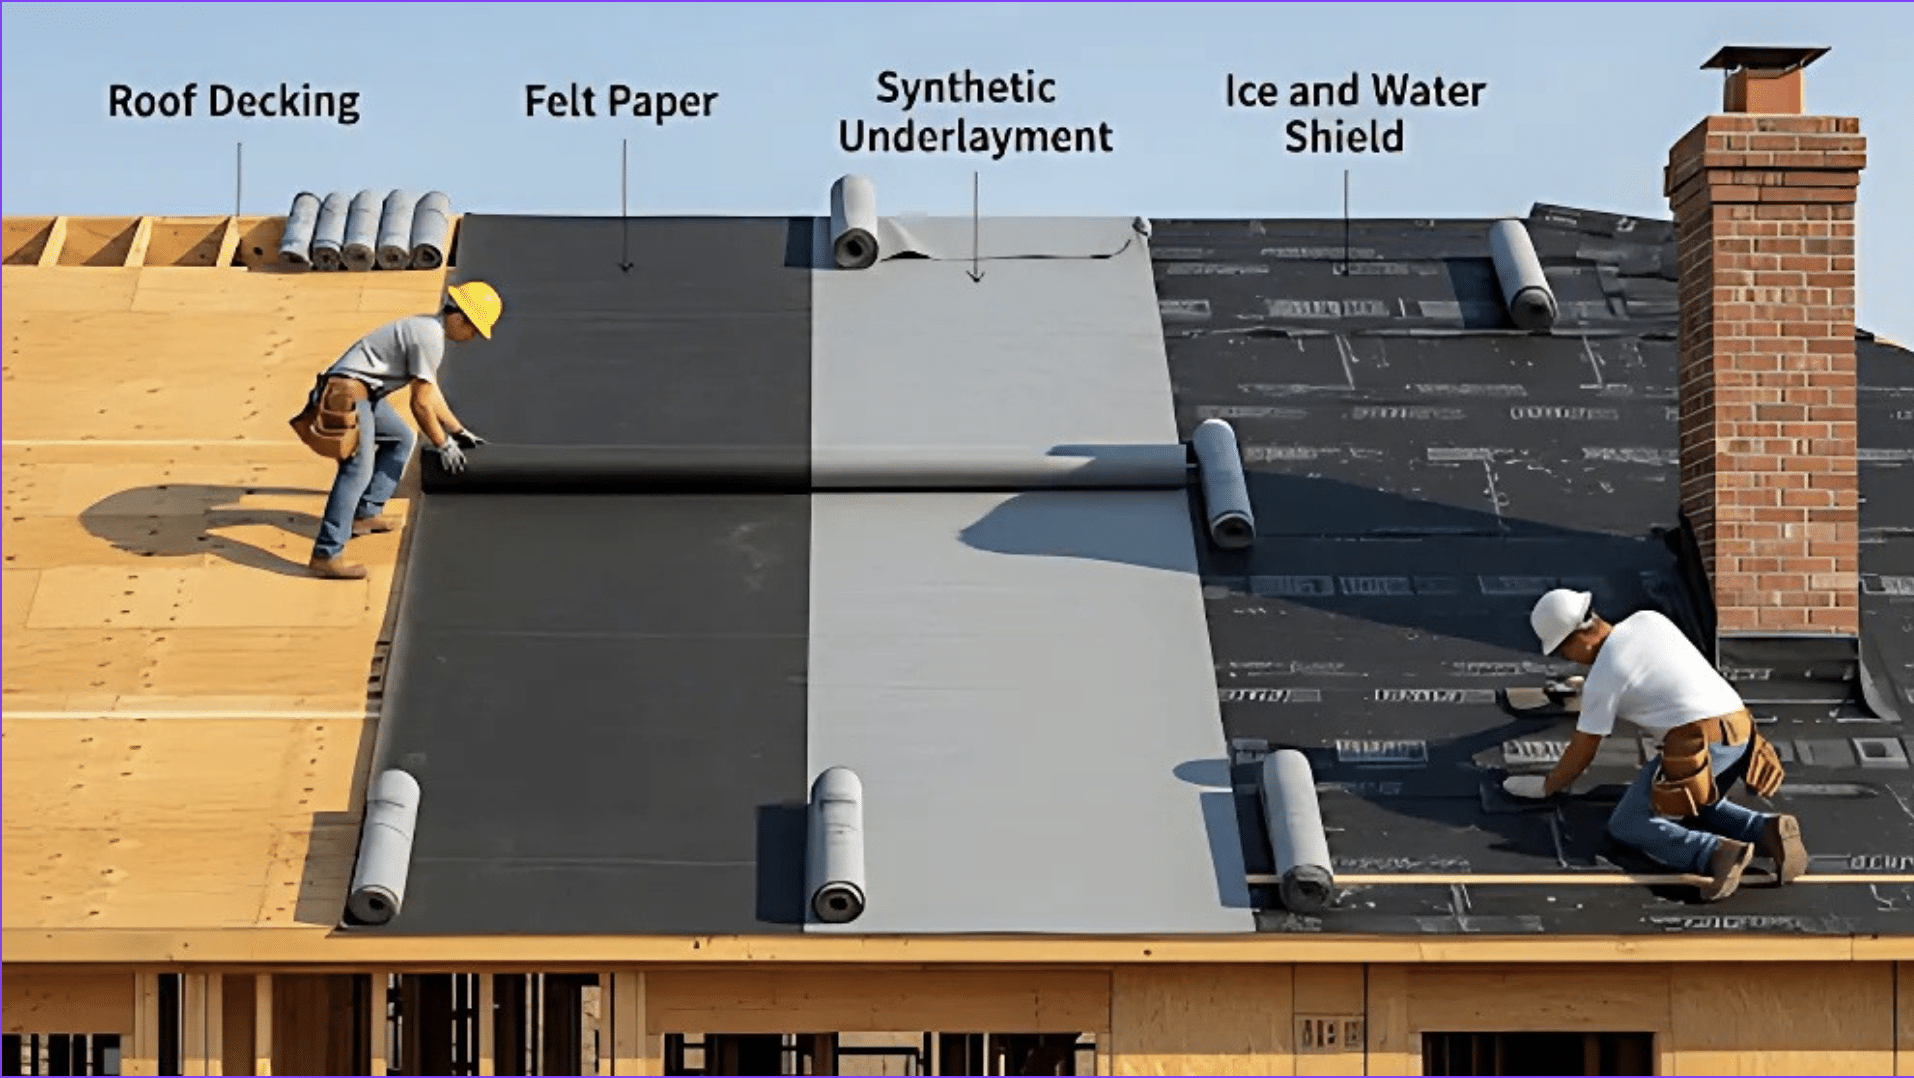
Before shingles go on, there’s a hidden world of layers that keep your roof strong and dry. Roof decking and underlayment work together as the silent protectors beneath the surface.
1. Roof Decking (Sheathing)
Roof decking, also called sheathing, is the flat wooden surface that covers the frame of your roof. It is usually made from plywood or oriented strand board (OSB). This layer provides a solid base for everything that sits on top, like shingles or tiles.
It helps support the weight of the roof and keeps everything stable. A strong deck also prevents sagging and helps protect your home from moisture. It is the foundation of the roofing system and plays a major role in overall roof strength.
2. Underlayment
Underlayment is a thin sheet installed directly over the roof decking before the final roofing material is added. It acts as a moisture barrier and provides backup protection in case shingles or tiles are damaged.
It helps prevent leaks caused by heavy rain, snow, or wind-driven water. Underlayment also adds a small layer of insulation, helping with temperature control.
It’s an essential part of the roof system, working quietly in the background to keep water out and protect the wooden layers underneath.
3. Felt Paper (Tar Paper)
Felt paper, also known as tar paper, is a traditional type of underlayment made by soaking paper in asphalt. It has been used for decades and is still common today, especially in standard or budget-friendly roofing jobs.
While it does not offer the same durability as newer materials, it provides decent water resistance and protection under normal weather conditions. Felt paper comes in rolls and is easy to install.
It’s best suited for areas with mild climates where the roof does not face extreme weather year-round.
4. Synthetic Underlayment
Synthetic underlayment is a modern upgrade from felt paper. It’s made from plastic-based materials that are stronger, lighter, and longer-lasting.
It resists tearing, even in high winds, and provides better protection against water.
Roofers like it because it is safer to walk on and easier to handle. Homeowners appreciate its durability and performance over time. If you live in an area with harsh weather or want extra peace of mind, synthetic underlayment is a smart investment. It’s quickly becoming the top choice for new roofing projects.
5. Ice and Water Shield
Ice and water shield is a special waterproof layer used in the most leak-prone parts of a roof, like valleys, edges, and around chimneys. It sticks directly to the decking and creates a tight seal, blocking water from sneaking through.
This type of underlayment is especially helpful in cold climates where ice dams can form. It also seals around nails and screws, adding extra protection.
Though it is not used over the entire roof, it plays a crucial role in preventing water damage in areas most likely to leak.
To understand all the layers of the roof better, check out our blog “Basic Roof Layers Types for Homeowners.”
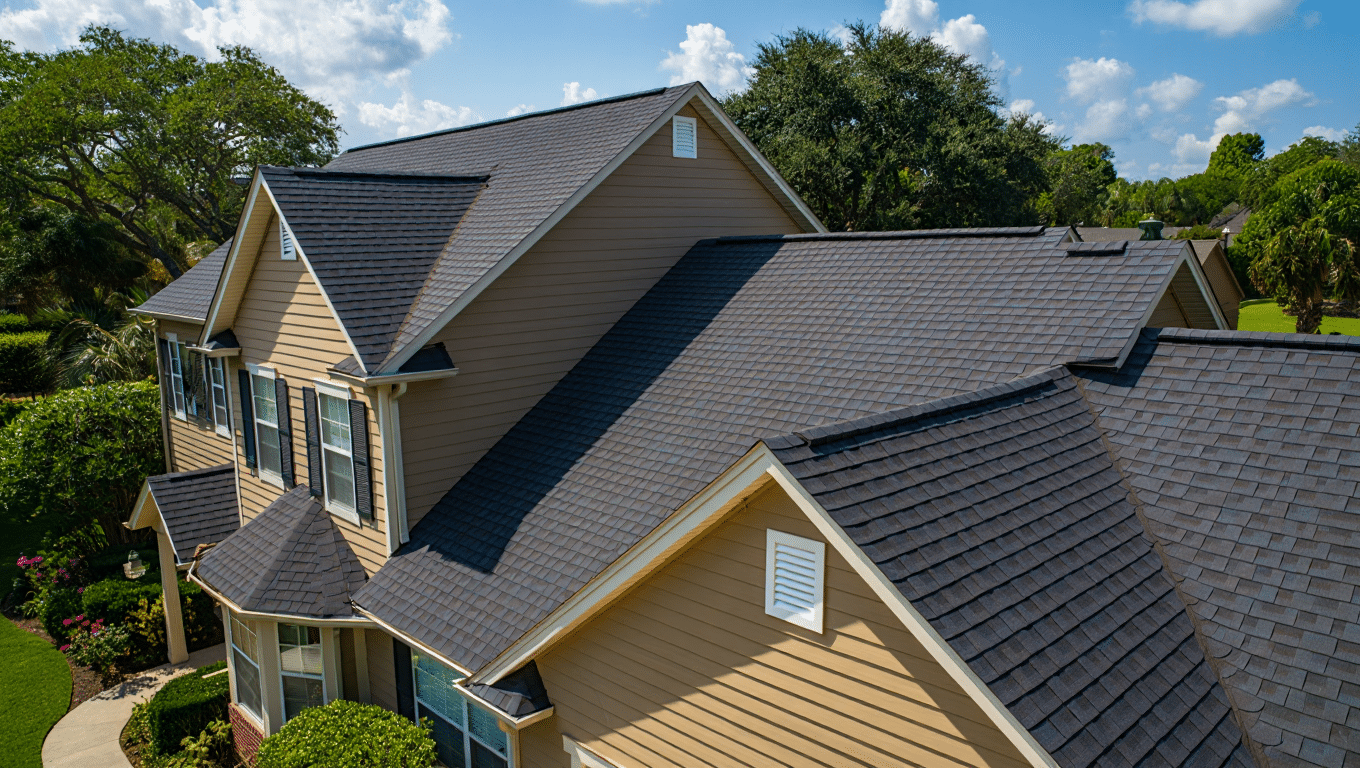
Common Roof Covering Materials and Their Key Features
The roof covering is the top layer that protects your home from the weather. Below is a quick look at the most common materials and their key features:
| Material | Key Features | Best For | Lifespan (Approx.) |
|---|---|---|---|
| Asphalt Shingles | Affordable, easy to install, common choice | Most homes, all climates | 15–30 years |
| Metal Roofing | Durable, fire-resistant, and reflects heat | Hot areas, modern or rural homes | 40–70 years |
| Clay/Concrete Tile | Heavy, stylish, resists sun and wind | Mediterranean or hot/dry climates | 50–100 years |
| Slate | Natural stone, very strong, heavy | Historic or high-end homes | 75–100+ years |
| Composite Shingles | Looks like slate or wood, lighter, durable | All styles, a low-maintenance option | 30–50 years |
| Wood Shingles | Natural look, needs care, not fireproof | Rustic or cottage-style homes | 20–40 years |
Each roofing material has its own strengths, from looks to durability. Picking the right one depends on your budget, climate, and the style you want for your home.
Flashing and Waterproofing Elements
Water is one of the biggest threats to any roof, and that’s where flashing and waterproofing come in.
These parts work together to keep water out of the weak spots. Without them, even a small leak can turn into serious damage:
- Flashing: Thin metal pieces placed around chimneys, vents, and roof edges. They help guide water away from areas where leaks are more likely. Without flashing, water can easily slip into gaps.
- Drip Edge: A metal strip installed along the edges of the roof. It directs rainwater into the gutters and protects the roof’s edges from water damage. It also keeps water from soaking into the wood below.
- Valley Flashing: Used in the valleys where two roof slopes meet. It helps carry water safely off the roof to prevent pooling and leaks. This flashing is especially important during heavy rain.
- Step Flashing: A type of flashing used along walls and roof edges. It is layered to block water where the roof meets vertical walls like chimneys or dormers. Each piece overlaps the next for better protection.
- Ice and Water Shield: A sticky, waterproof layer placed under the roof covering. It seals tightly in risky areas to stop water from getting inside, even if ice or snow builds up. It’s a must-have in cold or wet climates.
Roof Ventilation Systems
Proper airflow is a key part of a healthy roof and home. A well-designed roof ventilation system plays a big role in the overall roof anatomy, helping reduce heat buildup, control moisture, and improve energy efficiency throughout the year.
Intake and soffit vents bring in fresh air from below, while ridge and exhaust vents allow hot, stale air to escape through the top. Gable vents support airflow through the attic’s side walls.
Box vents near the roof peak help release warm air passively. Turbine vents spin with the wind to increase ventilation, and powered attic fans actively pull hot air outside.
All these elements work together to keep your roof cooler, drier, and longer-lasting.
Roof Edge Components & Drainage
Understanding how water moves off the roof is a key part of roof anatomy, helping prevent leaks, protect your foundation, and extend the life of your home’s structure:
1. Eaves: The eaves extend beyond the walls to guide rain away from your home’s siding and foundation. They also offer shade and reduce moisture problems near your home’s base.
2. Fascia: This board runs along the edge of the roof, supporting the gutters and blocking out water and pests. It gives the roof a neat finish while helping protect the interior structure.
3. Soffit: Found under the eaves, the soffit allows air into the attic to prevent moisture and mold. It also keeps out insects and adds a clean look to the roof edge.
4. Gutters: Gutters catch rainwater from the roof and send it safely away from your home. They stop water from damaging your walls, windows, and landscaping.
5. Downspouts: These pipes connect to the gutters and carry water down to the ground.They help prevent water from pooling near the foundation or leaking into the basement.
Roof edge parts may seem small, but they play a big role in keeping your home safe. When drainage is done right, it protects everything below from costly water damage.
Roof Add-ons, Maintenance & Glossary
There’s more to your roof than meets the eye. Smart add-ons and simple upkeep make a big difference.
Here are the add-ons and the maintainance tips for this:
- Dormers and skylights add natural light and style while needing proper flashing to avoid leaks.
- Chimneys and vents must be sealed well to prevent water from entering around the openings.
- Regular roof inspections help catch small problems early before they turn into big, costly repairs.
- Cleaning gutters and removing debris keeps water flowing away and protects the roof edges.
- Replacing missing shingles and sealing cracks helps your roof last longer and stay weather-resistant.
- Learn basic roofing terms like fascia, soffit, ridge, and valley to understand roof anatomy better.
Wrapping It Up
Understanding roof anatomy helps you see that your roof is more than just shingles; it is a team of parts working together to protect your home.
From the strong frame and weather-blocking layers to the vents and gutters, each piece plays an important role. Knowing how these parts work makes it easier to spot problems, plan repairs, or even build a new roof with confidence.
You do not have to be a roofing expert, but having a basic idea of what’s overhead can save you time, money, and stress.
So next time you look up, you will know your roof isn’t just shelter, it is smart design in action, built to keep you safe, season after season. A little roof knowledge goes a long way in keeping your home strong and worry-free.
Frequently Asked Questions
How to Calculate Roof Pitch?
Measure the height from the roof or rafter to the level 12 inches away from where it meets the surface. This measurement will be your rise. Display this measurement as a ratio of rise over run.
What Are the Two Main Types of Roofs?
Gable and hip roofs differ primarily in their design; gable roofs feature two sloping sides that meet at a peak, while hip roofs have slopes on all four sides, creating a more stable structure.