Installing window blinds can feel like a challenge, especially if it’s your first time.
Many people worry about uneven mounting, drilling in the wrong spots, or damaging their walls. But here’s the the thing, you don’t need professional help to get it right.
Learning how to install blinds is simpler than it seems. With the right tools and a clear process, you can hang them yourself in just a few steps.
This blog breaks down everything you need to know, from measuring your windows to securing the brackets.
By the end, you’ll have perfectly hung blinds that look great and function smoothly.
Measuring Your Windows Accurately for Blinds
Getting your measurements right is the most important part of the process. If your numbers are off, your blinds won’t fit properly, and you’ll end up with gaps or coverage issues.
Start by deciding if you want an inside or outside mount. For inside mounts, measure the width at the top, middle, and bottom of your window frame.
Use the smallest measurement to ensure a proper fit. Then measure the height from the top of the frame to the sill in three spots.
For outside mounts, measure where you want the blinds to sit beyond the frame. Add at least two inches on each side for better light blocking.
Write down all measurements and double-check them before ordering.
Tools and Materials You’ll Need Before Installation
Before you start, gather everything you need in one place.
Having the right tools ready makes the job faster and helps you avoid mistakes or unnecessary trips to the hardware store.
| Tool/Material | Purpose |
|---|---|
| Measuring tape | To get accurate window dimensions and mark bracket positions |
| Pencil | For marking drill holes and measuring points on the wall or frame |
| Power drill | To create holes for screws in wood, drywall, or other surfaces |
| Screwdriver | To tighten screws and secure brackets firmly in place |
| Level | To ensure your brackets are straight so blinds hang evenly |
| Mounting brackets | Usually included with blinds, these hold the headrail securely |
| Screws and anchors | For attaching brackets to walls or window frames safely |
| Ladder or step stool | To reach higher windows comfortably and work at the right height |
Step-By-Step Guide on How to Install Blinds Like a Pro
Installing blinds might seem tricky at first, but breaking it down into clear steps makes it manageable and practical.
Follow this process carefully, and you’ll have your blinds up and working like you hired a professional.
Step 1: Mark Your Bracket Positions
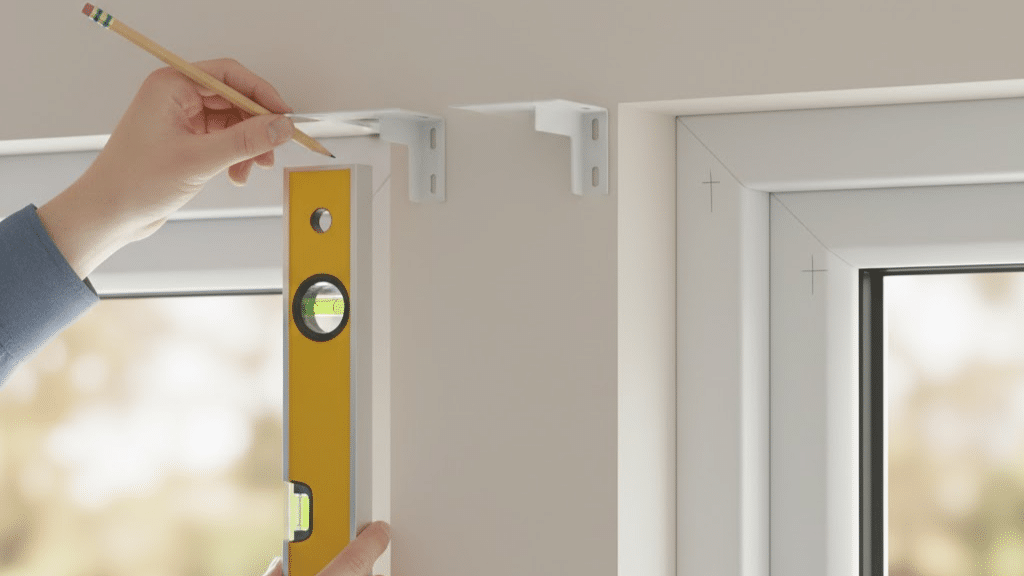
Hold each bracket against the window frame or wall where you want it mounted. Use a pencil to mark where the screw holes will go.
Make sure both brackets are at the same height by checking with a level, or your blinds will hang crooked.
Pro Tip: Measure the distance from the top of the window to each bracket mark. They should be identical on both sides for a perfectly straight installation.
Step 2: Drill Pilot Holes

Use your power drill to create small pilot holes at each pencil mark. This prevents the wood from splitting and makes screwing in easier.
If you’re drilling into drywall, insert wall anchors into the holes first so the screws have something solid to grip.
Step 3: Attach the Mounting Brackets
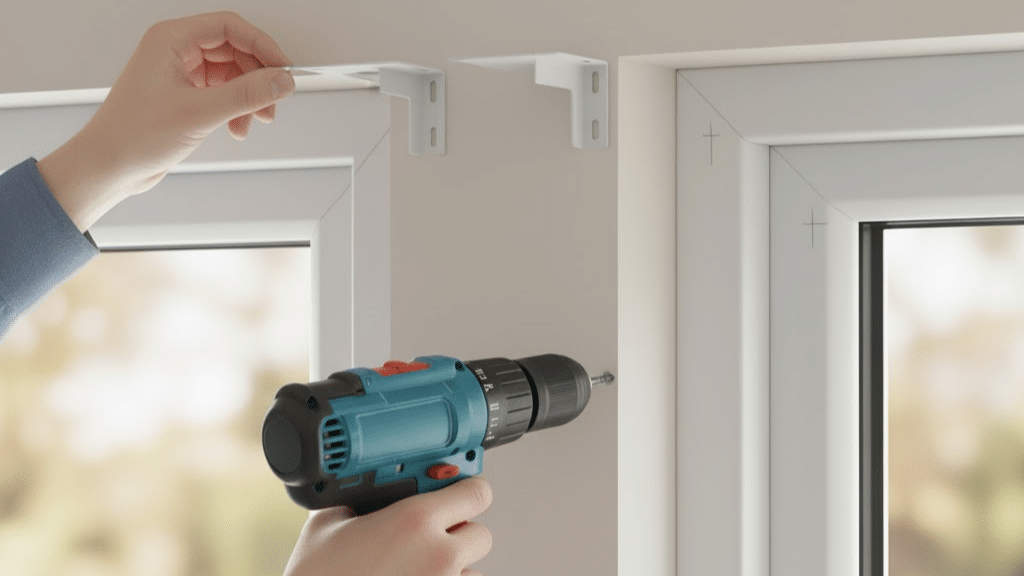
Line up each bracket with the pilot holes you just made.
Insert screws through the bracket holes and tighten them with your screwdriver or drill. Give each bracket a gentle tug to make sure it’s secure and won’t pull away from the wall.
Step 4: Snap the Headrail Into Place
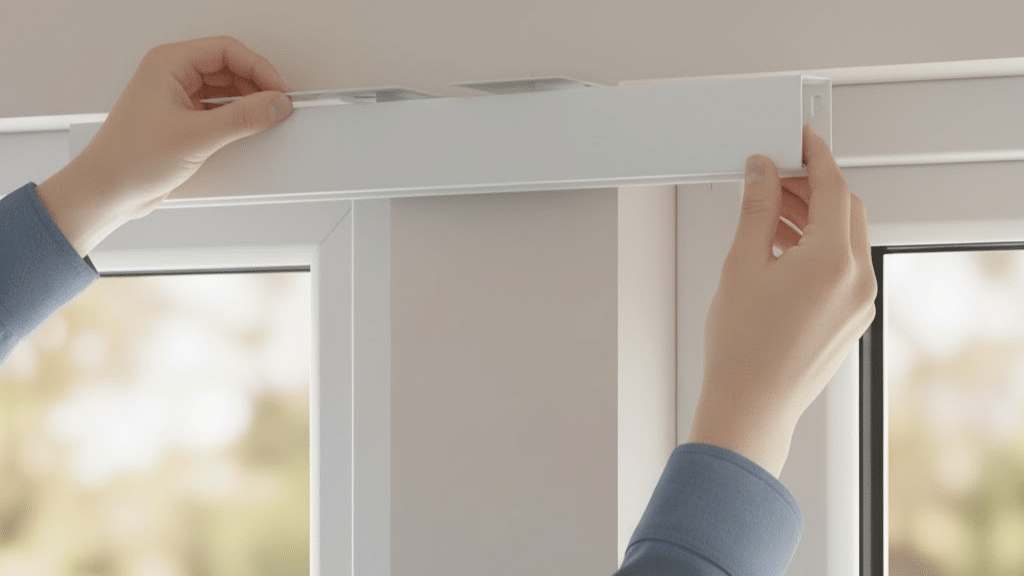
Lift your blind’s headrail and position it against the mounted brackets. Most blinds click or snap into place with a simple push.
You might need to slide it into a channel or hook it in, depending on your blind type. Listen for a clicking sound that tells you it’s locked in.
Pro Tip: Have someone help hold longer blinds while you secure them. This prevents bending the headrail or dropping the blinds during installation.
Step 5: Test the Blinds and Make Adjustments
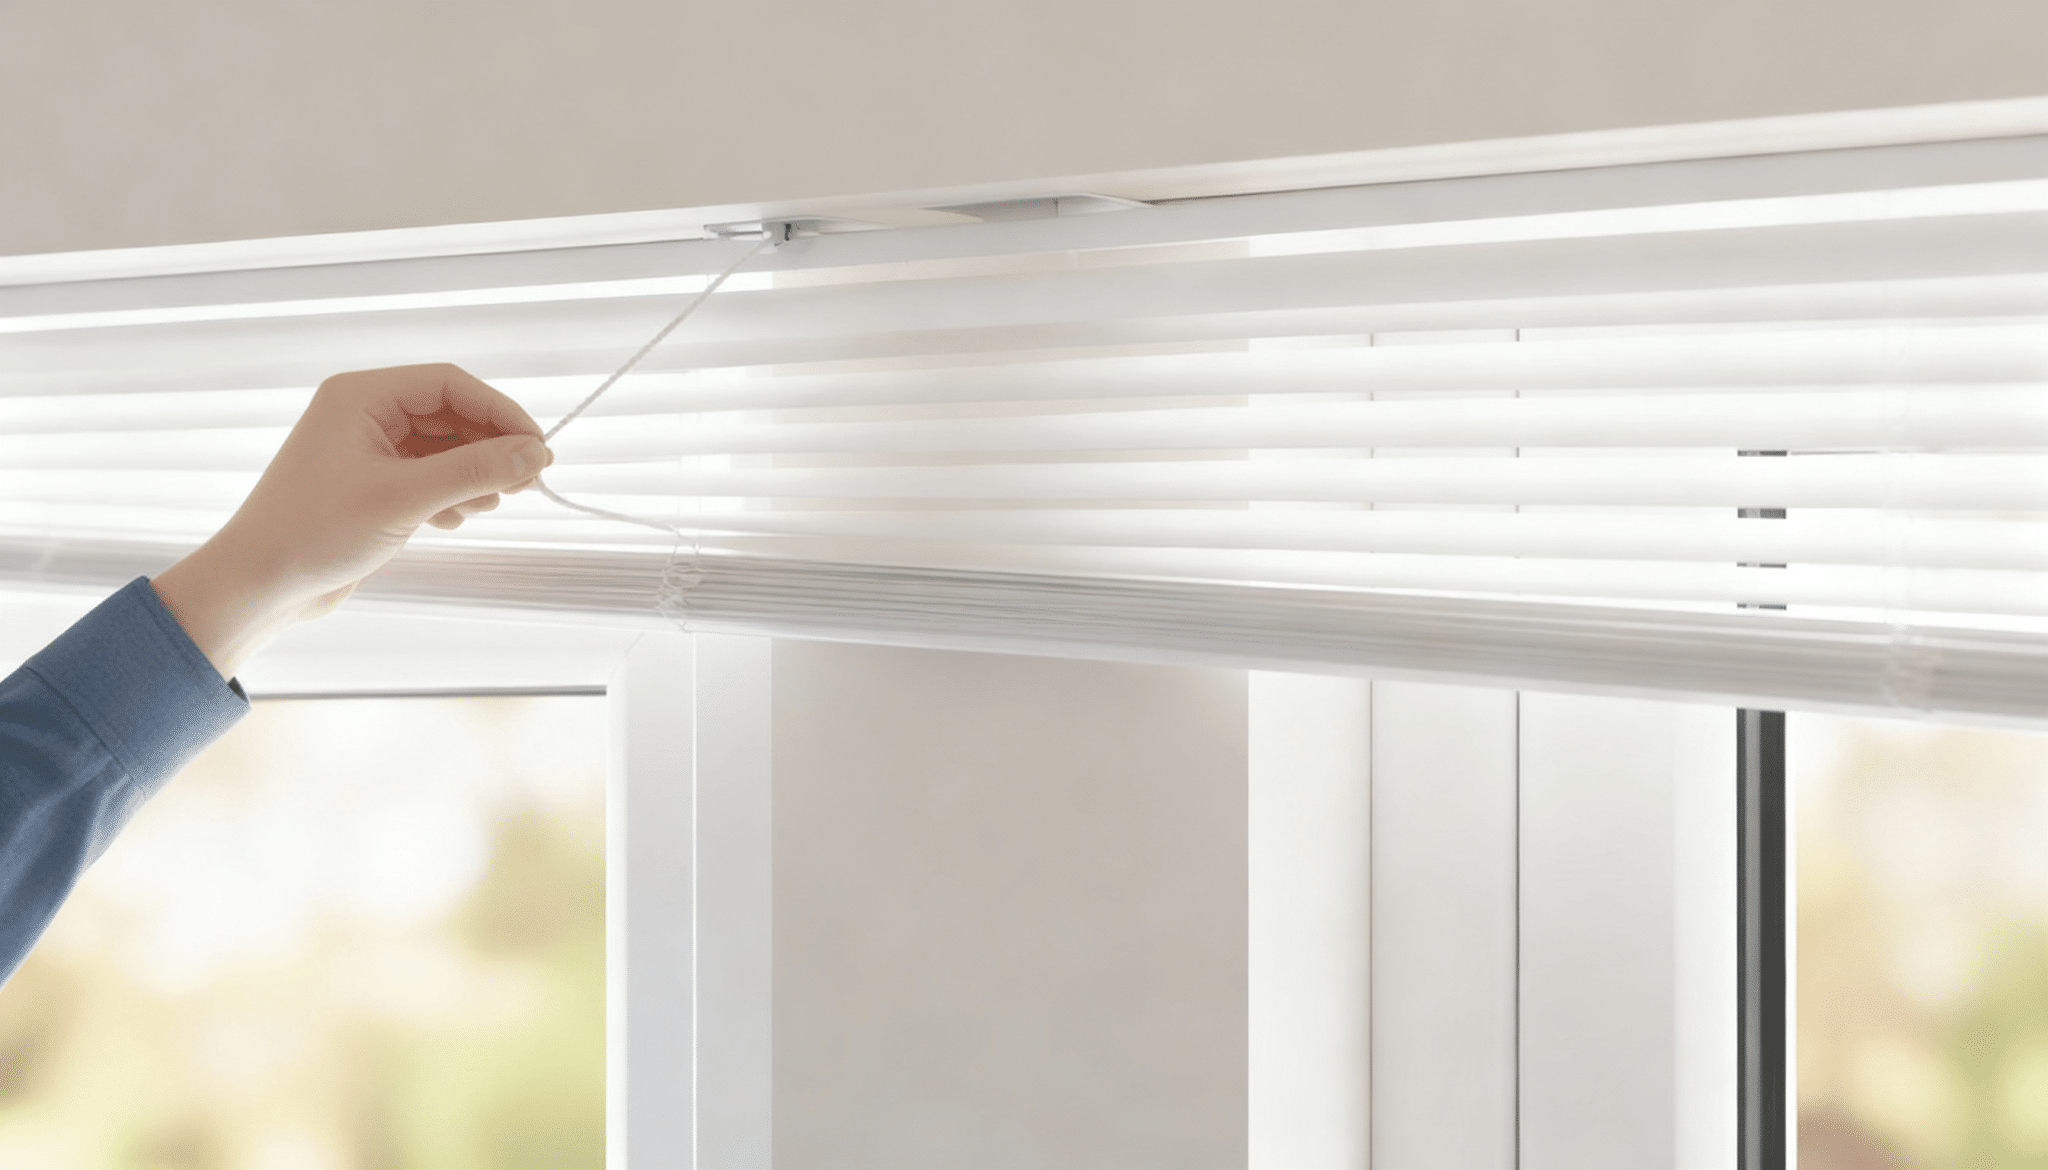
Pull the cord or twist the wand to raise, lower, and tilt your blinds. They should move smoothly without sticking or tilting to one side.
If they’re uneven, loosen the brackets slightly and adjust until everything hangs straight, then retighten the screws.
Troubleshooting Common Blind Installation Mistakes
Even careful installers run into problems sometimes. The most common issue is blinds that won’t stay level.
This usually happens when brackets aren’t aligned properly or when measurements are off by just a fraction of an inch.
Another frequent problem is blinds that don’t raise or lower smoothly. Check if the cord mechanism got twisted during installation or if the blinds are mounted too tightly against the window frame.
Sometimes blinds fall down shortly after installation because the screws weren’t driven into studs or proper anchors weren’t used.
If your blinds look crooked, don’t panic. Remove them and double-check your bracket positions with a level.
Most issues can be fixed quickly by loosening the brackets, adjusting the position, and remounting them carefully.
Tips for A Flawless Window Finish Along with Safety Measures
Getting that professional look doesn’t require years of experience. A few insider tricks can make a big difference in how your blinds look and function.
These tips will help you avoid amateur mistakes and achieve results that rival professional installations.
• Measure Twice, Cut Once: Always verify your measurements before drilling any holes. Even small errors can throw off the entire installation.
• Use a Level Religiously: Check horizontal alignment at every step when learning how to install blinds to prevent crooked results.
• Mark Drill Points Clearly: Use painter’s tape to mark exact drilling spots and prevent the drill bit from slipping on smooth surfaces.
• Pre-Drill Pilot Holes: Start with smaller holes to guide your screws and prevent wood from splitting or cracking.
• Test Before Finalizing: Hang the blinds loosely first to check operation before tightening all screws completely.
• Wear Safety Glasses: Protect your eyes from debris, especially when drilling into walls or ceilings above your head.
• Secure Loose Cords: Keep cords away from children and pets by using cord cleats or shorteners for added safety
Choosing the Right Style
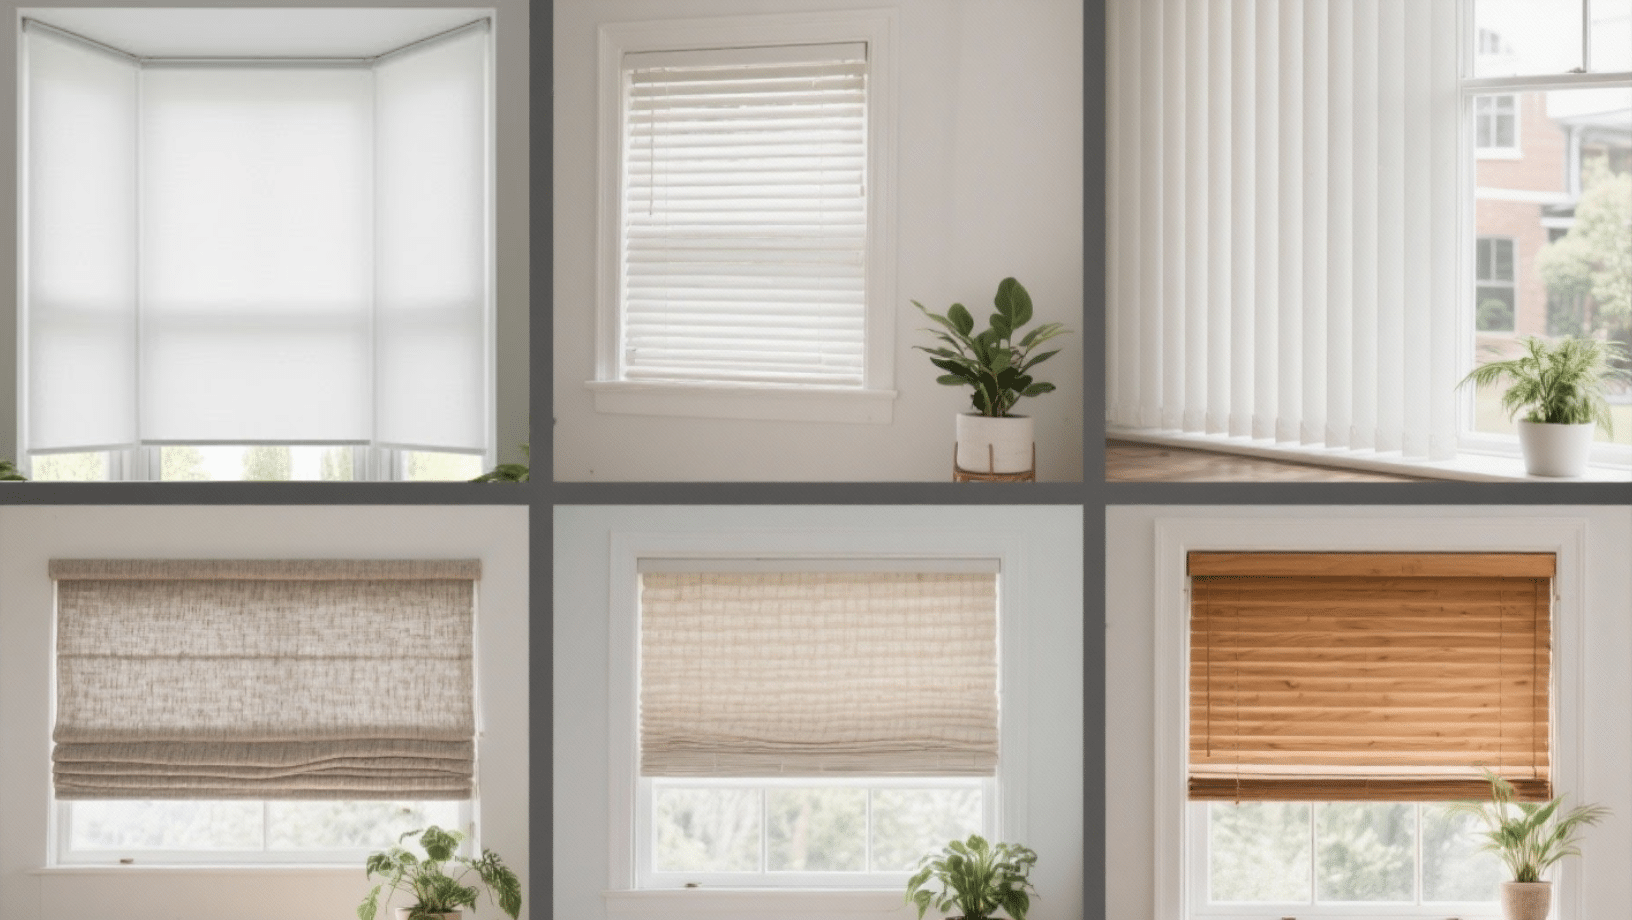
Different blind styles suit different rooms and purposes. Knowing your options helps you make the right choice for each space in your home.
| Blind Style | Best For | Key Benefits |
|---|---|---|
| Roller Blinds | Modern homes, small spaces | Simple to operate, affordable, easy to clean |
| Venetian Blinds | Offices, living rooms | Adjustable light control, classic look |
| Vertical Blinds | Sliding doors, large windows | Covers wide spaces, practical for high traffic areas |
| Roman Blinds | Bedrooms, formal rooms | Soft fabric look, adds comfort and texture |
| Cellular Blinds | Energy-conscious homes | Insulates windows, reduces heating and cooling costs |
| Wood Blinds | Traditional interiors | Durable, adds natural softness, increases home value |
Winding it Up
Installing blinds yourself isn’t just about saving money. It’s about gaining confidence in your home improvement skills.
You now know how to install blinds from start to finish, including measurements, bracket placement, and troubleshooting common problems.
Take your time with each step, and don’t hesitate to ask for help when mounting larger blinds.
Ready to change your style?
Share your installation experience in the comments below, we’d love to hear how your project turned out!