Hot summer days are rough without a working AC.
A dirty window air conditioner won’t cool properly. It just blows weak air and drives up your electric bill. Most people ignore their AC until it stops working.
Dust, mold, and grime build up inside, making it work harder and cool less.
Your energy costs go up, and air quality drops. Cleaning a window AC unit isn’t hard. Anyone can do it with basic tools in about an hour.
This blog shows you how to clean a window AC unit step-by-step for better cooling, lower bills, and fresher air.
Signs Your Window AC Needs Cleaning
The unit gives clear warnings when it needs attention. Watch for these common indicators:
- Weak or Reduced Airflow: Air barely comes out of the vents, even on the highest setting.
- Hot Air Instead of Cold: The AC runs but doesn’t cool the room as it used to before.
- Unusual Noises During Operation: Rattling, buzzing, or grinding sounds that weren’t present initially suddenly appear.
- Musty or Foul Odors: Unpleasant smells waft into the room whenever the unit turns on.
- Water Leaking from the Unit: Moisture is dripping inside the room instead of properly draining outside as designed.
- Visible Dust on Vents: Thick dust covers the front panel and gets blown into the air.
- Higher Electricity Bills: Monthly energy costs increase noticeably, even without changes in usage patterns or rates.
- Ice Forming on Coils: Frost appears on visible parts when the AC runs for extended periods.
- Longer Cooling Times: The room takes twice as long to reach the desired temperature setting
Gather all the Materials
Here’s everything needed for a thorough window AC cleaning:
| Item | Purpose |
|---|---|
| Screwdriver set | Removes front panel and casing screws |
| Vacuum with brush attachment | Cleans dust from coils and vents |
| Soft bristle brush | Scrubs fins without bending them |
| Spray bottle | Applies cleaning solution evenly |
| Mild dish soap | Cuts through grease and grime |
| White vinegar | Kills mold and removes odors |
| Warm water | Rinses away dirt and cleans |
| Microfiber cloths | Wipes surfaces without scratching |
| Fin comb | Straightens bent aluminum fins |
| Garden hose (optional) | Rinse outdoor components |
| Old towels | Catches drips and spills |
| Bucket | Mix the cleaning solution |
Safety Steps Before You Start
Safety comes first when working with any electrical appliance. Here’s what you need to do before cleaning your window AC unit:
- Unplug the unit completely from the wall outlet.
- Wait at least 10 minutes for the capacitor to discharge.
- Wear rubber gloves to protect your hands from sharp metal edges.
- Put on safety glasses to keep debris out of your eyes.
- Clear the area around the unit so there’s room to work.
- Keep a sturdy step stool nearby if the AC sits high up.
- Have towels ready because water will drip during cleaning.
Step-by-Step Instructions on How to Clean a Window AC Unit
Cleaning a window AC takes about an hour from start to finish. Follow these steps in order for the best results.
Step 1. Remove the Unit from the Window
Turn off the AC and unplug it first.
Then remove the front panel by unscrewing it. Lift the unit carefully from the window frame. Get someone to help because these units are heavy.
Set it on a flat surface outside or in a garage where water won’t cause damage.
Step 2. Take Apart the Outer Casing
Unscrew the metal casing that holds everything together. Most units have screws along the sides and back. Keep all screws in a container so nothing gets lost.
Gently slide off the outer shell. The inner components are now exposed and ready for cleaning.
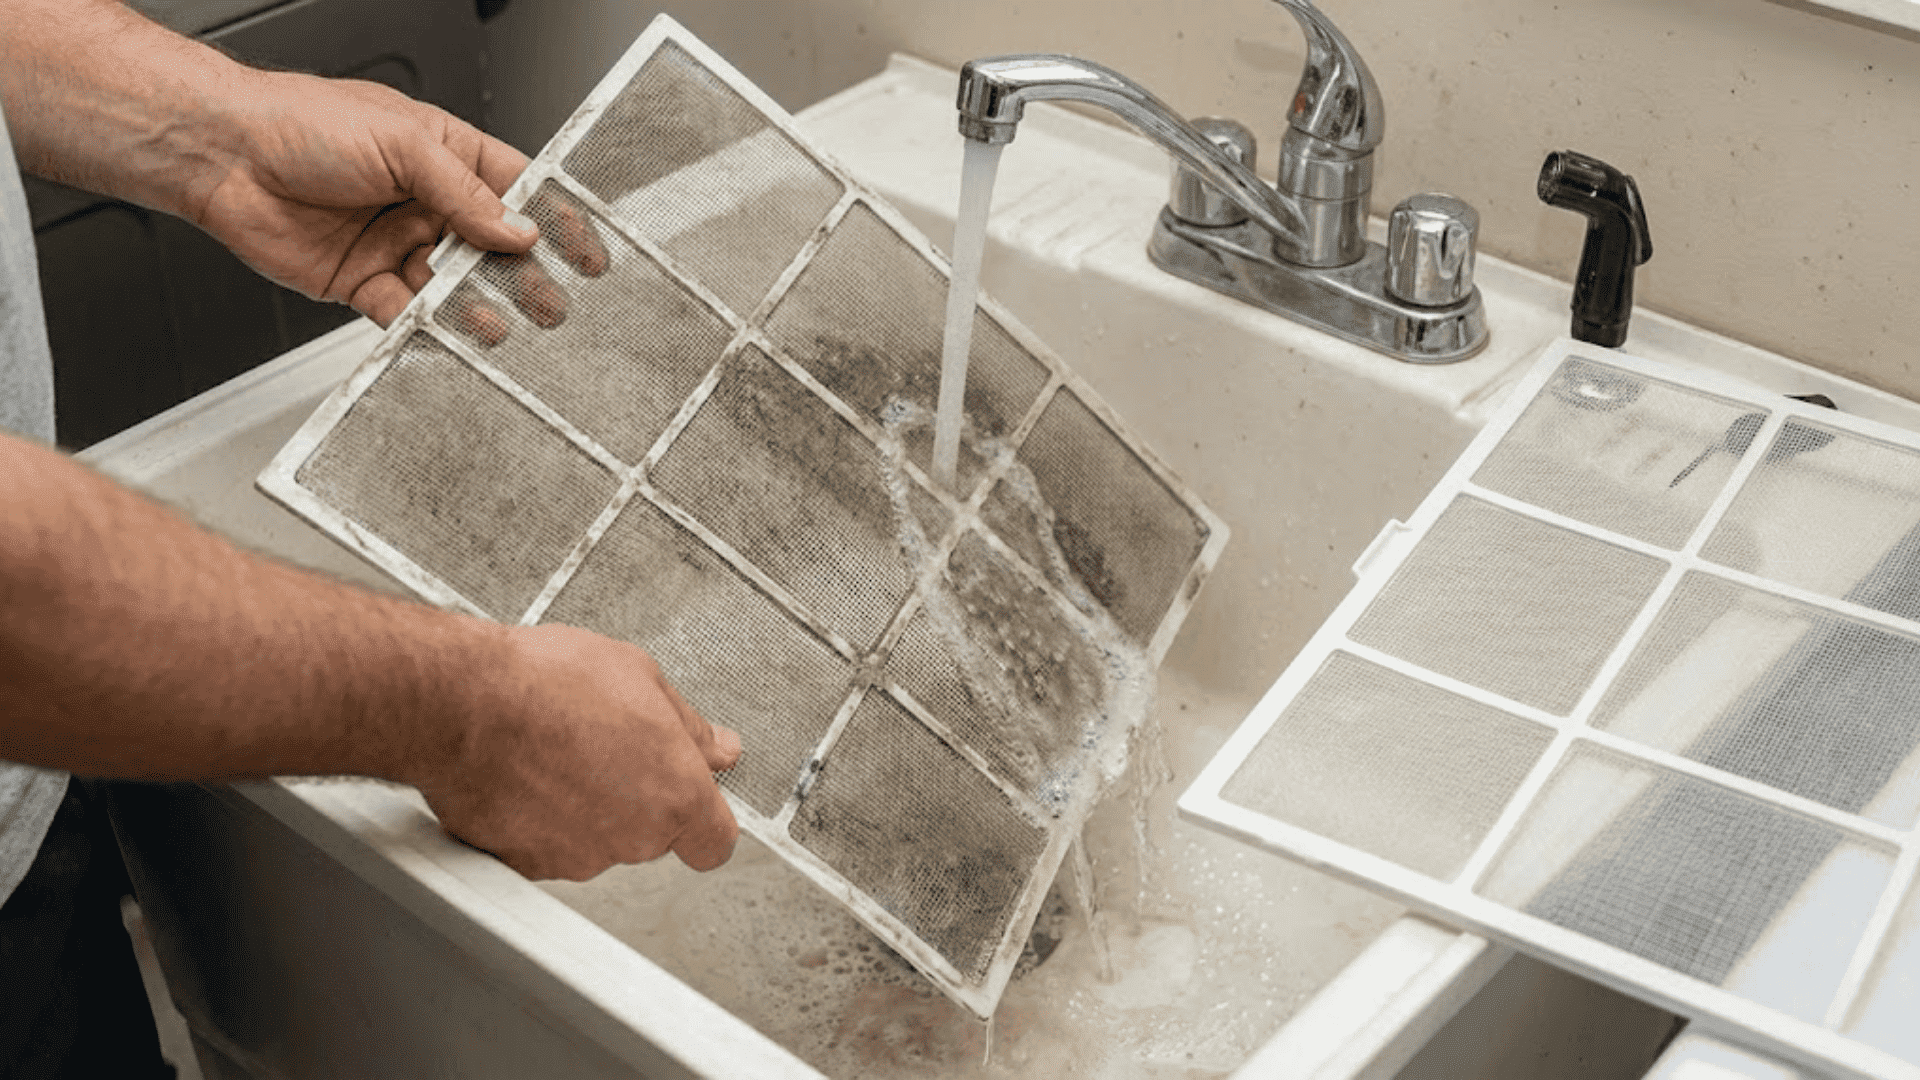
Step 3. Clean or Replace the Air Filter
Pull the filter out of its slot. Hold it up to the light and check how dirty it is. Wash reusable filters with light, soapy water and let them dry completely.
Disposable filters need to be replaced if they’re clogged. A clean filter improves airflow immediately.
Step 4. Vacuum the Coils and Fins
Use the vacuum’s brush attachment to remove dust from the evaporator and condenser coils.
Work gently because the aluminum fins bend easily. Get into all the corners where dirt hides. This step removes most of the buildup that blocks airflow.
Step 5. Spray and Scrub the Components
Mix dish soap with water in a spray bottle. Spray the coils, fins, and fan blades thoroughly.
Let it sit for five minutes. Then scrub gently with a soft brush. For stubborn mold, use a vinegar-and-water solution instead of soap.
Step 6. Rinse and Dry Everything
Rinse all soaped parts with clean water from a spray bottle or hose. Make sure no soap residue remains.
Wipe down the casing with a damp cloth. Let everything air dry for at least two hours. Running a wet AC can cause electrical problems.
Step 7. Reassemble and Reinstall the Unit
Put the outer casing back on and tighten all screws. Slide the dry filter back into place.
Carefully lift the unit back into the window and secure it. Plug it in and turn it on. The AC should run quieter and blow colder air now
Deep-Cleaning Tips (Optional)
- Straighten bent fins with a fin comb to restore proper airflow.
- Clean the fan blades individually with a damp cloth and cotton swabs.
- Flush the drain pan with a baking soda solution to eliminate odors.
- Use compressed air to blow dust out of hard-to-reach crevices.
- Apply a coil cleaner spray designed specifically for AC units.
- Check and tighten any loose screws or bolts on internal components.
- Lubricate the fan motor bearings if the manual recommends it.
- Inspect the rubber seal around the unit and replace it if cracked.
- Clean the window frame and sill where the AC sits to prevent mold transfer.
- Test the thermostat accuracy with a separate thermometer after reassembly.
How Often Should You Clean Your Window AC Unit?
Cleaning frequency depends on usage and environment.
Here’s a schedule that keeps the unit in top condition:
| Component | Cleaning Frequency | Why This Matters |
|---|---|---|
| Air filter | Every 2 weeks | Clogs fastest and affects airflow immediately |
| Front panel and vents | Monthly | Prevents dust from entering internal parts |
| Coils and fins | Twice per season | Removes buildup that reduces cooling power |
| Drain pan | Every 3 months | Stops mold growth in standing water |
| Full deep clean | Start and end of season | Prepares the unit for heavy use or storage |
| External casing | Weekly wipe-down | Keeps dust from accumulating on surfaces |
| Fan blades | Every 2 months | Maintains balanced rotation and efficiency |
When to Replace Instead of Clean
Sometimes cleaning won’t fix an old or severely damaged unit. If your AC is over 12 years old and needs constant repairs, replacement makes more sense.
New models use less electricity and cool more efficiently.
Major component failures, such as a broken compressor or motor, often mean repair costs equal half the price of a new unit. That’s not worth it for old equipment.
Refrigerant leaks in older R-22 units are expensive to fix. This coolant is being phased out and now costs hundreds per pound. Modern units use cheaper, eco-friendly alternatives.
If rust has eaten through the casing or coils, cleaning won’t help. Structural damage compromises safe operation.
Calculate repair costs versus replacement before investing in an aging window AC.
Mistakes People Often Make (and How to Dodge Them)
Using a pressure washer on the coils
The force can bend the delicate fins, so stick to gentle cleaning methods.
Reassembling the AC while parts are still damp
Moisture inside the unit can lead to mold or electrical issues. Let everything dry completely.
Applying bleach directly to aluminum coils
Bleach can cause corrosion. Use a coil-safe cleaner instead.
Spraying water onto electrical components
Water near the wiring or the control panel can cause shorts and damage.
Running the AC immediately after cleaning
Give the unit time to dry before running it to avoid internal problems.
Using abrasive scrubbers or steel wool
These can scratch and damage metal surfaces. Opt for soft brushes or non-abrasive sponges.
Final Thoughts
Maintaining a window AC unit doesn’t require special skills or expensive equipment.
Most people can handle it with common household items and an hour.
The benefits are clear: lower energy bills, cleaner air, and a unit that lasts years longer.
Clean the filter monthly and do a full cleaning twice per season. These simple habits prevent bigger problems.
Now that you know how to clean a window AC unit, don’t let dirt and mold build up. Start this weekend and notice the difference in cooling and air quality.