Working at a regular desk all day? Sitting for eight hours straight left you stiff and tired.
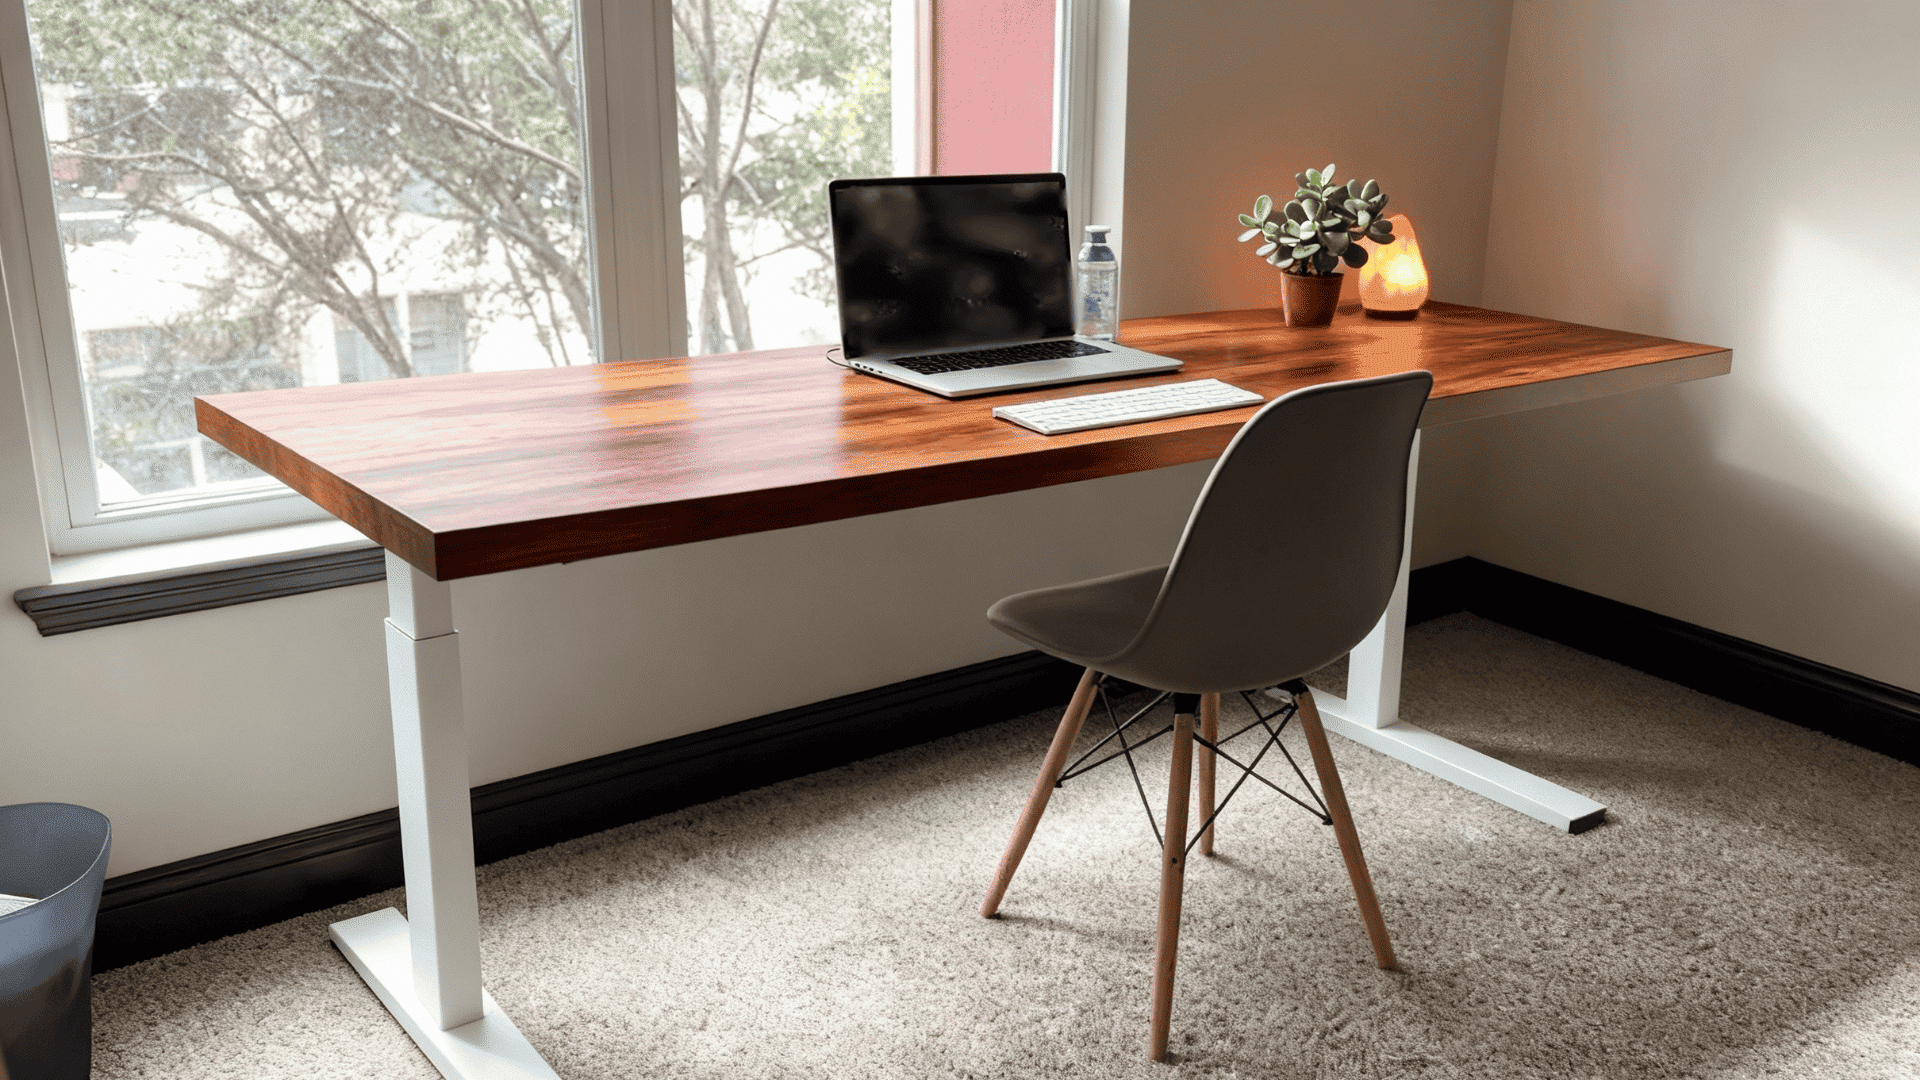
Buying a fancy standing desk? That’ll cost you anywhere from $300 to $1,000. You don’t need to spend that much.
From budget-friendly ideas under $50 to premium custom designs featuring high-end materials, find a standing desk solution tailored to every budget and purpose.
In this blog, you will see a step-by-step process of building your own standing desk with various methods.
You’ll save money, get exactly what you need, and feel great knowing you made it yourself.
DIY Standing Desk Ideas
Here are practical DIY standing desk ideas you can build at home. Each one uses different methods to fit your budget and skill level.
1. IKEA Hack Standing Desk
This is one of the most popular DIY standing desk options out there. You combine IKEA shelves and table legs to create an affordable setup.
Most people finish this in under an hour.
Tools and Materials: IKEA Lack shelves, IKEA table legs (Capita or Olov), screwdriver, measuring tape, and wood screws.
DIY Step-by-Step Instructions:
- Step 1: Measure your ideal standing height from the floor to the elbow, and buy IKEA Lack shelves in your preferred size.
- Step 2: Attach adjustable legs to the bottom of each shelf.
- Step 3: Stack shelves to reach your measured height.
- Step 4: Secure the shelves together with wood screws.
- Step 5: Place on top of your existing desk.
Cost Estimate: $30-$100 (Depends on the size and quality of IKEA components purchased).
2. Cinder Block and Wood Plank Desk
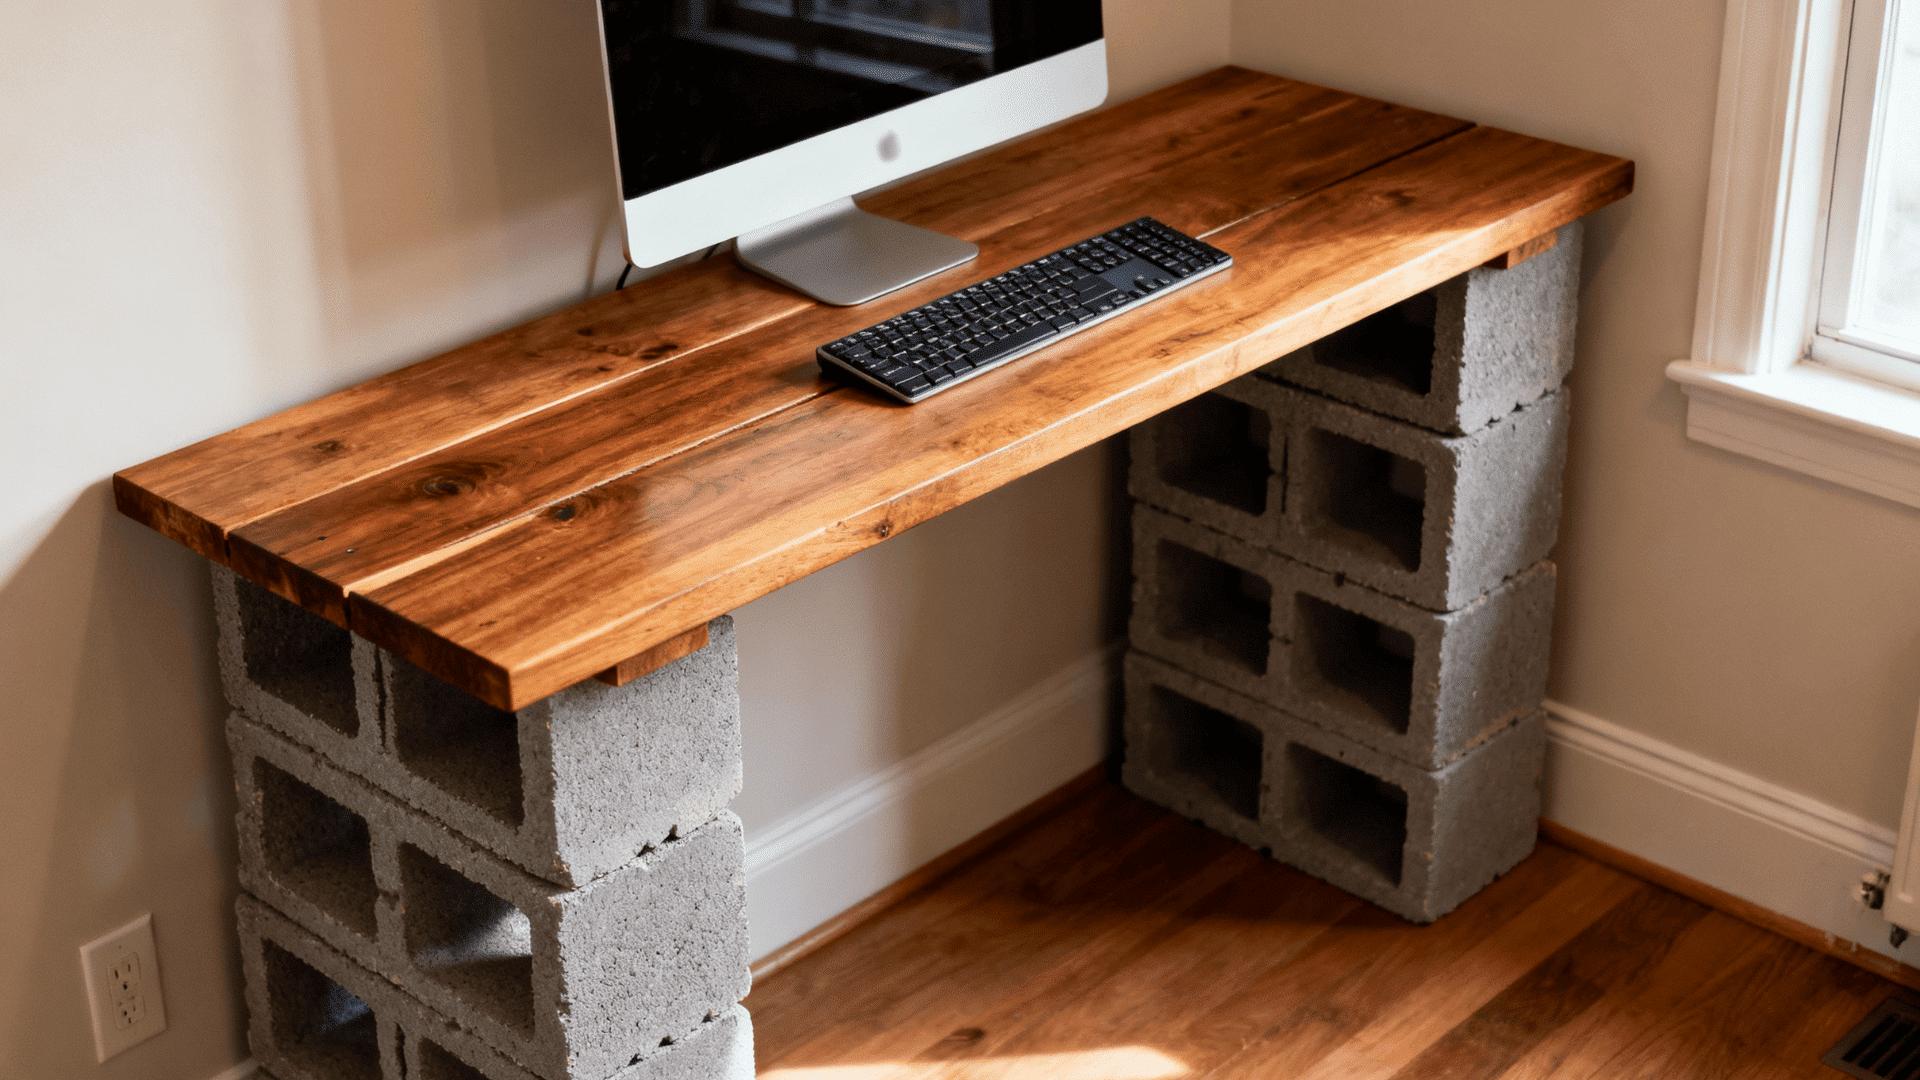
This industrial-style desk costs very little to build. The cinder blocks provide solid support, and you can easily adjust the height.
It looks modern and holds a lot of weight.
Tools and Materials: Cinder blocks (8-12 pieces), wood planks (2×10 or 2×12), sandpaper, wood stain or paint, and a level.
DIY Step-by-Step Instructions:
- Step 1: Sand your wood plank and apply stain or paint, and let it dry completely.
- Step 2: Arrange cinder blocks in two or three stacks and check each stack with a level.
- Step 3: Place a wood plank across the cinder block stacks.
- Step 4: Test stability before adding your computer.
Cost Estimate: $20-$75 (Cinder blocks are very inexpensive; cost depends mainly on the wood plank).
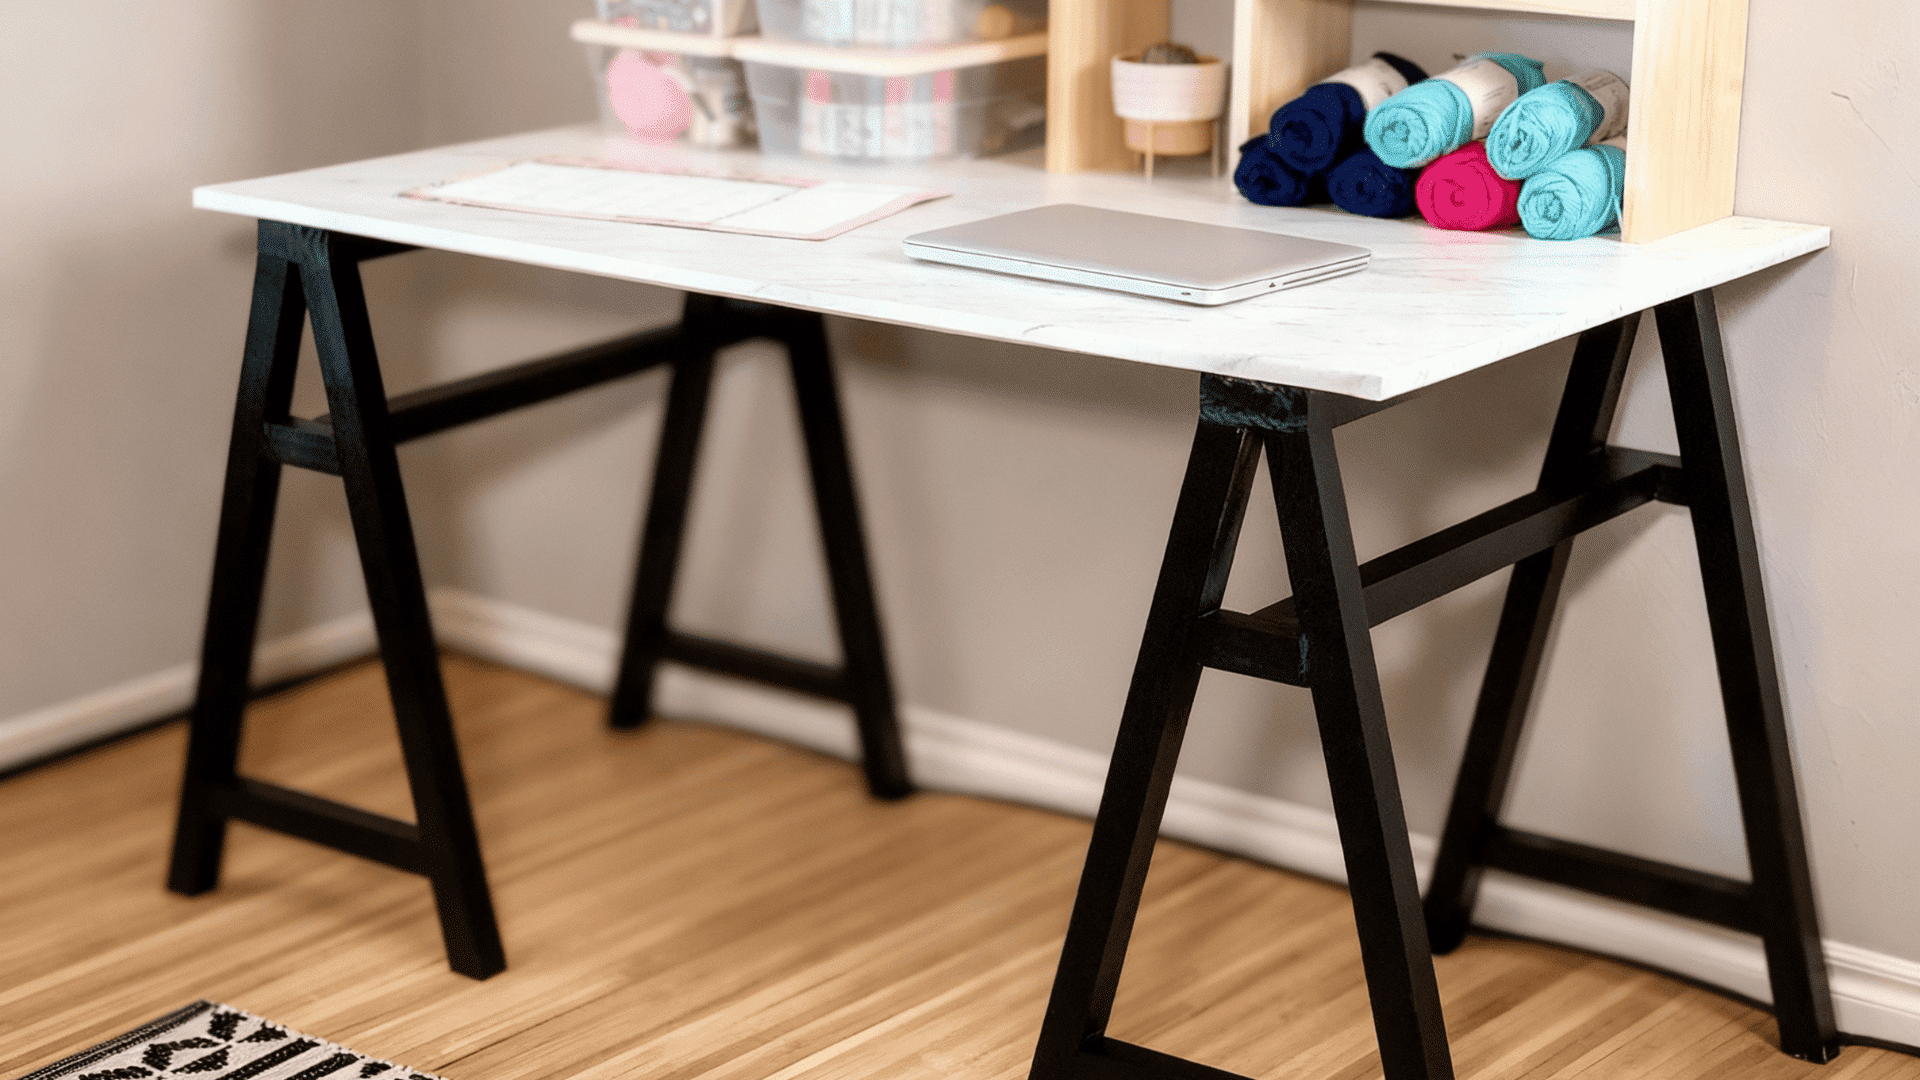
3. Pipe Frame Standing Desk
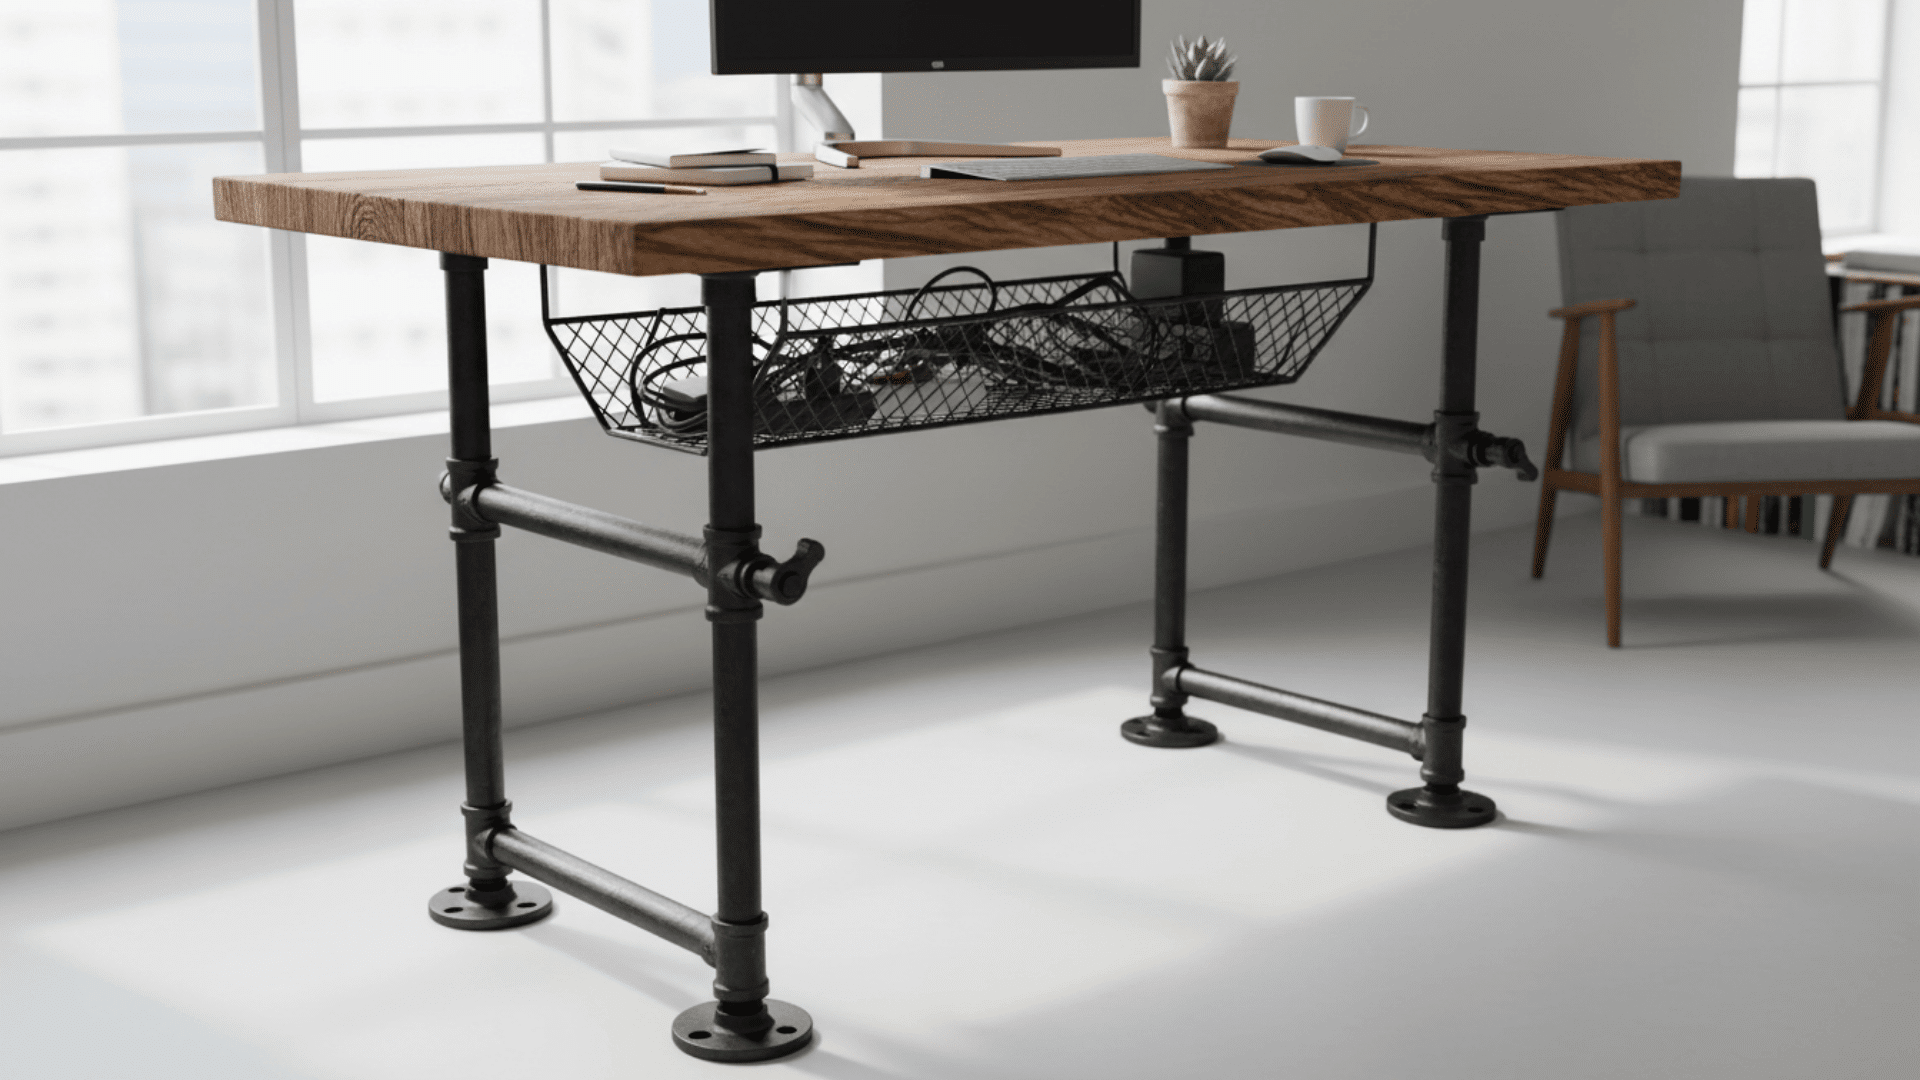
Metal pipes create a strong frame for this desk. It has an industrial look that works well in modern spaces. You can customize the dimensions to fit any room.
Tools and Materials: Black iron pipes and fittings, wood desktop, pipe wrench, drill, wood screws, sandpaper, and clear coat.
DIY Step-by-Step Instructions:
- Step 1: Plan your desk dimensions and height.
- Step 2: Buy pipes cut to your measurements.
- Step 3: Assemble the pipe frame using fittings.
- Step 4: Tighten all connections with a pipe wrench.
- Step 5: Sand and finish your wood desktop.
- Step 6: Attach the desktop to the frame with screws from underneath.
Cost Estimate: $100-$250+ (Pipes and fittings can be expensive; cost depends on size and finish).
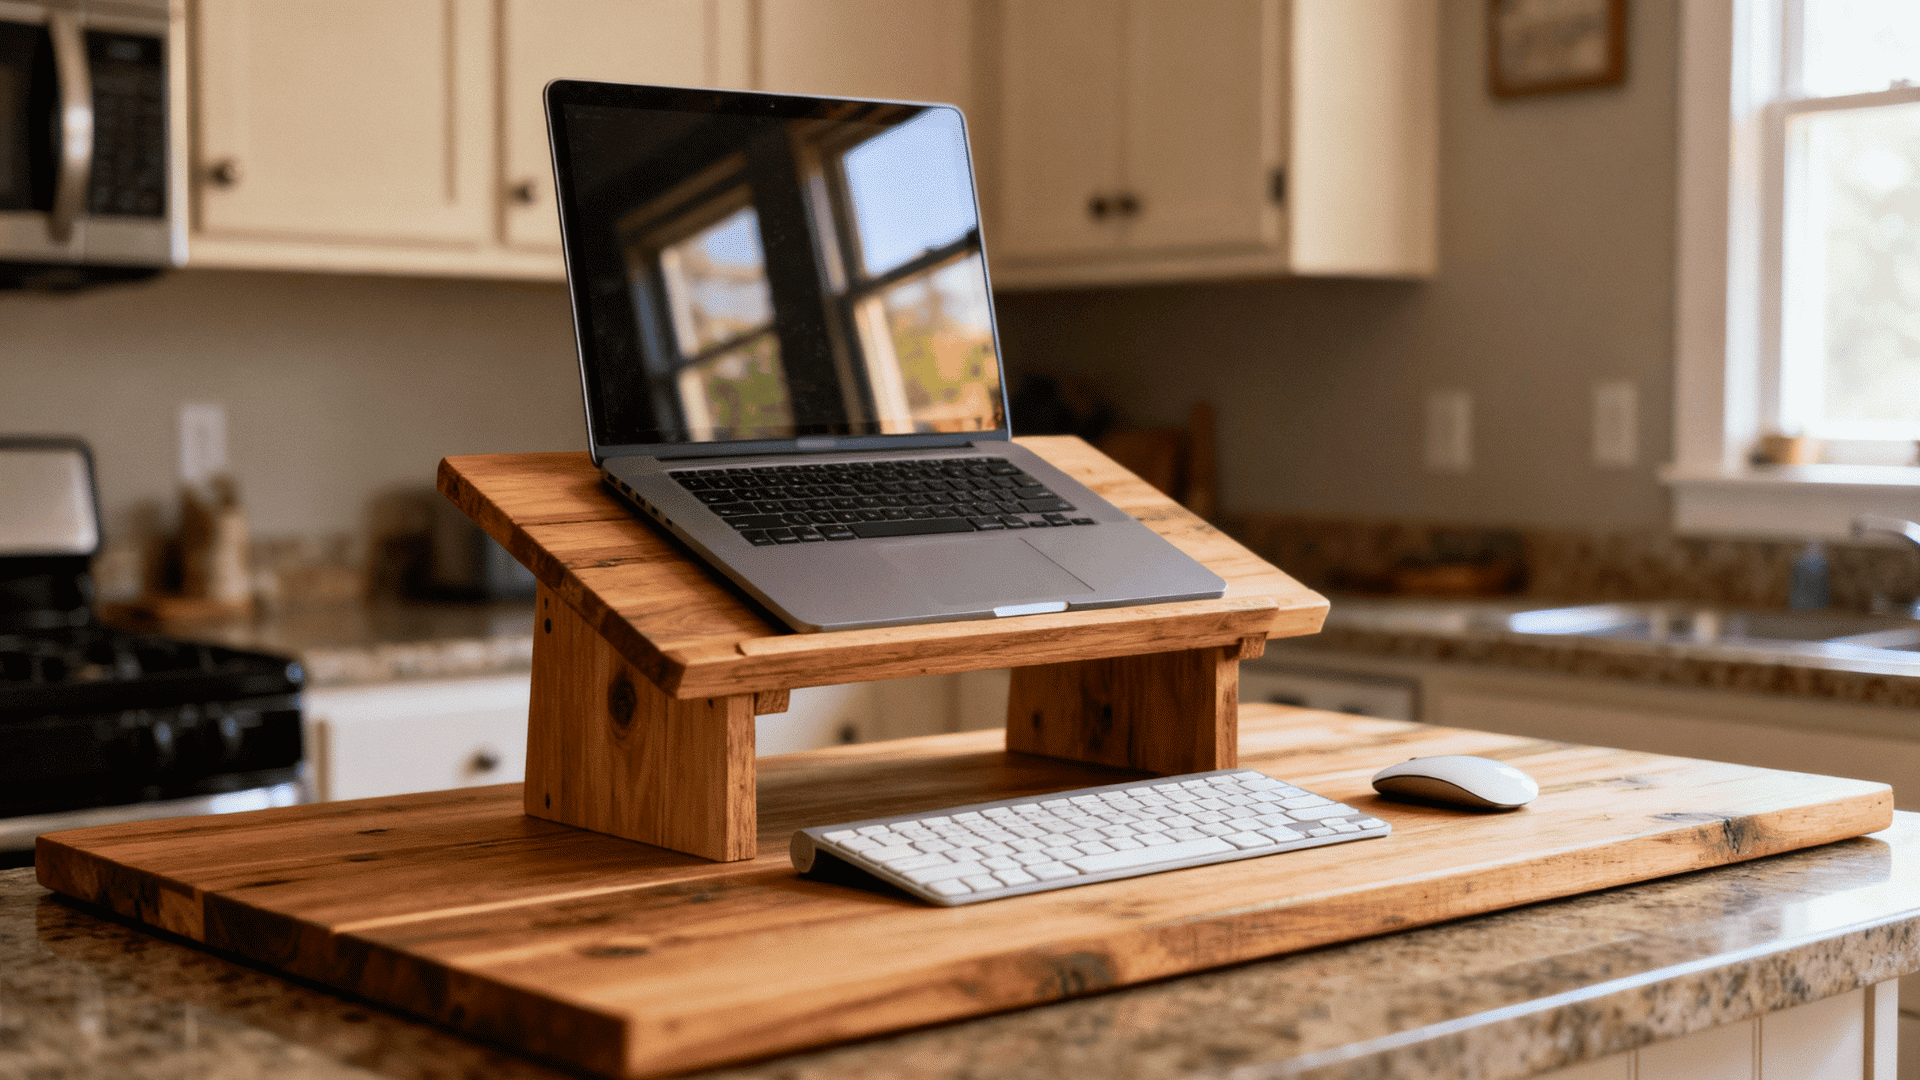
4. Adjustable Shelf Riser Desk
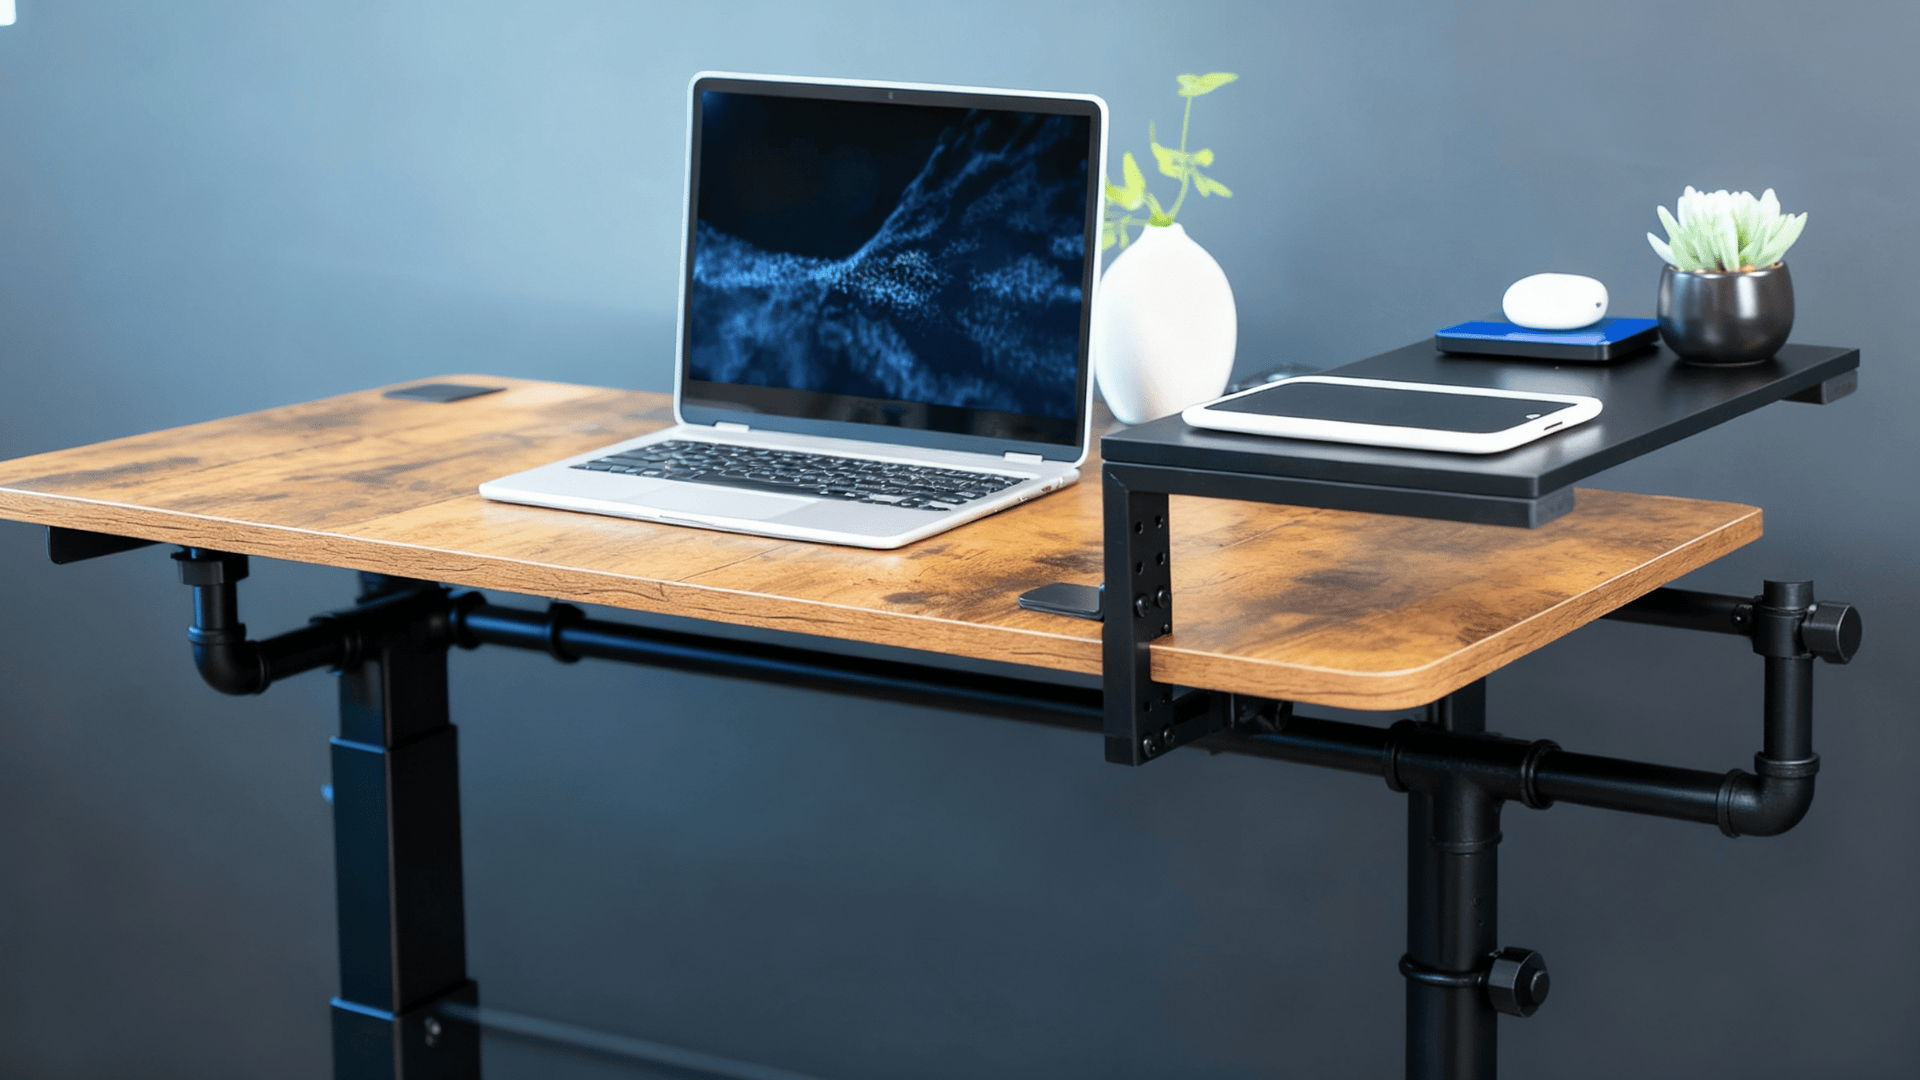
This sits on top of your current desk, upgrading your workspace.
You can move it around or take it off when you want to sit. It’s perfect for renters who can’t make permanent changes.
Tools and Materials: Plywood sheets, wooden dowels or brackets, saw, drill, sandpaper, wood glue, paint or varnish.
DIY Step-by-Step Instructions:
- Step 1: Cut the plywood to match the width of your laptop and monitor.
- Step 2: Cut side supports at your desired height and sand all edges until smooth.
- Step 3: Glue and screw the pieces together.
- Step 4: Paint or varnish the entire unit.
- Step 5: Let it dry and place it on your existing desk.
Cost Estimate: $20-$50 (Primarily cost of plywood and small hardware).
5. Bookshelf Conversion Desk
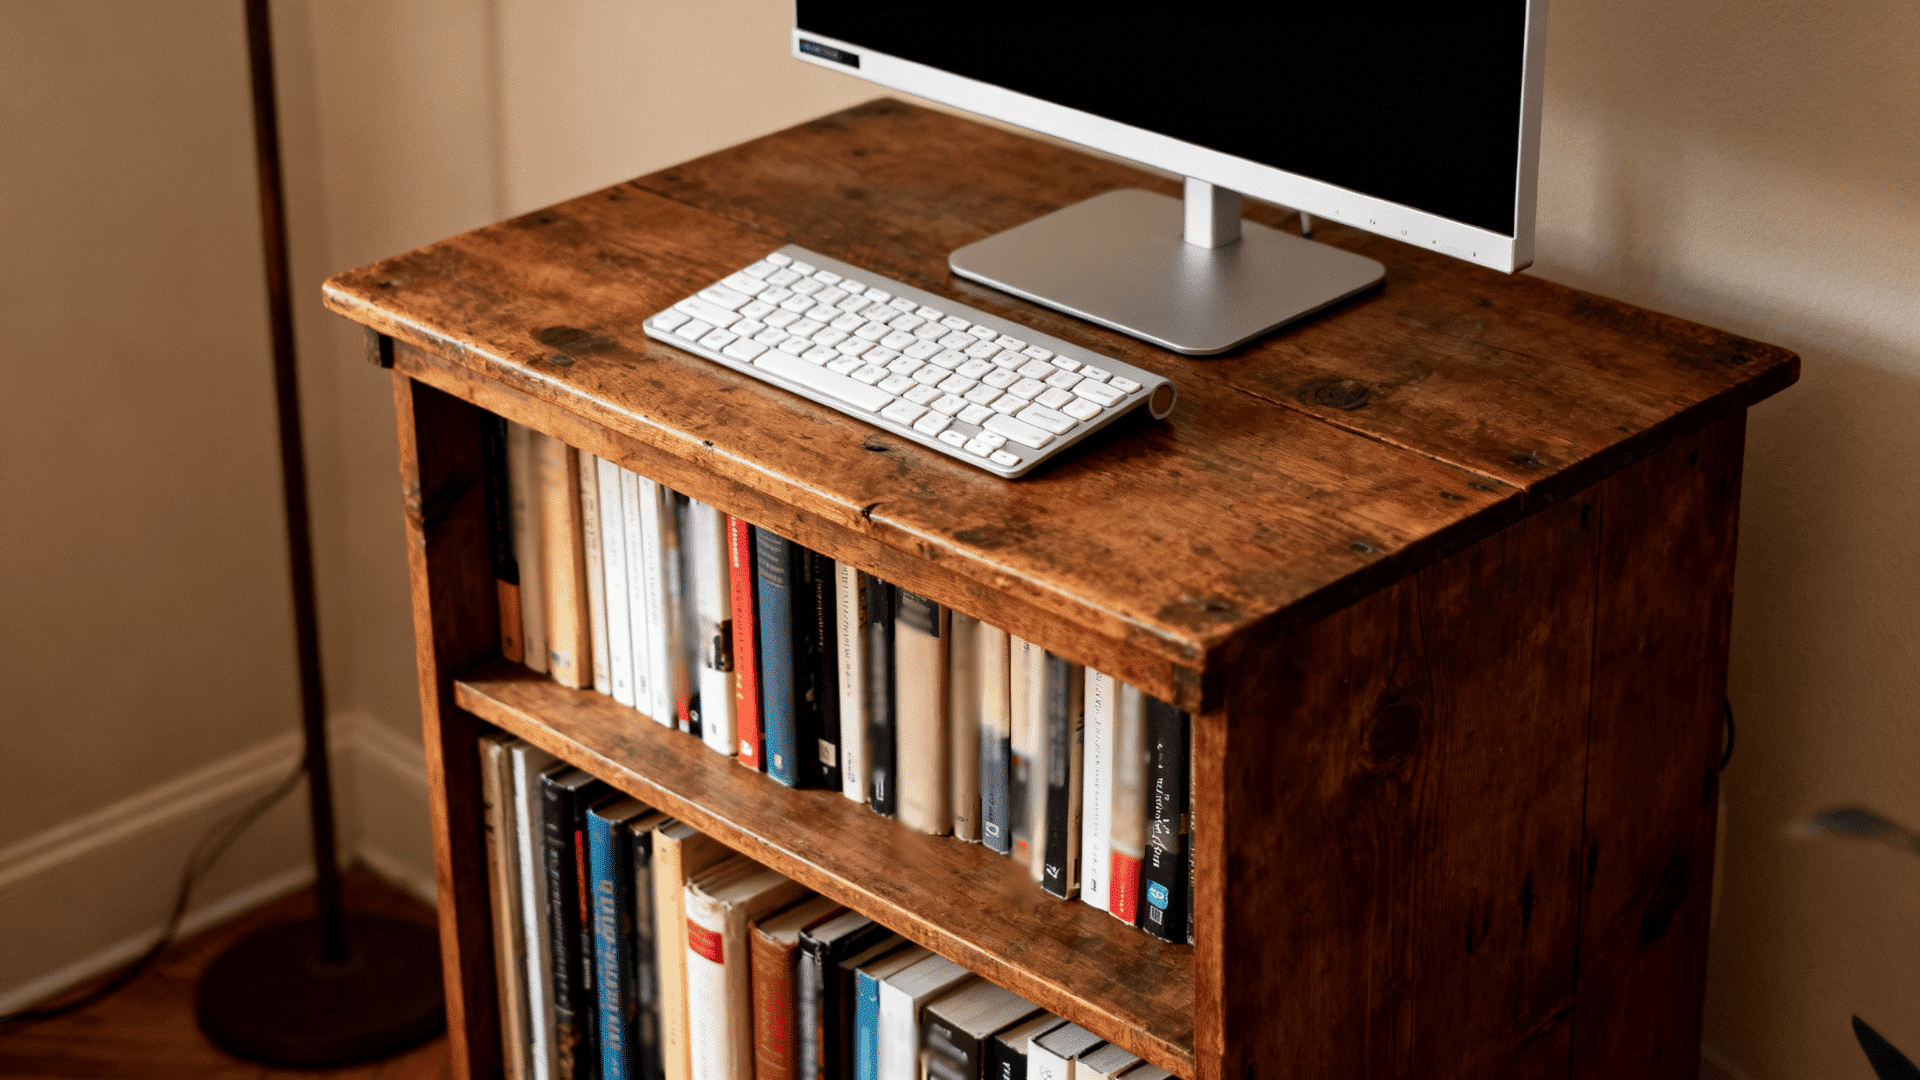
An old bookshelf becomes a standing desk with minimal work. You flip it on its side and use the shelves for storage. This works great in small spaces.
Tools and Materials: Sturdy bookshelf, L-brackets, screws, drill, level, wood board for desktop (optional).
Steps:
- Step 1: Empty and thoroughly clean your bookshelf.
- Step 2: Lay the bookshelf on its side.
- Step 3: Secure it to the wall with L-brackets.
- Step 4: Arrange your keyboard and monitor on top.
Cost Estimate: $50 (Free if you use an existing bookshelf; up to $50 for a used or basic new one).
6. Sawhorses and Door Desk
Two sawhorses and an old door make a simple standing desk. This gives you lots of workspace for multiple monitors.
Tools and Materials: Two adjustable sawhorses, a hollow-core door or a large wooden board, sandpaper, paint, and rubber pads.
DIY Step-by-Step Instructions:
- Step 1: Remove door hardware and fill holes.
- Step 2: Sand the door surface completely.
- Step 3: Paint or stain to your preference.
- Step 4: Adjust sawhorses to your standing height.
- Step 5: Place rubber pads on top of each sawhorse.
- Step 6: Set the door across both sawhorses.
Cost Estimate: $50-$150 (for the adjustable sawhorses and the door/wood board).
7. Wall-Mounted Fold-Down Desk
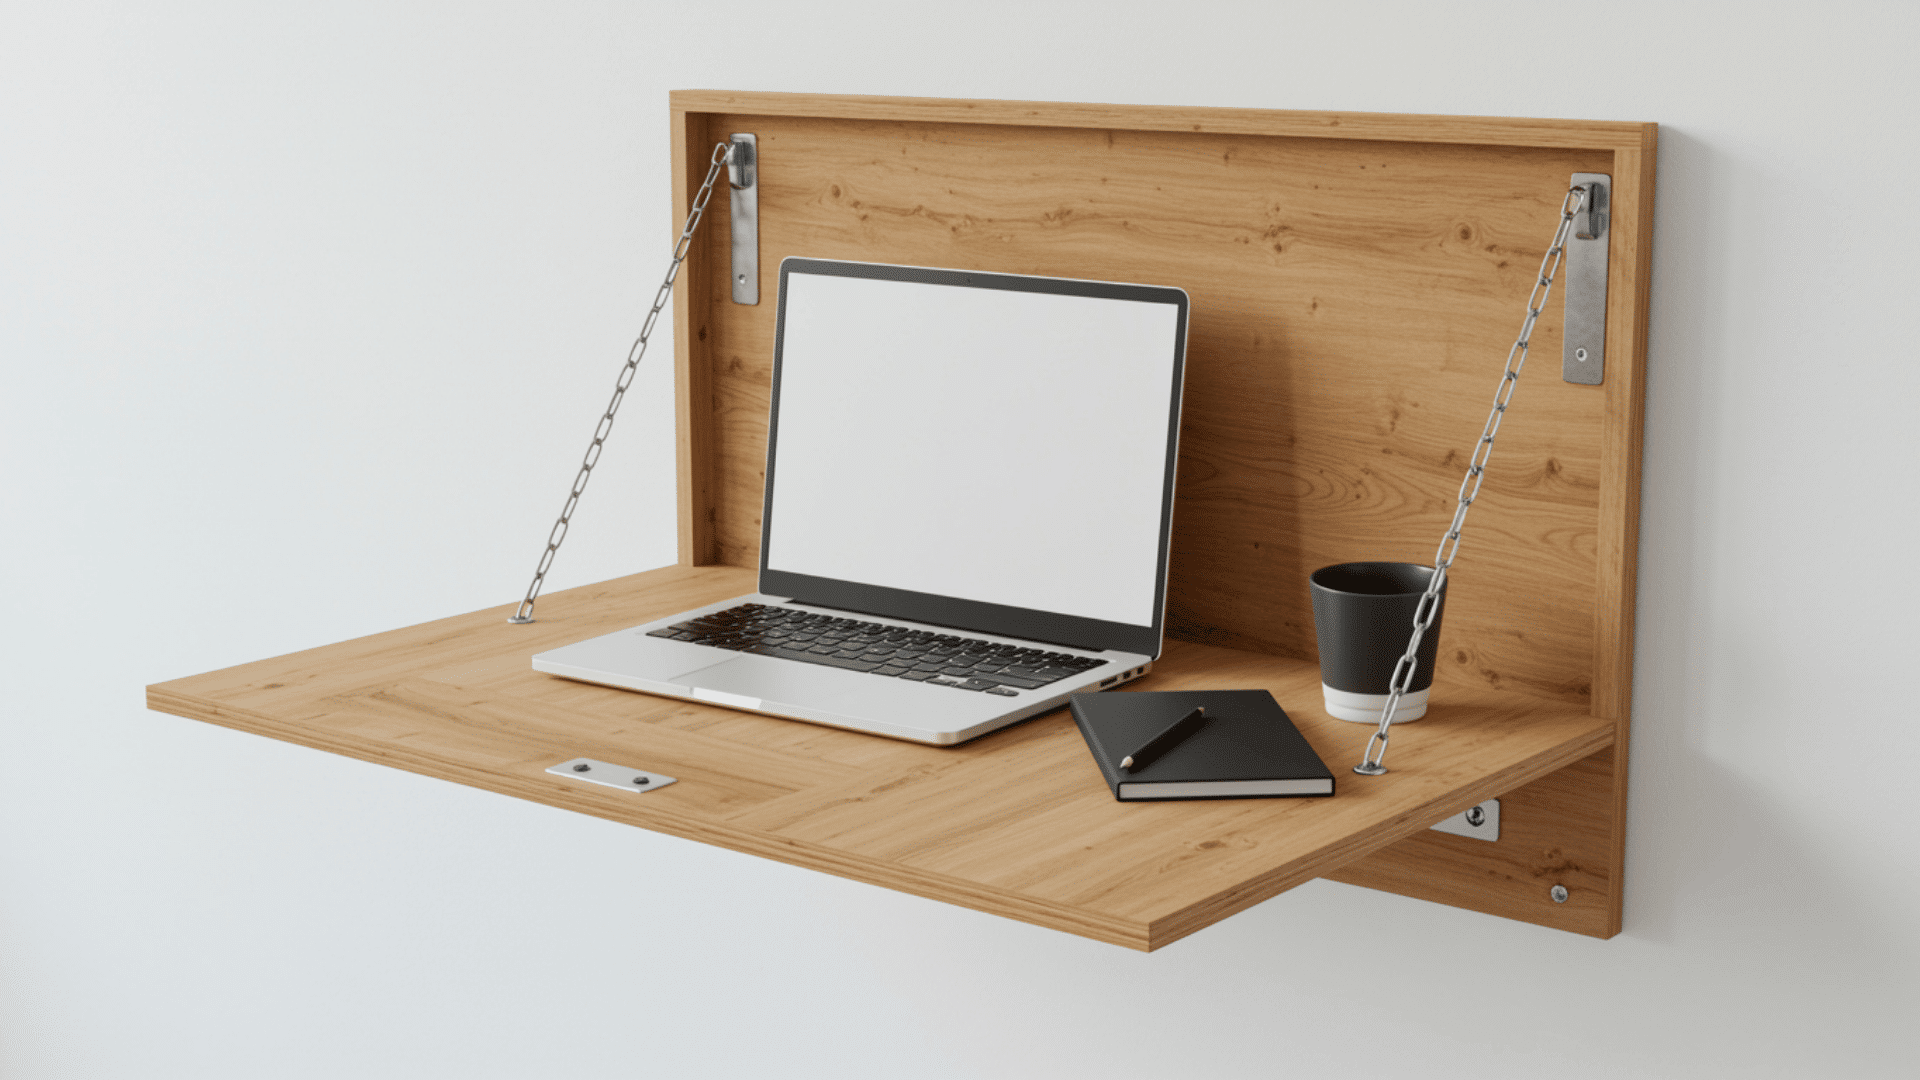
This desk folds up against the wall when not in use. It’s ideal for tight spaces or shared rooms. The hinges do all the work.
Tools and Materials: Plywood board, heavy-duty folding hinges, wall anchors, drill, level, chain or support brackets, and screws.
DIY Step-by-Step Instructions:
- Step 1: Find wall studs and mark your height.
- Step 2: Cut plywood to your desired desk size.
- Step 3: Sand and finish the wood surface.
- Step 4: Attach folding hinges to the wall and mount the plywood to the hinges.
- Step 5: Add chain supports to hold it level when down.
Cost Estimate: $50- $120 (for wood board and heavy-duty folding hardware).
8. Milk Crate Standing Desk
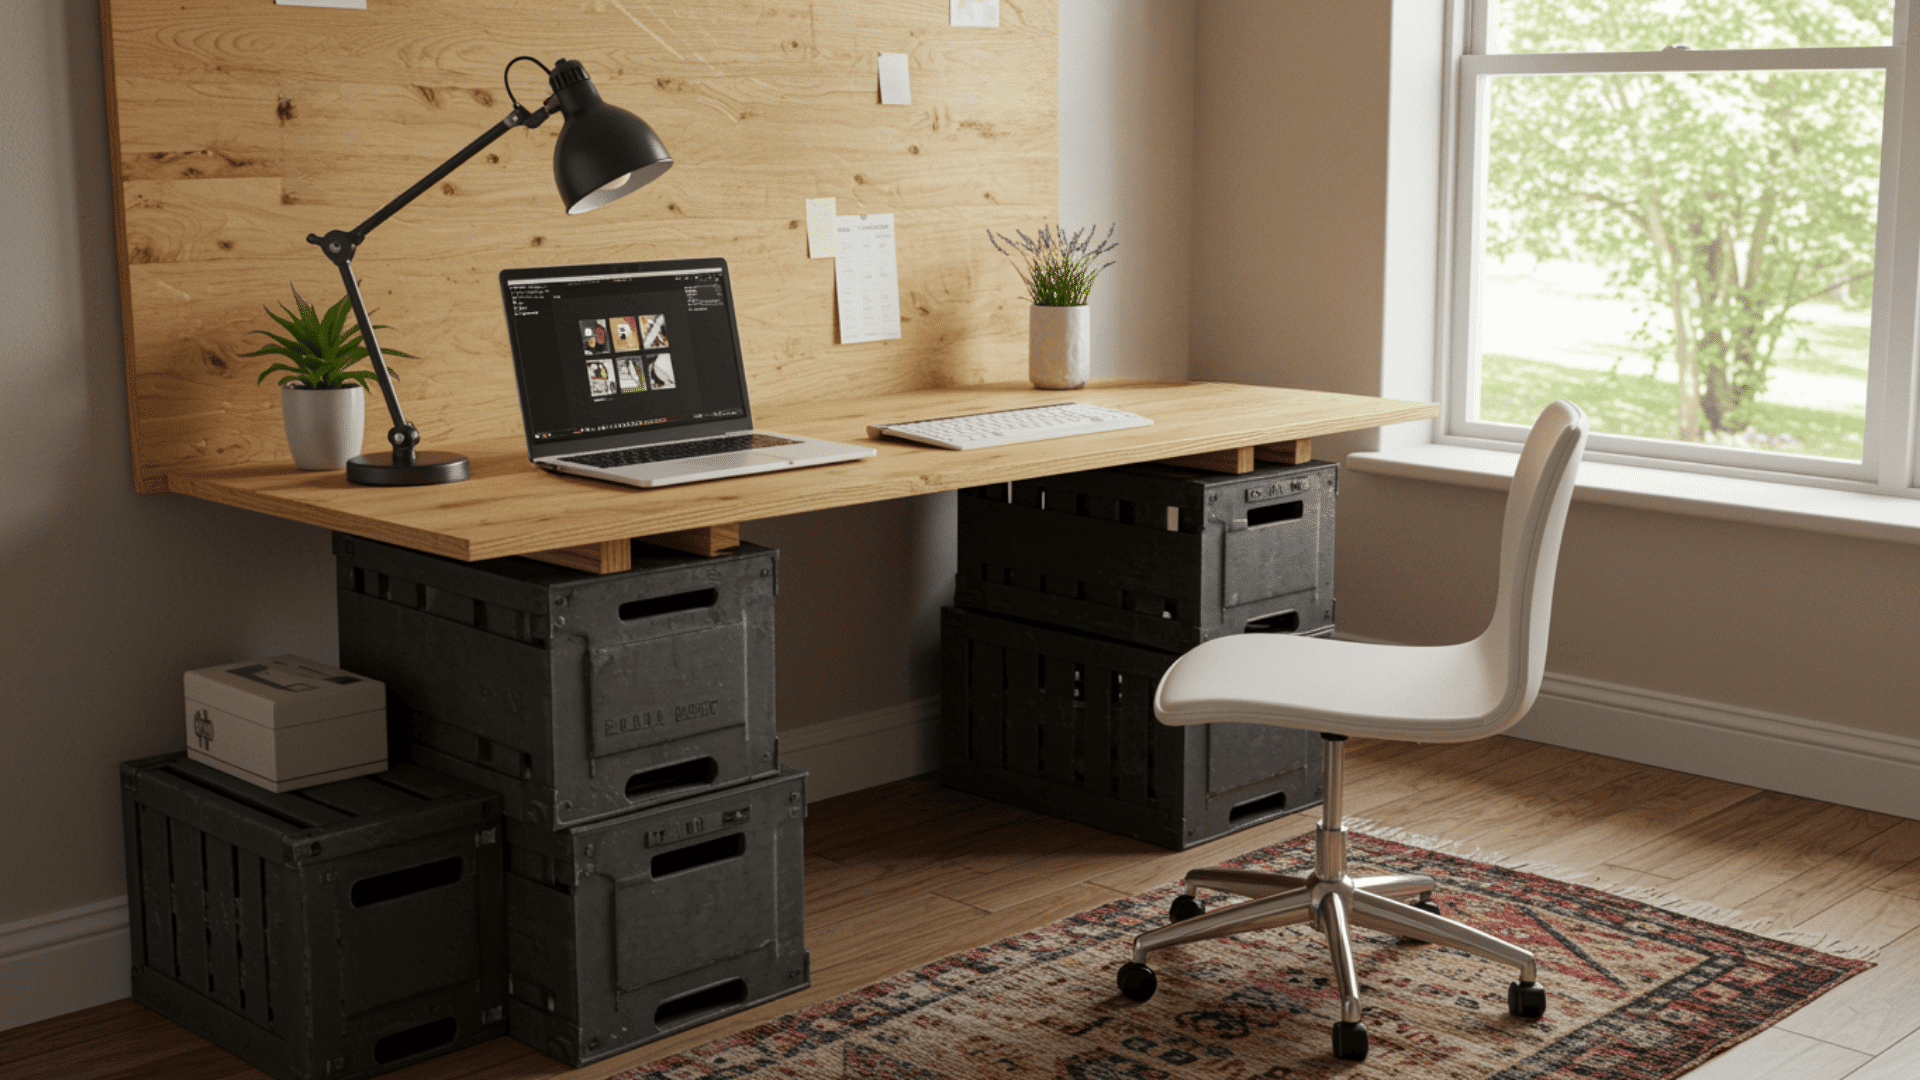
Plastic milk crates stack easily and cost almost nothing. You can find them for free or buy them cheaply. This desk takes five minutes to set up.
Tools and Materials: Plastic milk crates (6-8 pieces), zip ties, a wooden board or thick cardboard, and a non-slip mat.
DIY Step-by-Step Instructions:
- Step 1: Stack milk crates in two columns.
- Step 2: Zip tie the crates together at the corners.
- Step 3: Check that both columns are the same height.
- Step 4: Place a wooden board across the top.
- Step 5: Add a non-slip mat between crates and the board.
- Step 6: Test the weight capacity before using.
Cost Estimate: $5-$30 (Crates can be found for free or purchased for a low cost, plus the top board).
9. Dresser Top Standing Desk
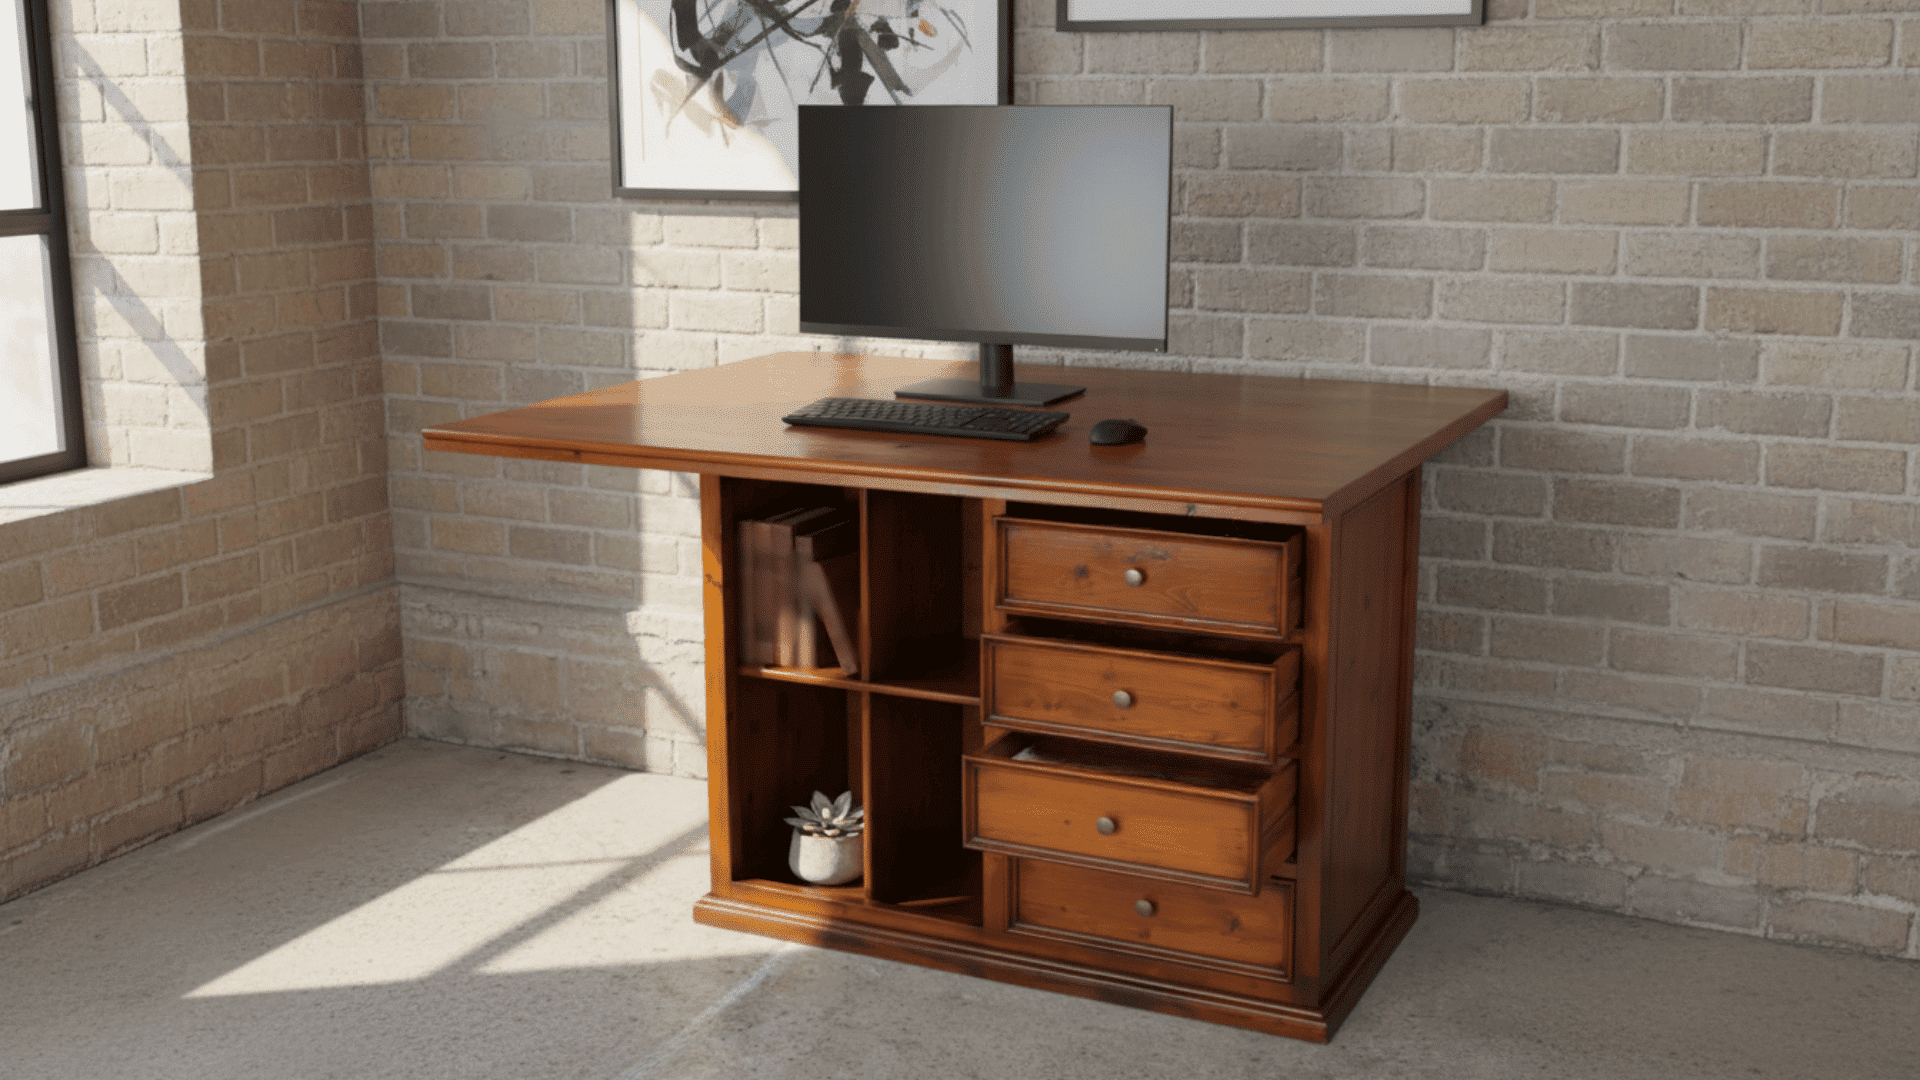
An old dresser becomes a desk with built-in storage. The drawers hold all your office supplies. You add a work surface on top.
Tools and Materials: Tall dresser or chest of drawers, large wood board, L-brackets, screws, drill, furniture pads.
DIY Step-by-Step Instructions:
- Step 1: Empty the dresser and clean it well.
- Step 2: Measure the dimensions of the top surface.
- Step 3: Cut a wooden board slightly larger than the top.
- Step 4: Sand and finish the board.
- Step 5: Attach the board to the dresser with L-brackets.
- Step 6: Add furniture pads under the dresser legs.
Cost Estimate: $0-$100 (Free if you use an existing dresser; cost of new top board and hardware).
10. Kitchen Counter Height Desk
Your kitchen counter is already the right height for standing. You create a removable desk that sits on the counter. This works perfectly for small apartments.
Tools and Materials: Wood board cut to size, rubber feet or cork pads, clamps (optional), and a laptop stand.
DIY Step-by-Step Instructions:
- Step 1: Measure your available counter space.
- Step 2: Buy or cut a board to fit that space.
- Step 3: Sand the board edges smooth.
- Step 4: Attach rubber feet to the bottom.
- Step 5: Place the board on your kitchen counter.
Cost Estimate: $10-$40 (for a simple wooden board and rubber/cork feet).
11. Stacked Storage Bin Desk
Clear storage bins stack to create an interesting desk. You can see what’s inside each bin. The setup is temporary and easy to move.
Tools and Materials: Large plastic storage bins with lids (4-6), a wood desktop board, non-slip shelf liner, and weights or books for stability.
DIY Step-by-Step Instructions:
- Step 1: Choose bins that are the same size.
- Step 2: Fill the bottom bins with heavy items for stability.
- Step 3: Stack bins in two even columns.
- Step 4: Place a non-slip liner on top.
- Step 5: Set your wood board across the bins.
- Step 6: Test before placing your equipment.
Cost Estimate: $15-$50 (Cost of new storage bins and a top board).
12. Bar Stool Base Desk
Two or three barstools become desk legs. The seats hold up your work surface. You can adjust the height if you have adjustable stools.
Tools and Materials: Bar stools (2-3 matching), large wood board, wood screws, drill, level, sandpaper.
DIY Step-by-Step Instructions:
- Step 1: Adjust all barstools to the same height.
- Step 2: Sand your desktop board smooth.
- Step 3: Place stools where you want them.
- Step 4: Set the board across the stool tops.
- Step 5: Screw through the board into each stool.
Cost Estimate: $50-$150 (Cost depends on whether two or three matching barstools are purchased).
What People Online are Saying
People push DIY standing desks when buying a frame, and a top can be just as costly. Many say DIY only saves money if you skip pricey hardwood.
A few still prefer bundled desks when deals make the top almost free.
Find cheap tops at places like Ikea, Home Depot, or kitchen suppliers.
Others build their own tops to get real wood, exact sizes, or better quality than thin MDF, even if it takes more work.
Several users report that taking a top course taught them basic woodworking skills and gave them a desk they feel attached to.
Safety Tips to Follow
- Wear safety glasses when cutting or drilling wood.
- Test the desk stability before placing expensive equipment on it.
- Secure the desk to the wall if it feels wobbly.
- Sand all sharp edges and corners smooth.
- Tighten all screws and bolts completely.
- Ask someone to help with heavy lifting.
- Check that your desk height doesn’t strain your neck or wrists.
- Verify that wall anchors can support your desk weight for wall-mounted designs.
Final Thoughts
Building a DIY standing desk doesn’t require expert skills or expensive tools.
You’ve seen different ways to make one that fits your space and budget. Start with something simple.
You can always build something more complex later. Your body will thank you for making the switch. You’ll feel accomplished knowing you built it yourself. Pick a design that matches your skill level.
So grab your tools and get started. Your new desk is waiting.