That ugly chip on your living room wall keeps catching your eye, doesn’t it?
You probably think fixing it means repainting the entire wall or calling in a professional. But what if I told you there’s a simpler way?
Most chipped paint problems can be fixed in under an hour with tools you likely already have at home.
You’ll save money, avoid the hassle of major repairs, and feel satisfied knowing you handled it yourself.
Keep reading to learn the step-by-step process.
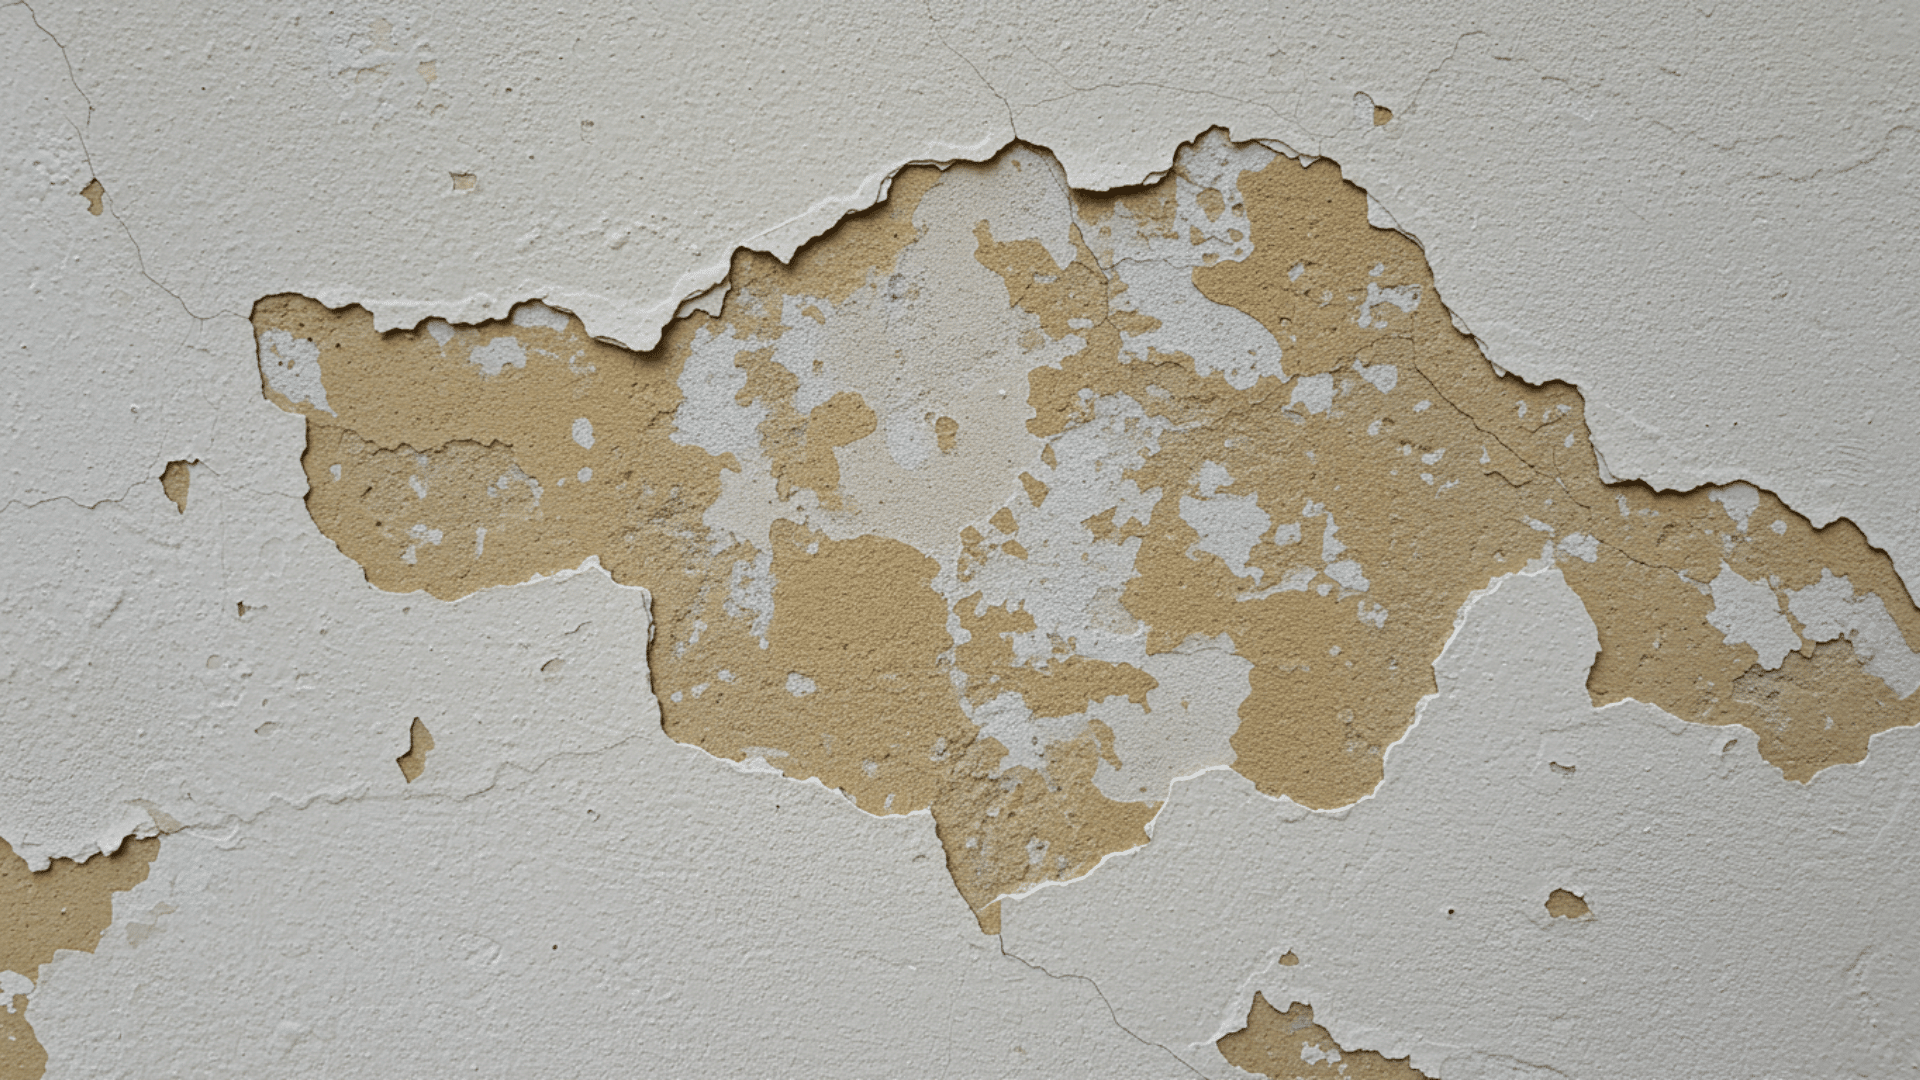
What Causes Paint to Chip?
Before we jump into repairs, let’s talk about why paint chips in the first place.
1. Moisture Damage
Water is paint’s worst enemy, and it causes more chipping than anything else. When moisture seeps behind your paint layers, it breaks the bond between paint and wall.
Bathrooms and kitchens are especially vulnerable to this problem because of constant humidity and steam exposure.
2. Poor Surface Preparation
Skipping prep work before painting always comes back to haunt you later on. If the wall wasn’t cleaned properly or had loose paint, the new coat won’t stick well.
Dirty, greasy, or dusty surfaces create a weak foundation that leads to peeling and chipping over time.
3. Low-Quality Paint
Cheap paint might save you money upfront, but it costs more in the long run.
Budget paints lack the binding agents and flexibility that quality paints have, making them prone to cracking.
They also don’t handle temperature changes or normal wear and tear as well as better options do.
4. Age and Wear
Nothing lasts forever, and paint is no exception to that rule at all.
Over years of exposure to sunlight, temperature changes, and daily life, paint naturally degrades and loses flexibility.
High-traffic areas like hallways and doorways show this aging process faster than other spots in your home.
5. Temperature Fluctuations
Extreme temperature swings make paint expand and contract repeatedly throughout the year. This movement stresses the paint film and eventually causes it to crack and chip away.
Exterior walls and rooms without climate control experience this problem more frequently than temperature-stable areas in homes.
6. Incompatible Paint Layers
Painting oil-based paint over latex or vice versa creates adhesion problems down the road.
These different paint types don’t bond well together because of their different chemical compositions and properties.
The layers separate over time, leading to bubbling, cracking, and eventual chipping that ruins your wall’s appearance completely.
Step-By-Step: How To Fix Paint Chips on the Wall?
Now that you know what causes paint to chip, it’s time to fix those problem spots.
The repair process is straightforward, but you need to follow each step carefully for results that last.
Step 1: Gather Your Materials
You’ll need a few basic supplies before starting this project at all.
Grab sandpaper, spackling paste, a putty knife, primer, paint that matches your wall, and a small brush or roller.
Having everything ready saves time and keeps you from stopping mid-project to hunt for missing items around your house.
Step 2: Clean the Damaged Area
Wipe down the chipped spot with a damp cloth to remove dust and dirt buildup. Grease and grime prevent new paint from sticking properly to the surface below.
Let the area dry completely before moving forward with repairs.
A clean surface is the foundation of a repair job that actually holds up over time and looks good, too.
Don’t skip cleaning even if the wall looks clean to your eyes. Invisible oils from hands and airborne dust create adhesion problems.
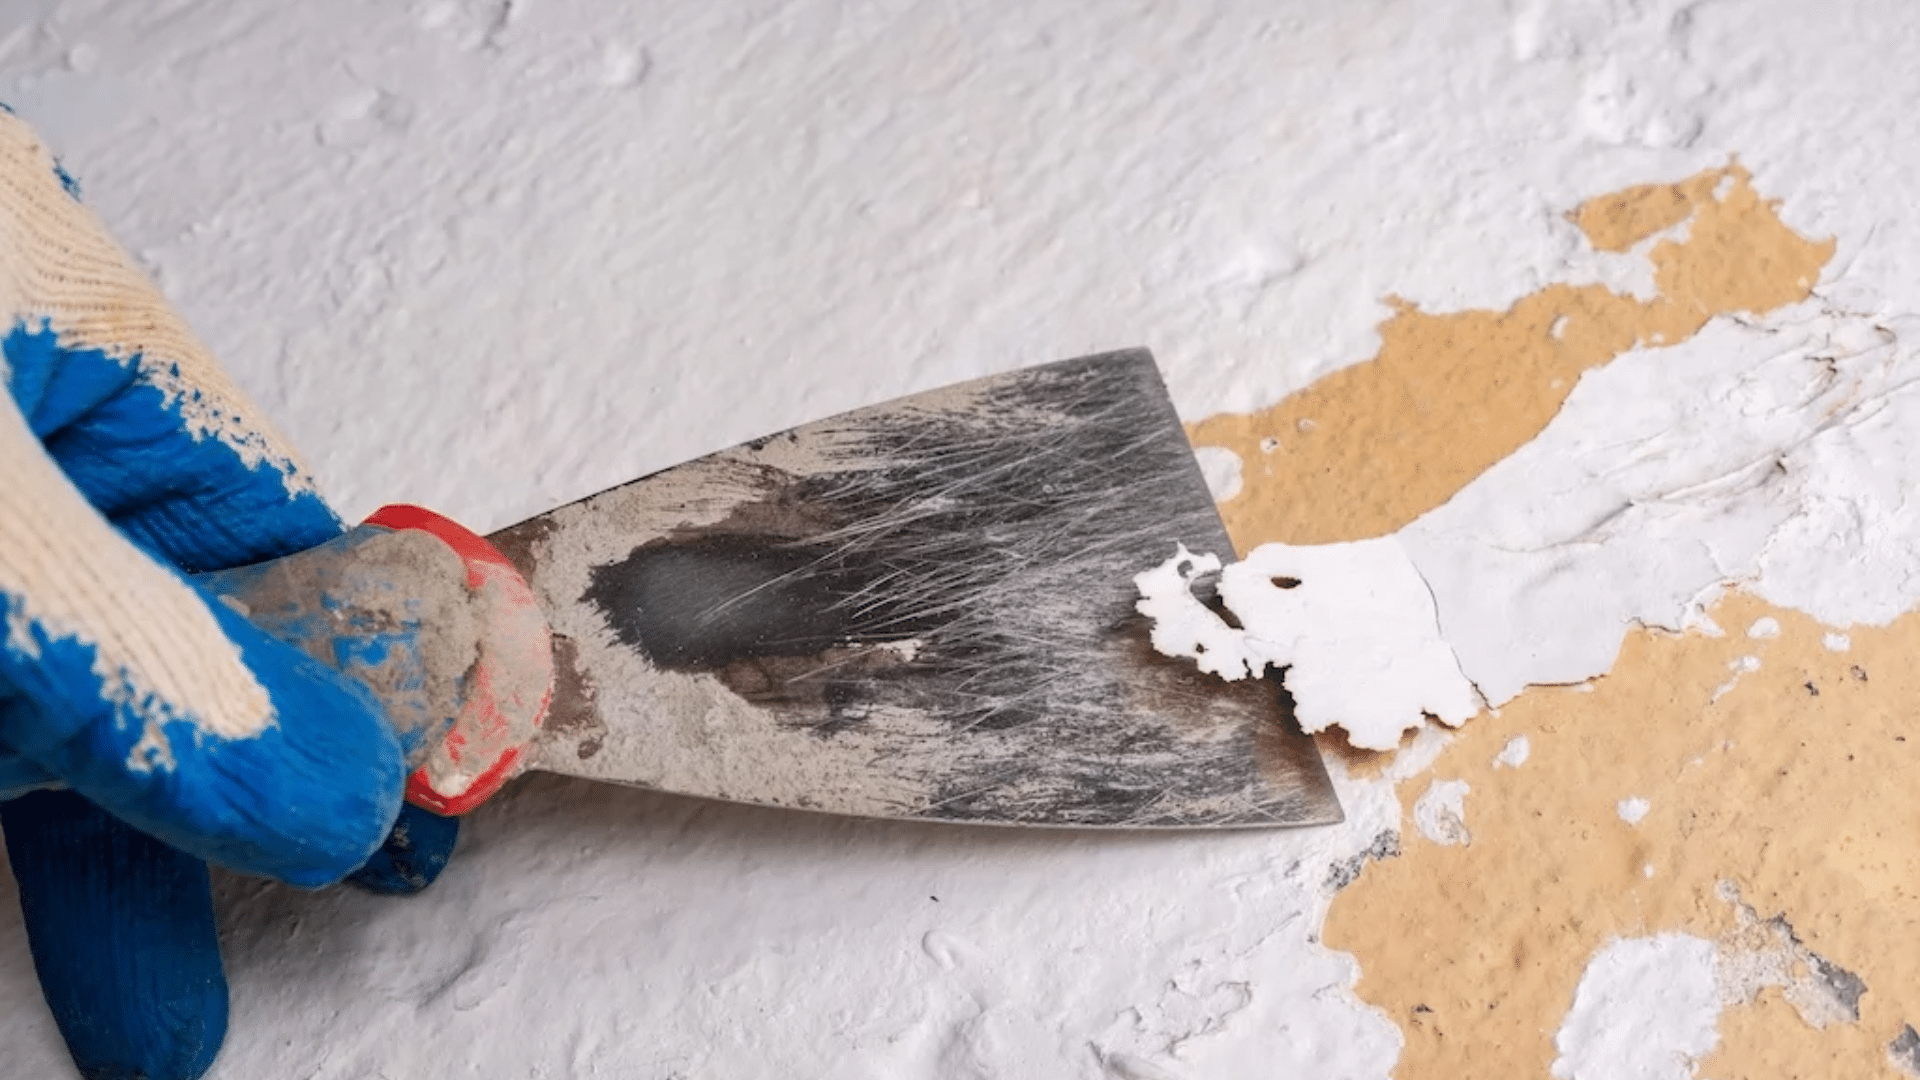
Step 3: Remove Loose Paint
Use your putty knife to scrape away any paint that’s lifting or peeling around the chip.
Be gentle but thorough; loose paint needs to come off now, or it’ll peel later anyway. Work outward from the damaged spot until you reach paint that’s firmly attached to the wall.
This creates a stable base for your repair work to build on.
Step 4: Sand the Edges
Take medium-grit sandpaper and smooth the edges where old paint meets bare wall completely.
This creates a gradual transition instead of a sharp cliff between layers that shows through later. Feather the edges by sanding at an angle to blend everything smoothly.
Wipe away all sanding dust with a slightly damp cloth when you’re done with this step.
Don’t sand too aggressively, or you’ll create a depression in the wall surface. Always sand gently in circular motions for the smoothest results possible every time.
Step 5: Fill Deep Chips
If the chip goes deep into the wall, apply spackling paste with your putty knife now.
Press the paste firmly into the damaged area and smooth it level with the surrounding wall surface.
For really deep spots, apply thin layers and let each one dry before adding more paste on top. This prevents cracking and shrinking as the filler dries out completely.
Step 6: Sand the Filled Area
Once the spackling paste dries fully, sand it smooth with fine-grit sandpaper until it’s flush.
Run your hand over the spot to check for bumps or low areas that need attention. The repaired section should feel perfectly smooth and blend invisibly with the rest of the wall around it.
Remove all dust with a tack cloth or slightly damp rag before proceeding further.
Don’t rush this step or sand while the filler is still damp inside. Wet spackling clogs sandpaper and creates a mess instead of a smooth surface.
Step 7: Apply Primer
Brush a thin coat of primer over the repaired spot and slightly beyond its edges for coverage.
Primer seals the patched area and helps your topcoat paint adhere properly to the surface. It also prevents the repair from showing through as a dull spot on your finished wall later.
Let the primer dry completely according to the manufacturer’s instructions before moving on to painting.
Step 8: Paint the Area
Use paint that matches your wall color and apply thin, even coats over the primed spot.
Feather the edges by brushing outward from the repair into the surrounding painted area smoothly. Multiple thin coats look better than one thick coat and dry faster, too.
Let each coat dry before applying the next one, and check the color match in natural light when done.
Don’t glob on thick paint trying to cover the spot in one coat quickly. Thick paint sags, shows brush marks, and takes forever to dry properly.
Step 9: Blend and Touch Up
Step back and look at your repair from different angles in various lighting conditions now.
If the spot still shows, lightly feather more paint around the edges to blend better. Sometimes, painting a larger section or the entire wall from corner to corner gives the most invisible results.
The goal is repairing disappear completely into the surrounding wall surface.
Step 10: Let It Cure
Give your repair at least 24 hours to dry before touching or cleaning the area at all. Paint needs time to harden and bond properly with the wall surface underneath it.
Avoid scrubbing or placing furniture against the spot for several days after completing repairs.
Proper curing time prevents new chips and ensures your hard work lasts for years to come without problems.
Is Chipped Paint Dangerous to Health?
Chipped paint can pose health risks, especially in older homes built before 1978. That’s when lead-based paint was commonly used in houses across the country.
If your home was built before this date, paint might contain lead, which is toxic when inhaled or ingested by people.
Children are particularly vulnerable because they often put their hands in their mouths after touching surfaces.
Lead exposure can cause developmental delays, learning difficulties, and other serious health problems in kids. Even small amounts of lead dust from paint create risks.
If you suspect lead paint, don’t sand or scrape it yourself. Contact a certified lead abatement professional to test and safely remove it.
For homes built after 1978, paint is generally safe but can still harbor mold or moisture problems underneath.
Prevention Tips to Stop Paint Chips on the Wall
Once you’ve fixed the chipped paint, you’ll want to keep it from happening again.
A few simple prevention steps can protect your walls and save you from future repairs.
- Control humidity levels in your home with proper ventilation, especially in bathrooms and kitchens where moisture builds up quickly.
- Use quality paint when repainting any surface. Better paint costs more upfront but resists chipping and lasts much longer.
- Prepare surfaces properly before painting by cleaning, sanding, and priming every time without skipping steps.
- Fix water leaks immediately before moisture seeps behind paint and causes damage to walls.
- Avoid harsh cleaning on painted walls. Use gentle cleaners and soft cloths instead of abrasive scrubbers.
- Maintain consistent temperatures in your home to reduce expansion and contraction that stresses paint over time.
Here’s When to Call a Professional
If you’re dealing with extensive chipping across multiple walls or entire rooms, call a professional painter for help.
Large-scale damage often indicates underlying moisture issues that need expert diagnosis and treatment before repainting.
Also, if you’ve tried fixing chips but they keep coming back in the same spots, a pro can identify and solve the root problem.
High ceilings, hard-to-reach areas, and structural damage beyond cosmetic chipping also warrant professional attention for safety and quality results.
Wrap Up
Fixing chipped paint isn’t as hard as it looks when you break it down into simple steps.
You now have everything you need to tackle those unsightly chips and make your walls look great again.
If you’re dealing with lead paint or damage that keeps coming back, don’t hesitate to call a professional. Sometimes the smart move is knowing when to ask for help.
Got questions about your specific paint problem? Drop a comment below, and I’ll help you figure it out.