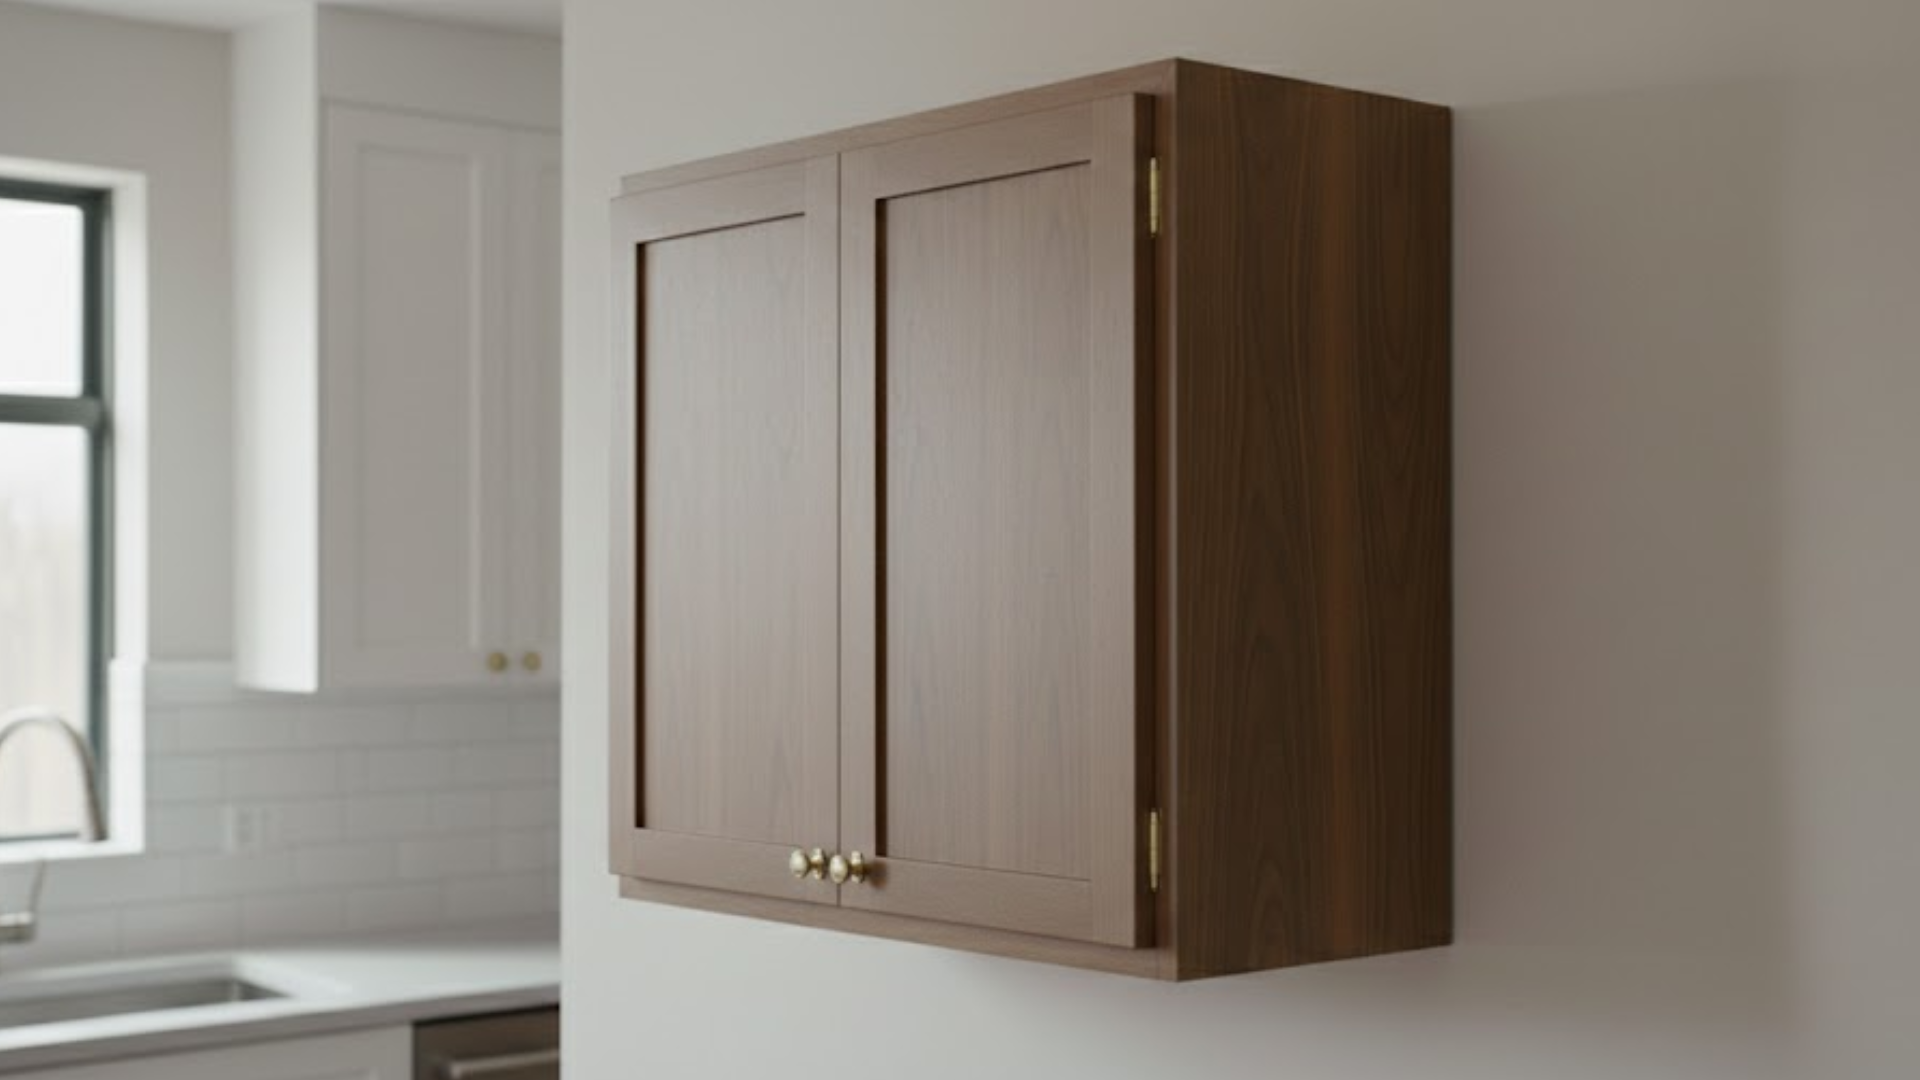
Ever walked into a kitchen and thought, “Those cabinets look perfect”?
Most store-bought cabinets don’t fit right. They leave gaps, waste space, and cost too much.
Building your own gives you custom cabinets that fit your exact measurements and match your style. Plus, you’ll save money.
This blog shows you how cabinet making works, from selecting wood to applying the final finish.
You don’t need fancy tools or years of experience, just basic woodworking skills and a willingness to learn.
Planning First
Good planning prevents costly mistakes and wasted materials. Measure accurately and sketch your design before cutting any wood.
- Measure your space precisely: Record the width, height, and depth where cabinets will go. Measure twice to catch errors. Note any electrical outlets, plumbing, or obstacles.
- Sketch your design: Draw a simple diagram with cabinet dimensions, door locations, and shelf positions. This visual guide keeps you on track.
- Choose your cabinet style: Face-frame cabinets have a traditional look with a front frame. Frameless cabinets offer a modern appearance with more interior space.
- List all materials: Calculate plywood, hardwood, hardware, and finish amounts. Add 10% extra for mistakes. This prevents mid-project store trips.
- Create a cut list: Break down each cabinet into individual pieces with exact dimensions. Organize by material type and thickness to save time and reduce waste.
Tools and Materials Checklist
Here’s what it takes to use for basic cabinet making:
| Tools | Materials |
|---|---|
| Table saw | Plywood sheets |
| Drill | Solid wood boards |
| Measuring tape | Wood glue |
| Square | Screws |
| Clamps | Hinges |
| Sander | Drawer slides |
| Level | Cabinet handles |
| Pencil | Wood finish |
Step-by-Step Instructions for Cabinet Making
Follow these steps to build durable, professional-quality cabinets.
Step 1. Cut Your Cabinet Panels
Measure and mark your plywood first. You need two side panels, a top panel, a bottom panel, and a back panel.
Use your table saw to make straight cuts. Double-check measurements before cutting. You can’t add wood back once it’s cut. Sand the edges smooth after cutting.
Step 2. Create the Cabinet Box
Lay one side panel flat on your work surface. Apply wood glue along the edges where the top and bottom will attach. Position the top and bottom panels perpendicular to the side. Drill pilot holes to prevent splitting.
Drive screws through the side into the top and bottom pieces. Repeat with the other side panel.
Step 3. Attach the Back Panel
Flip your cabinet box face down. The back panel adds strength and keeps the cabinet square. Apply glue around all four edges of the opening.
Place your back panel on top. Make sure all corners align perfectly.
Nail or screw the back panel in place. Check that the cabinet is square by measuring the diagonals with your measuring tape.
Step 4. Build the Face Frame
Cut two vertical pieces and two horizontal pieces from solid wood.
The vertical pieces run the full height of your cabinet. Horizontal pieces fit between them at the top and bottom.
Clamp the frame together and let it dry for at least an hour. This frame gives your cabinet a finished look. Apply glue to the joints.
Step 5. Attach the Face Frame
Position your dry face frame on the front of the cabinet box. It should completely cover the plywood edges.
Apply glue to the back of the frame. Clamp it in place and wipe away excess glue. Once dry, drive small finish nails through the frame into the cabinet box.
These nails will barely show when painted or stained.
Step 6. Sand All Surfaces
Start with coarse sandpaper to remove rough spots. Then switch to medium grit. Finish with fine-grit sandpaper for a smooth surface. Sand with the wood grain, not against it.
Pay extra attention to edges and corners. Wipe away all dust with a damp cloth.
Let everything dry before moving to the next step.
Step 7. Apply Wood Finish
Choose either paint or stain, whichever you prefer. The stain shows the wood grain. Paint gives solid color coverage. Apply your first coat with a brush or cloth.
Let it dry completely according to product instructions. Light sanding between coats helps the next layer stick better.
Apply at least two coats for best results.
Step 8. Install the Hinges
Mark where your hinges will go on the cabinet door. Typically, place them three inches from the top and bottom.
Use a chisel to create a shallow recess for each hinge. This lets the hinge sit flush with the wood. Screw the hinges into the door first.
Then attach the other side to the cabinet frame. Test the door swing before tightening completely.
Step 9. Hang the Cabinet Door
Hold your door up to the cabinet opening. The hinges should align with your marked positions on the frame. Start with just one screw per hinge.
Check if the door opens and closes smoothly.
Adjust as needed before adding the remaining screws. The door should have a small gap all around. This prevents rubbing and sticking.
Step 10. Add Shelves If Needed
Measure the inside width and depth of your cabinet. Cut shelf boards slightly smaller than these measurements. This gives clearance for easy shelf placement.
Install shelf pins or brackets inside the cabinet. These support your shelves at whatever height you want.
You can adjust shelf positions later as your storage needs change.
Step 11. Final Touches and Inspection
Open and close the door several times. Listen for squeaks or resistance. Tighten any loose screws you find.
Clean fingerprints and dust from all surfaces. Apply furniture wax or polish if desired.
Stand back and admire your work. You just built a real cabinet from scratch.
Common Mistakes People Make
- Not measuring twice before cutting once.
- Skipping the pilot holes and splitting the wood.
- Using too much glue that squeezes out everywhere.
- Forgetting to check if the cabinet box is square.
- Applying finish in thick coats instead of thin layers.
- Installing hinges without testing the door swing first.
- Mounting cabinets without finding wall studs.
- Cutting all pieces at once instead of one at a time.
- Ignoring the wood grain direction when sanding.
- Over-tightening screws and stripping the holes.
Cabinet Making Material and Finishes
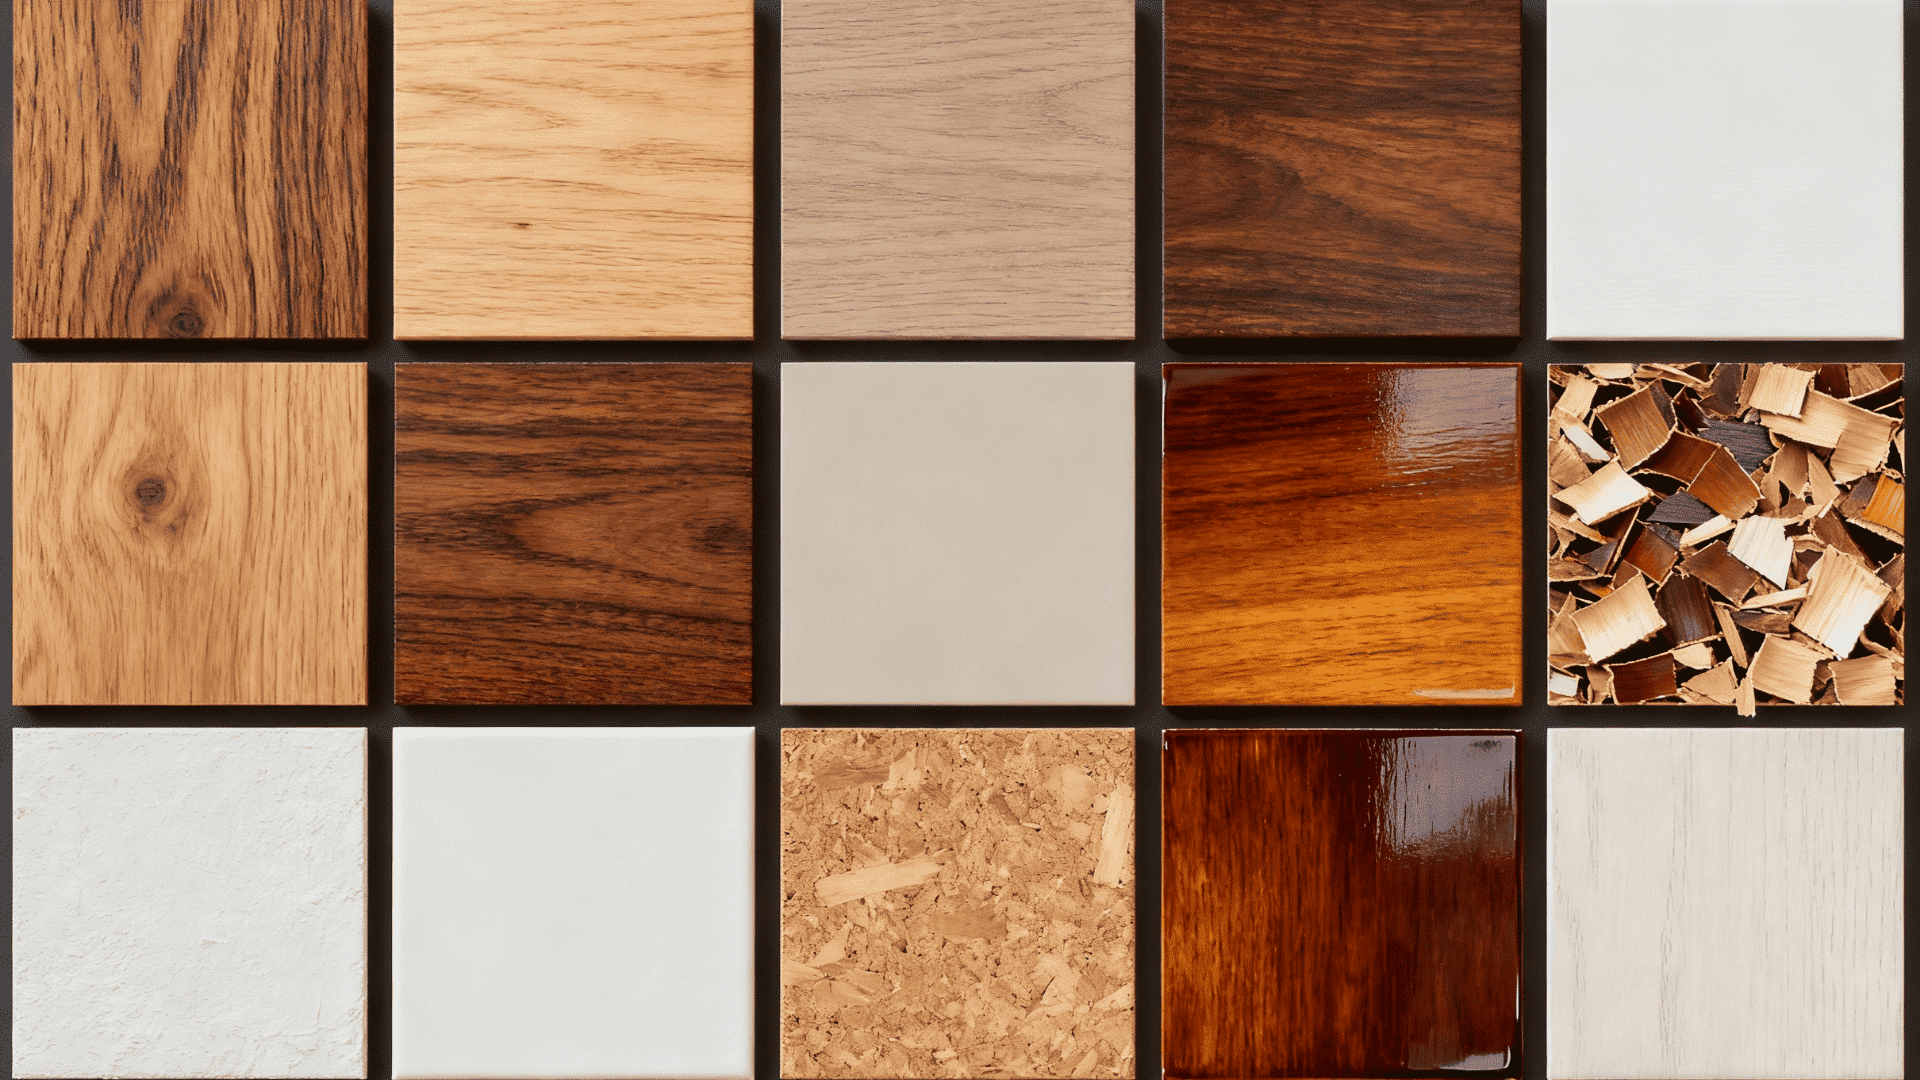
Choosing the right materials makes a huge difference. Here’s what works best for different cabinet parts:
| Material/Finish | Best For | Why Use It |
|---|---|---|
| Birch plywood | Cabinet boxes | Strong and affordable |
| Maple | Face frames | Hard and smooth |
| Oak | Doors | Beautiful grain pattern |
| Pine | Practice projects | Cheap and easy to work with |
| MDF | Painted cabinets | No grain, perfectly smooth |
| Polyurethane | High-traffic areas | Durable and water-resistant |
| Stain | Natural wood look | Shows off wood grain |
| Paint | Modern style | Covers imperfections |
| Tung oil | Food-safe finish | Natural and non-toxic |
| Lacquer | Professional look | Dries fast and hard |
Safety Tips to Follow
- Wear safety glasses every time you use power tools.
- Keep your fingers at least six inches away from saw blades.
- Use push sticks instead of your hands near cutting areas.
- Keep your workspace clean and free of sawdust buildup.
- Never reach over a spinning blade.
- Make sure guards are in place on all power tools.
- Use clamps to secure the wood rather than holding it by hand.
- Turn off and unplug tools when taking breaks.
- Keep a first aid kit nearby in your workshop.
- Work in a well-ventilated area when applying finishes.
Final Thoughts
Building your first cabinet takes patience and practice, but it’s completely doable.
You’ve learned everything from planning and measuring to final installation. You now know which tools to buy, what materials work best, and how to avoid common errors.
A simple wall cabinet is perfect for learning the basics. You’ll save thousands compared to hiring a professional and get exactly what you want, with no compromises on size, style, or quality.
Ready to build? Grab your tools and get started today. Any questions? Drop a Comment!