Want to know how to clean window screens without the hassle?
Dirty window screens block sunlight and make homes look neglected.
Dust, pollen, and grime build up fast. Many people avoid this chore because it seems time-consuming and messy. They worry about damaging the screens or creating more work than necessary.
This blog post shows the best methods for cleaning window screens effectively.
From basic tools to step-by-step instructions, everything needed is right here.
How Often Should You Clean Window Screens?
Window screens need cleaning at least twice a year. Spring and fall work best for this task.
Some homes may need more frequent cleaning, though.
It depends on the surroundings. Screens near busy roads collect more dust. Homes with trees get extra pollen and debris. Coastal areas and dusty regions require cleaning every two to three months.
Clean screens right away if there’s visible dirt, reduced airflow, or dark streaks. Pet owners should clean more often since hair and dander stick to the mesh.
Regular cleaning keeps screens working well and helps them last longer.
The Quickest Way to Clean Window Screens
Following these simple steps makes the process quick and effective.
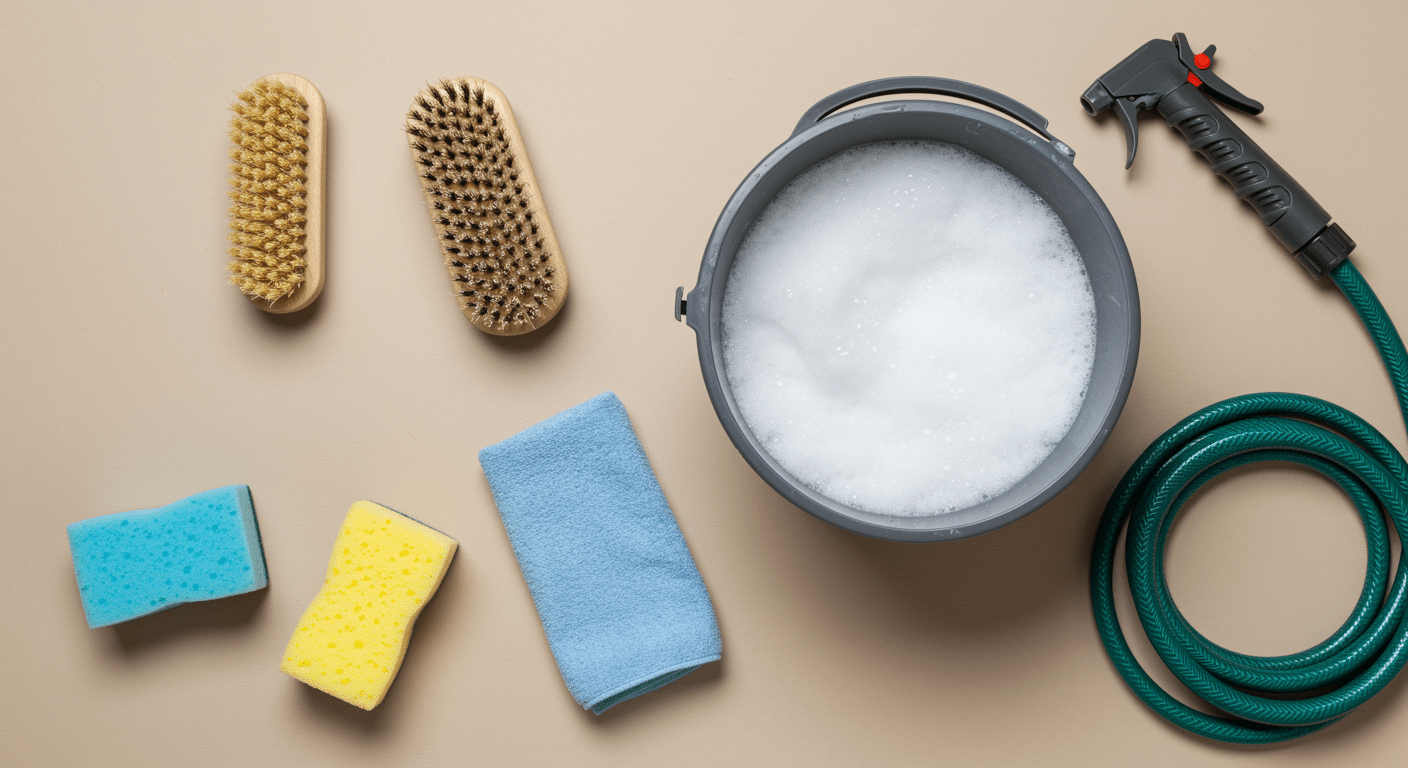
Step 1. Gather Tools and Materials
Cleaning window screens requires just a few basic items. Most of these are already at home.
- Soft brush or sponge
- Bucket
- Dish soap
- Garden hose or shower
- Towel
Step 2. Remove the Screens
Take the screens out of the window frames carefully. Most screens have tabs or clips that release them. Handle them gently to avoid bending or damaging the frames.
Step 3. Vacuum Loose Dirt
Use a vacuum with a brush attachment on both sides of the screen. This removes dust, cobwebs, and loose debris. It makes the washing step much easier.
Step 4. Prepare Cleaning Solution
Fill a bucket with warm water and add a few drops of mild dish soap. Mix it gently until suds form. This solution is safe and effective for all screen types.
Step 5. Scrub the Screens
Dip a soft brush or sponge into the soapy water. Scrub both sides of the screen using gentle circular motions. Pay extra attention to corners and edges where dirt builds up.
Step 6. Rinse Thoroughly
Use a garden hose with gentle pressure to rinse off all soap. Make sure no suds remain on the mesh. Soap residue attracts more dirt later.
Step 7. Dry the Screens
Shake off excess water and lean screens against a wall or fence. Let them air dry completely in a sunny spot. This usually takes 30 minutes to an hour.
Step 8. Reinstall the Screens
Once fully dry, place the screens back into the window frames. Make sure they fit snugly and secure them properly.
Best Cleaning Method by Your Screen Type
Different screen types need different care approaches. Using the right method protects the material and gets better results.
Fiberglass Screens
These are the most common types found in homes.
They’re durable and handle regular cleaning well. Use warm, soapy water with a soft brush or sponge. Rinse gently and let them air dry.
Fiberglass screens can tolerate a bit more scrubbing than other types.
Aluminum Screens
Metal screens are strong but can corrode over time. Clean them with mild dish soap and water.
Avoid harsh chemicals that might cause oxidation. Dry them quickly to prevent water spots and rust. A microfiber cloth works well for wiping them down.
Pet-Resistant Screens
These heavy-duty screens are thicker and tougher.
They can handle more vigorous cleaning. Use a stiff brush if needed for stubborn dirt. The material is designed to withstand pet claws, so it holds up well during cleaning, too.
Solar Screens
These special screens block heat and UV rays.
They have a delicate coating that needs gentle care. Use only water and a very soft cloth. Harsh soaps or scrubbing can damage the protective coating.
Pat them dry instead of rubbing.
Genius Hacks for Deep Cleaning & Stubborn Stains
Sometimes regular cleaning isn’t enough for really dirty screens. These smart tricks help tackle tough, stubborn stains.
- White vinegar solution: Mix equal parts vinegar and water. Spray on stains, wait five minutes, then scrub. This removes hard water marks easily.
- Baking soda paste: Mix baking soda with water to form a paste. Scrub it on dirty frame edges with a toothbrush for tough grime.
- Dryer sheet trick: Rub a dry dryer sheet over screens before vacuuming. It reduces static and pulls dust off more easily.
- Bathtub soaking: Lay screens flat in a tub with warm, soapy water. Soak them for 15 minutes to loosen stubborn dirt.
- Lemon juice boost: Add lemon juice to cleaning water for extra grease-cutting power. It leaves screens smelling fresh, too.
- Newspaper drying: After rinsing, wipe screens with crumpled newspaper. It absorbs water fast and prevents streaks.
Avoid These Common Mistakes
Even simple tasks can go wrong if common mistakes aren’t avoided. Here are errors to watch out for when cleaning window screens.
1. Using too much pressure: Scrubbing too hard can damage the mesh or push it out of the frame. Use a light touch to keep screens intact.
2. Skipping the vacuum step: Wetting screens without removing loose dirt first turns dry dust into muddy paste. Always vacuum or brush off debris before adding water.
3. Using harsh chemicals: Strong cleaners like bleach can weaken the mesh and damage the frame. Stick to mild dish soap for safe cleaning.
4. Reinstalling wet screens: Putting damp screens back traps moisture and can cause mold or rust. Always let screens dry completely first.
5. Using high water pressure: A strong blast from the hose can tear the mesh or bend the frame. Use gentle pressure when rinsing.
When to Repair or Replace Your Window Screens
Window screens don’t last forever. Knowing when to fix them or get new ones saves money and frustration.
Signs It’s Time to Repair
- Small holes or tears under two inches
- Loose frames that only need a new spline
- Slightly sagging mesh with a frame still in good condition
Signs It’s Time to Replace
- Large or multiple tears that can’t be patched
- Bent, cracked, or warped frames
- Old, brittle, or rusted mesh
- Screens that no longer fit properly or stay secure
Keep Your Screens Fresh and Clear
Clean window screens make homes more comfortable by letting in fresh air and natural light without grime. The process is simple and requires only basic supplies.
Remove screens, vacuum loose dirt, wash with soapy water, rinse thoroughly, and let them dry completely before reinstalling.
Regular maintenance prevents bigger problems.
Check for damage during each cleaning; making small repairs now can save money later. Clean screens improve air quality, brighten rooms, and make windows look better.
The results are immediate.